My X2D is outstanding. Ignore all the claims about the aux nozzle having terrible print quality, in my opinion they are the same quality for me. I do not know about other people
No one here claims aux has terrible quality. It is much slower and hard to calibrate with some materials though. In general the whole printer has quality problems, I am more than happy for your outstanding prints, maybe you can share some pictures with some prints?
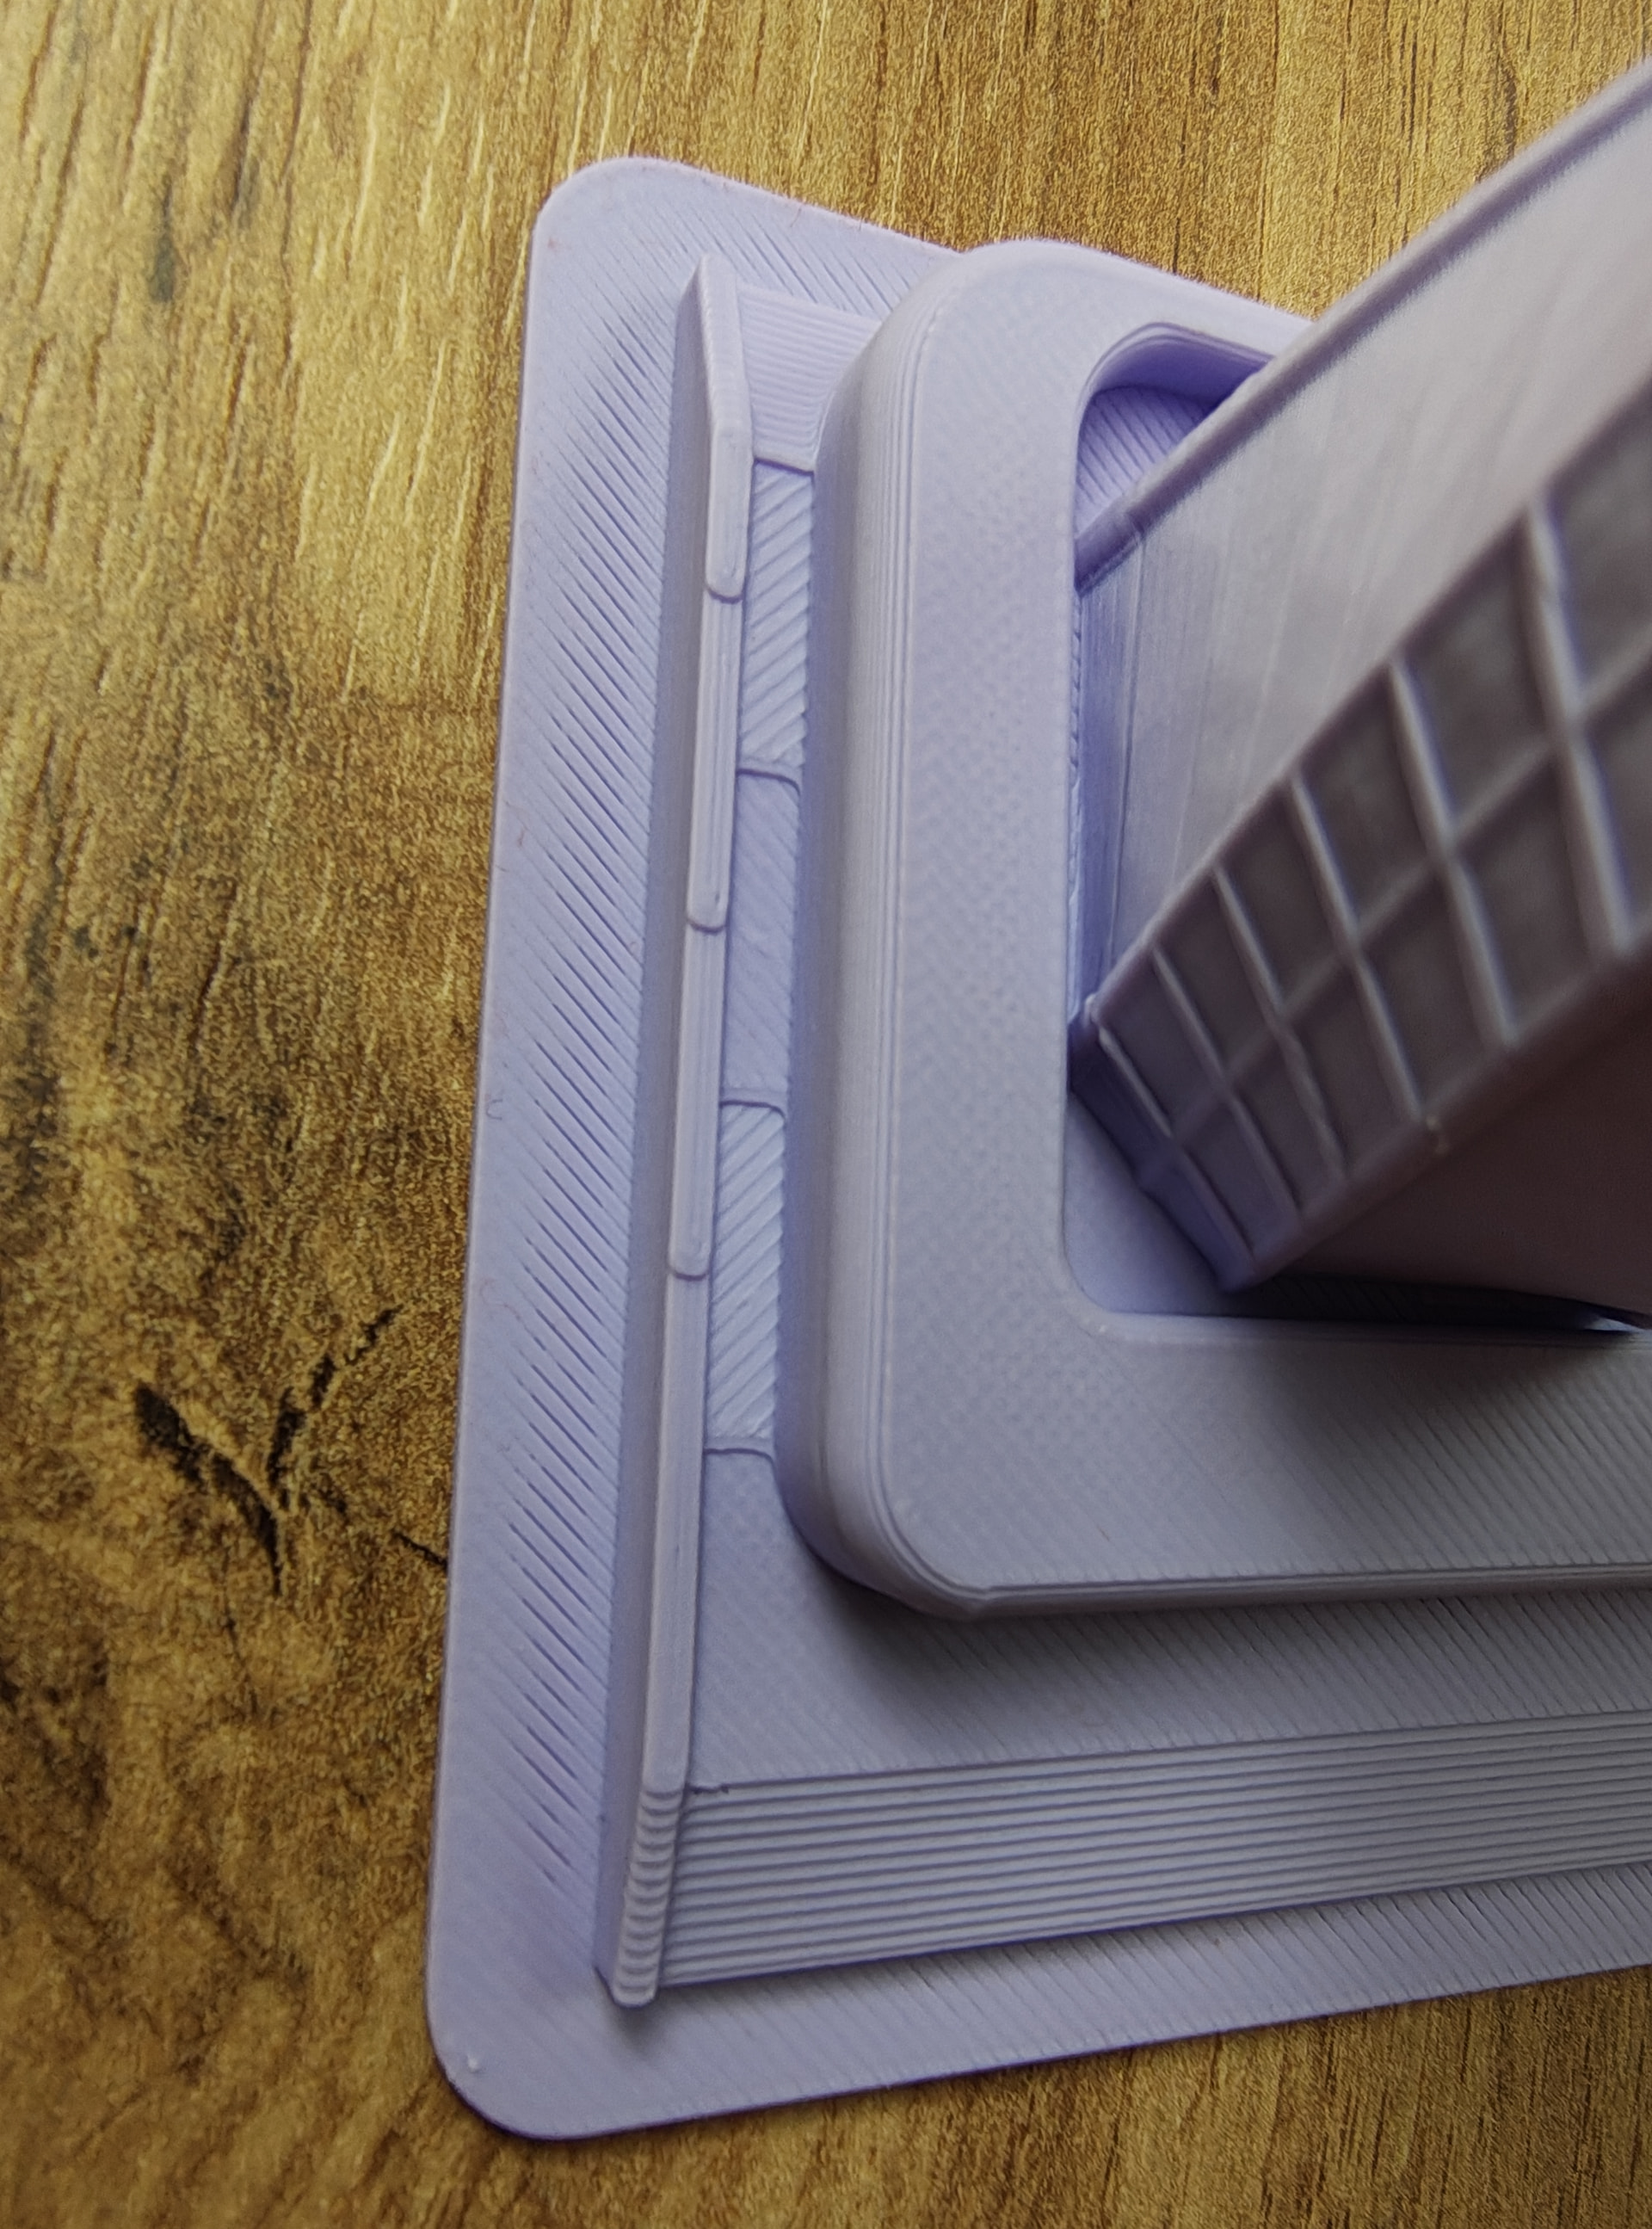
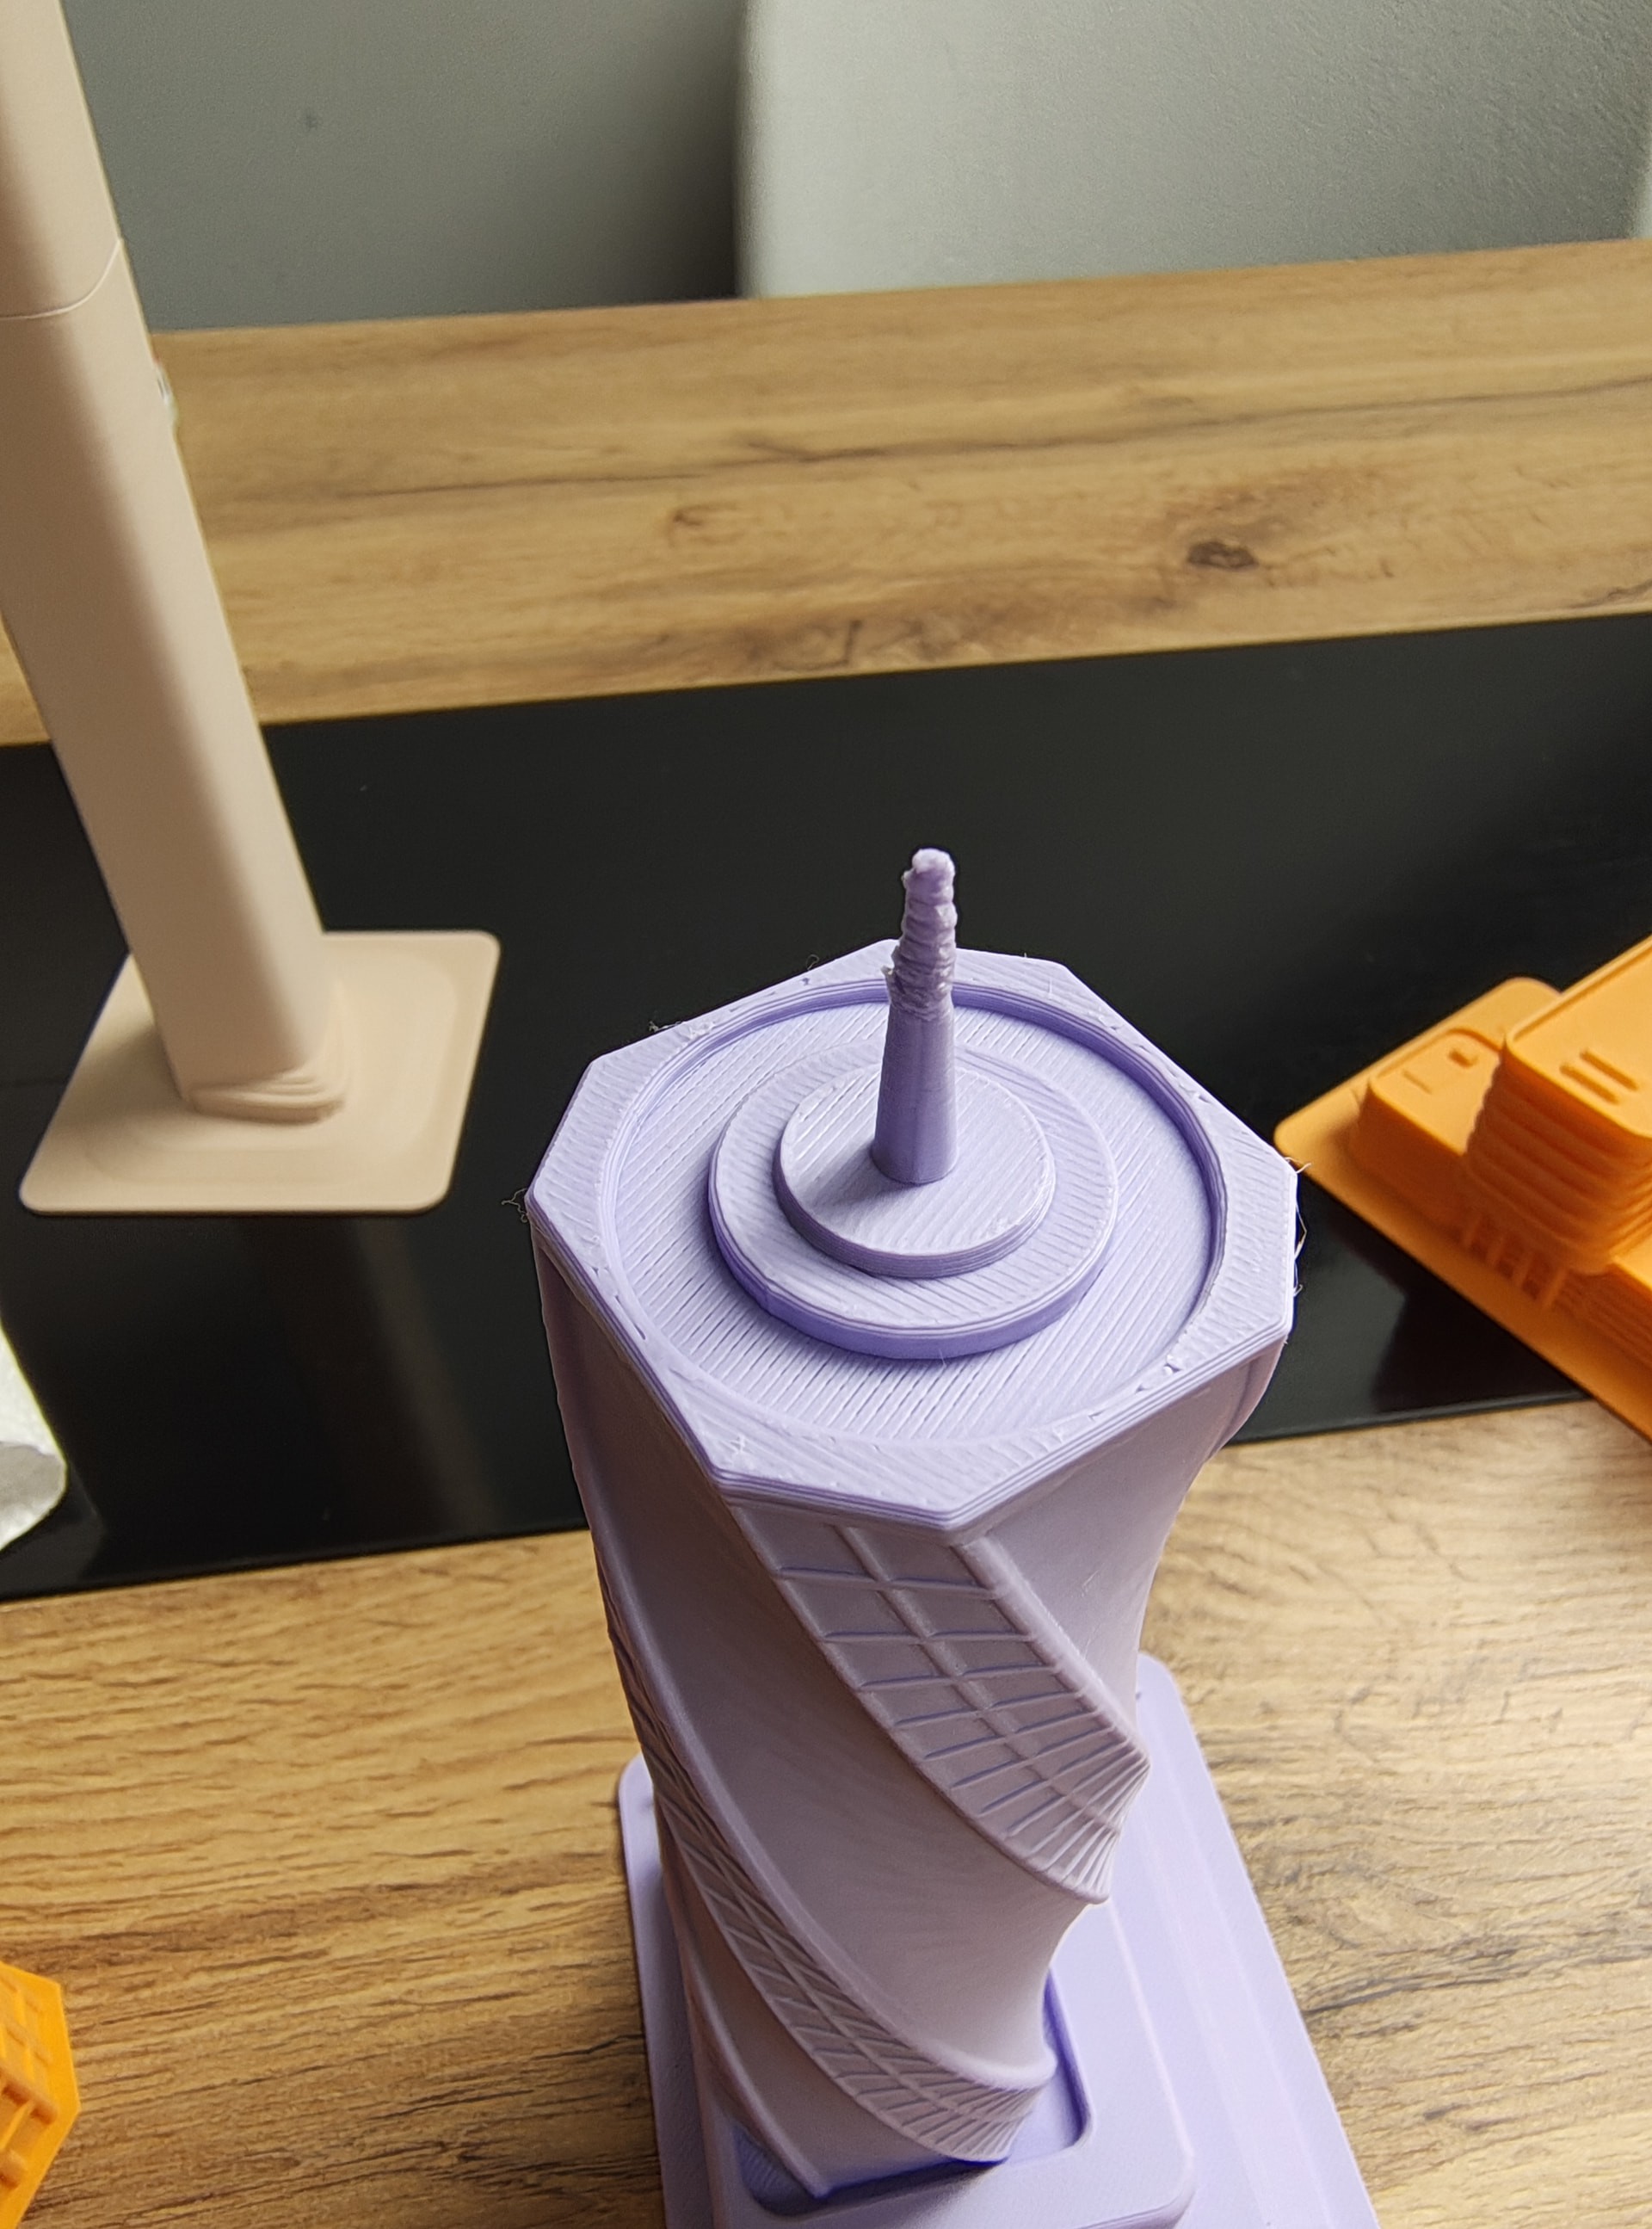
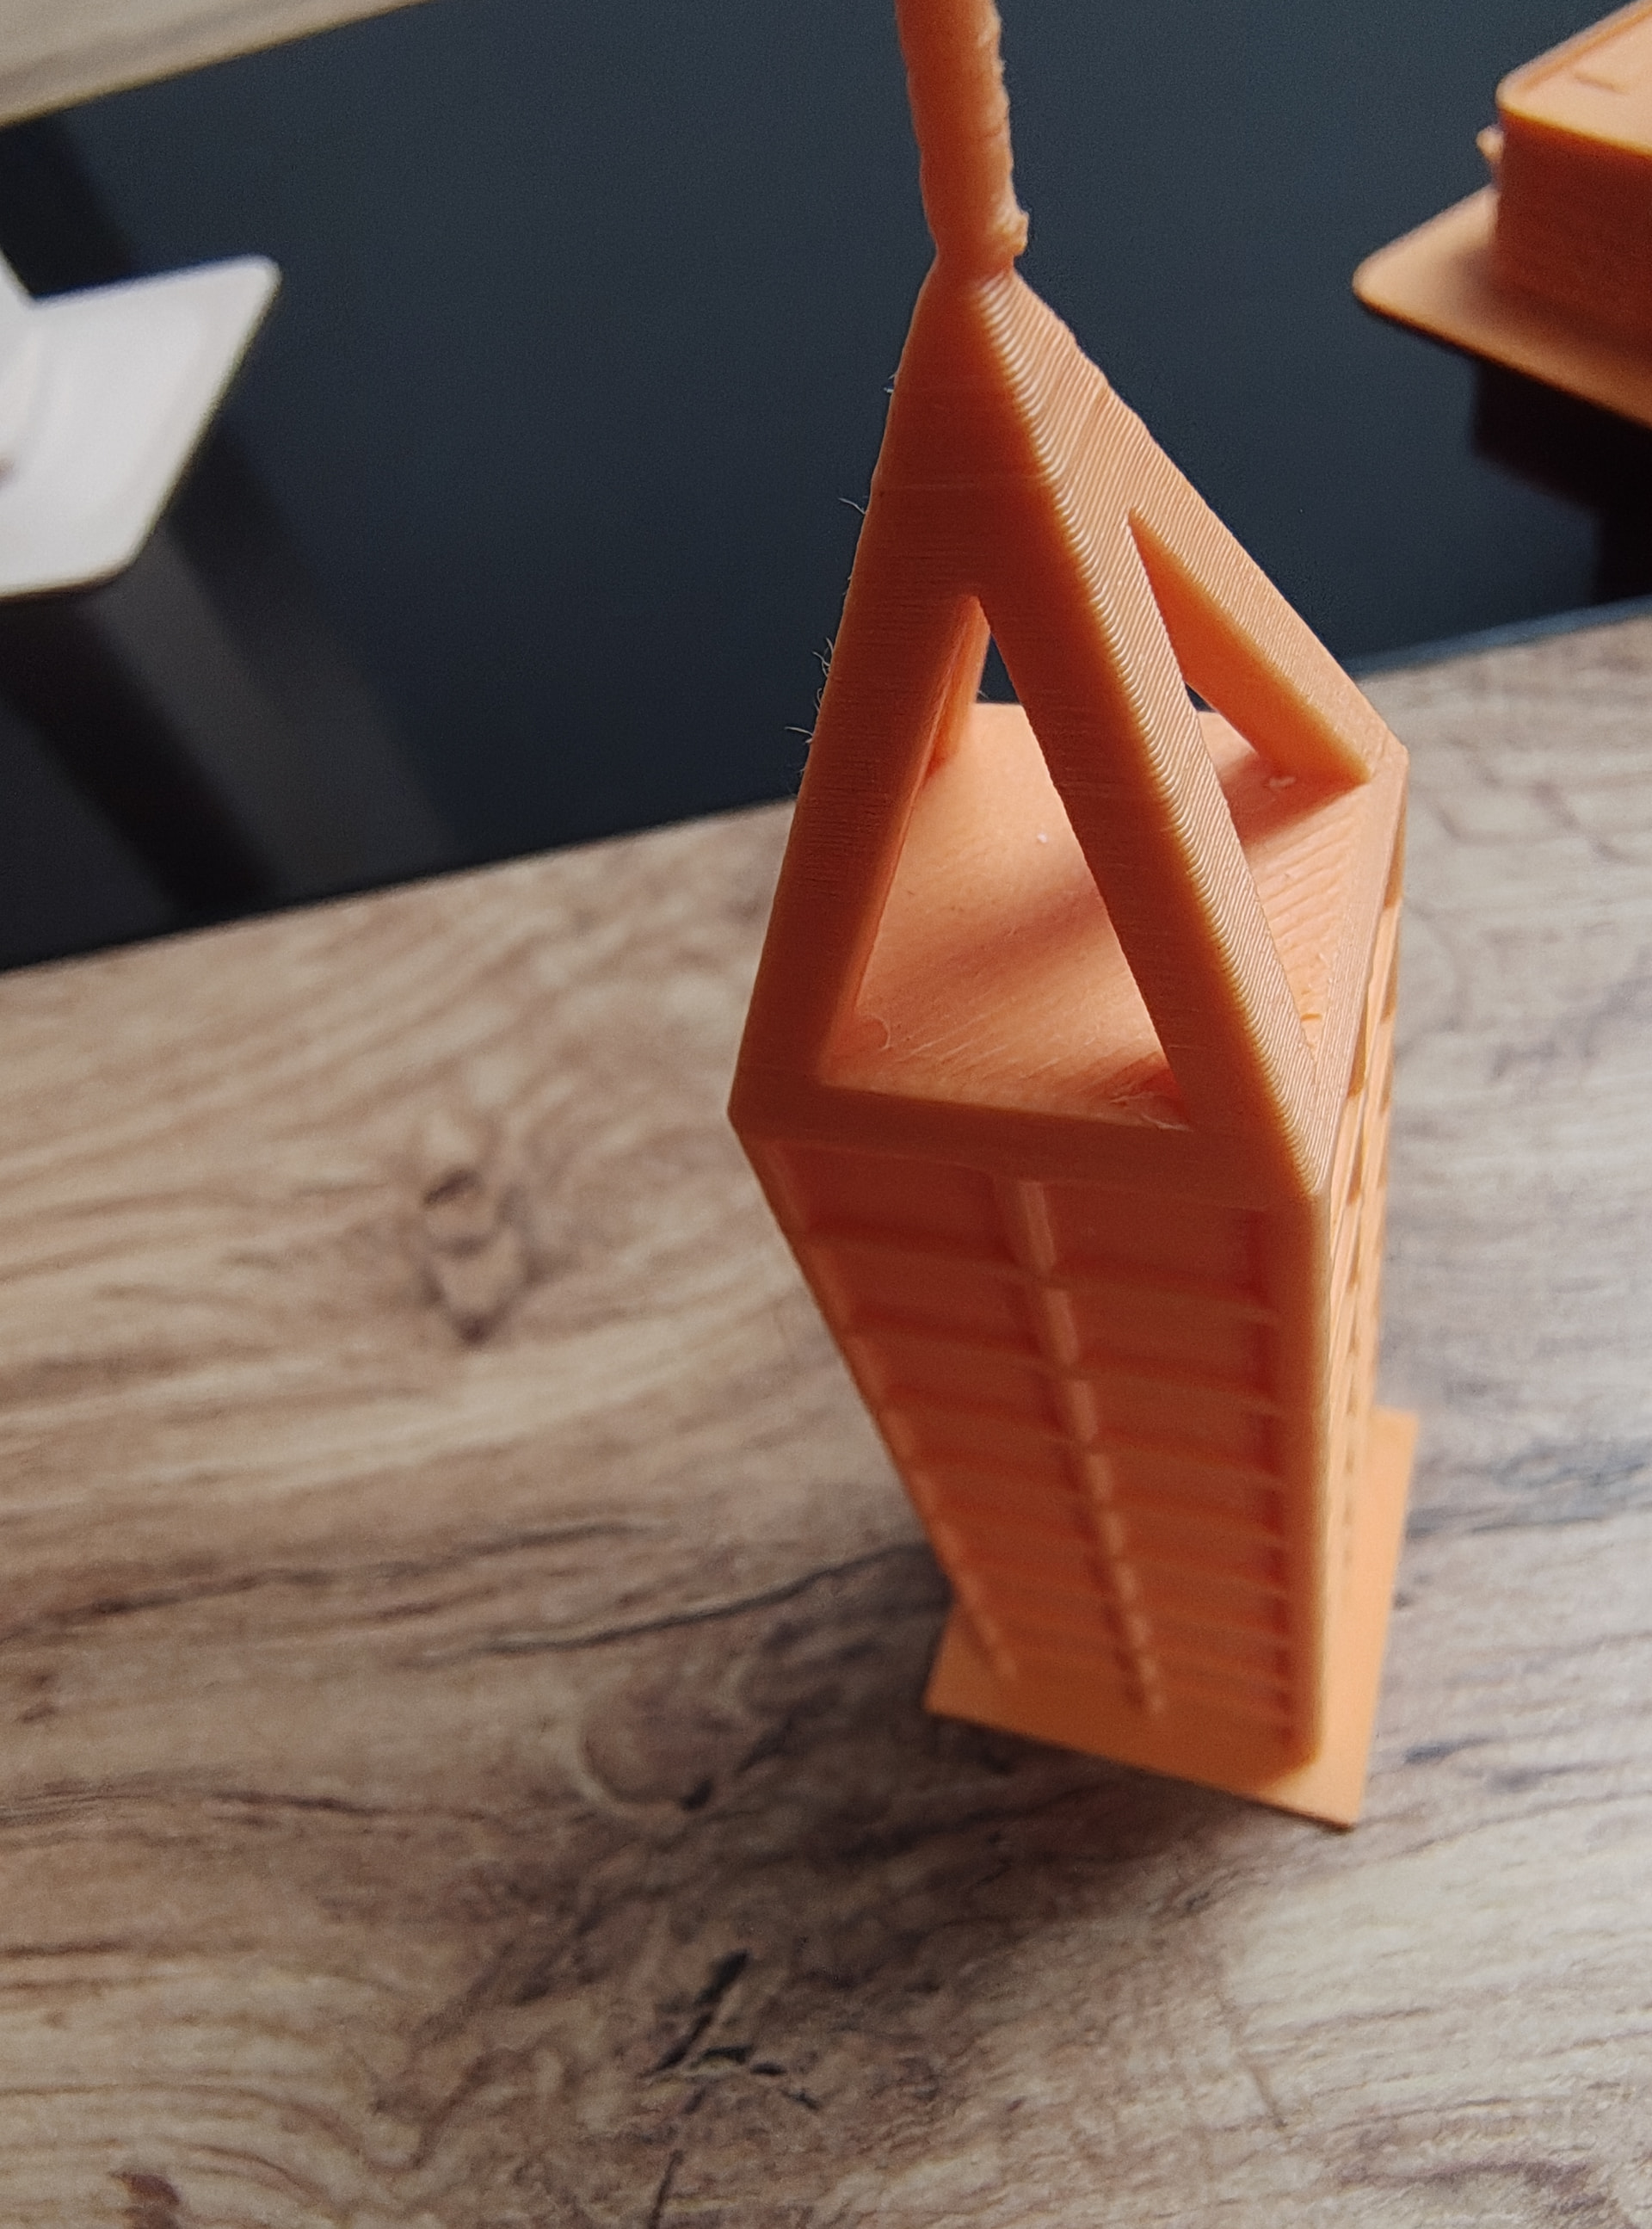
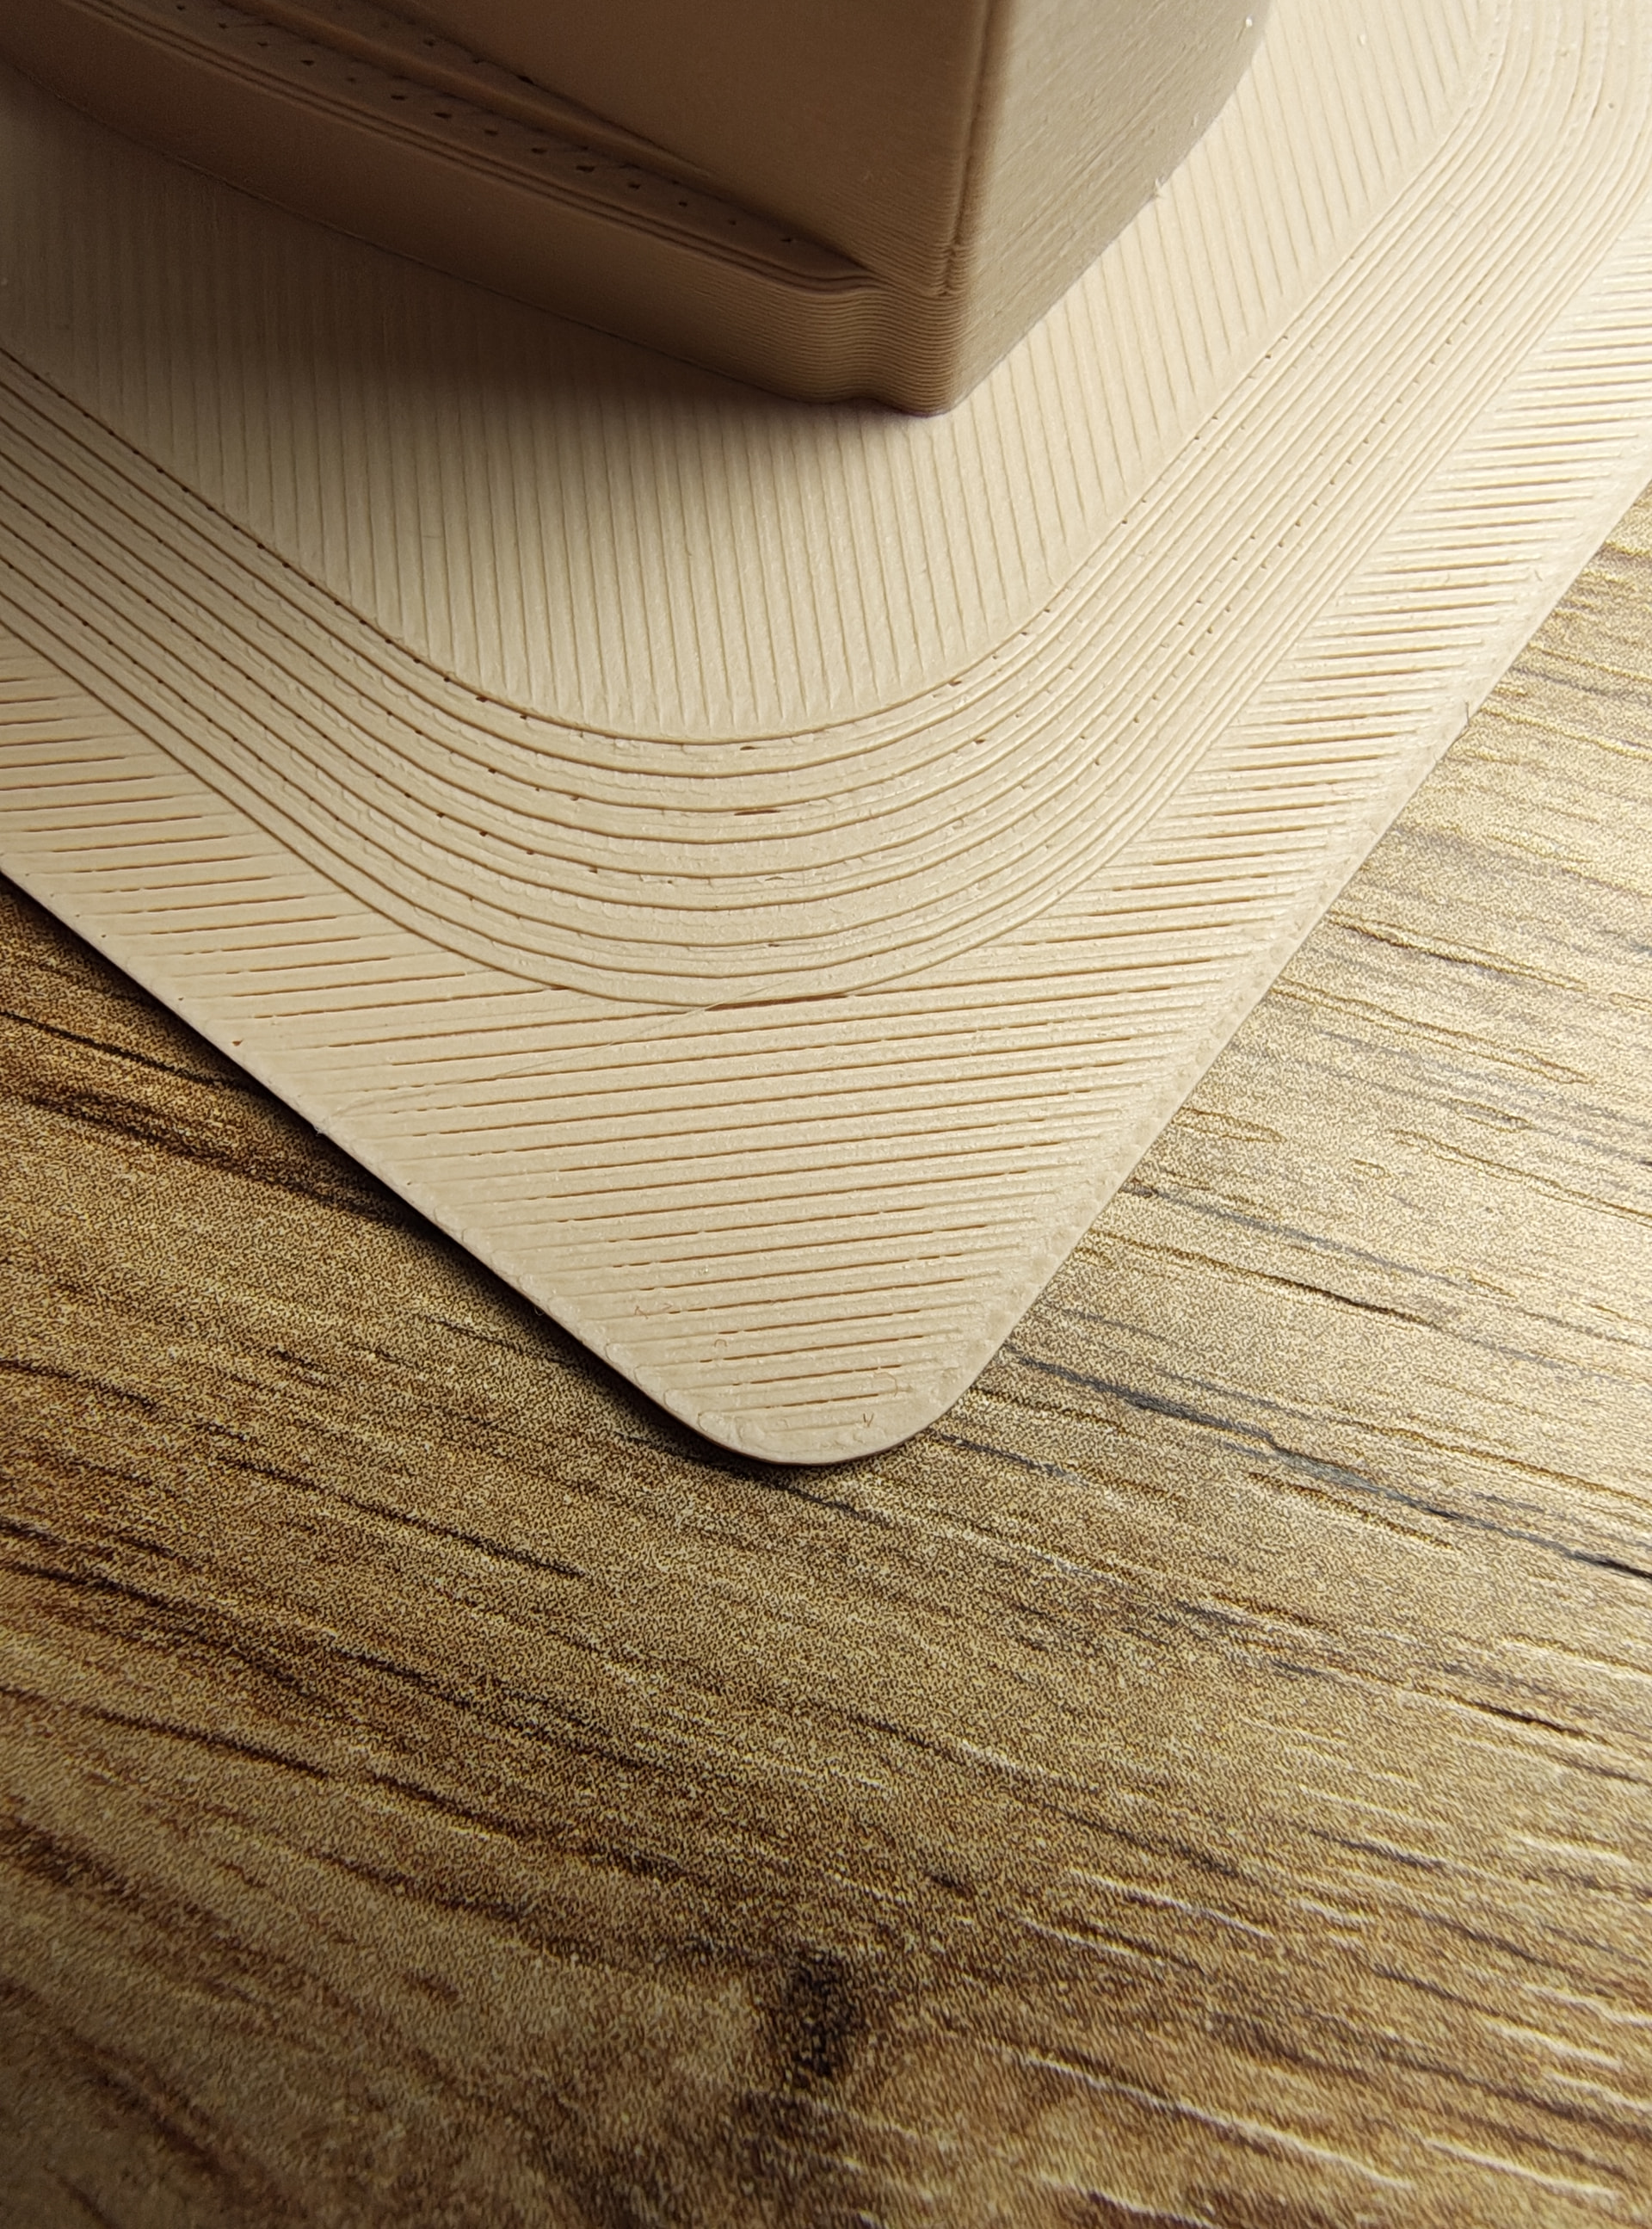
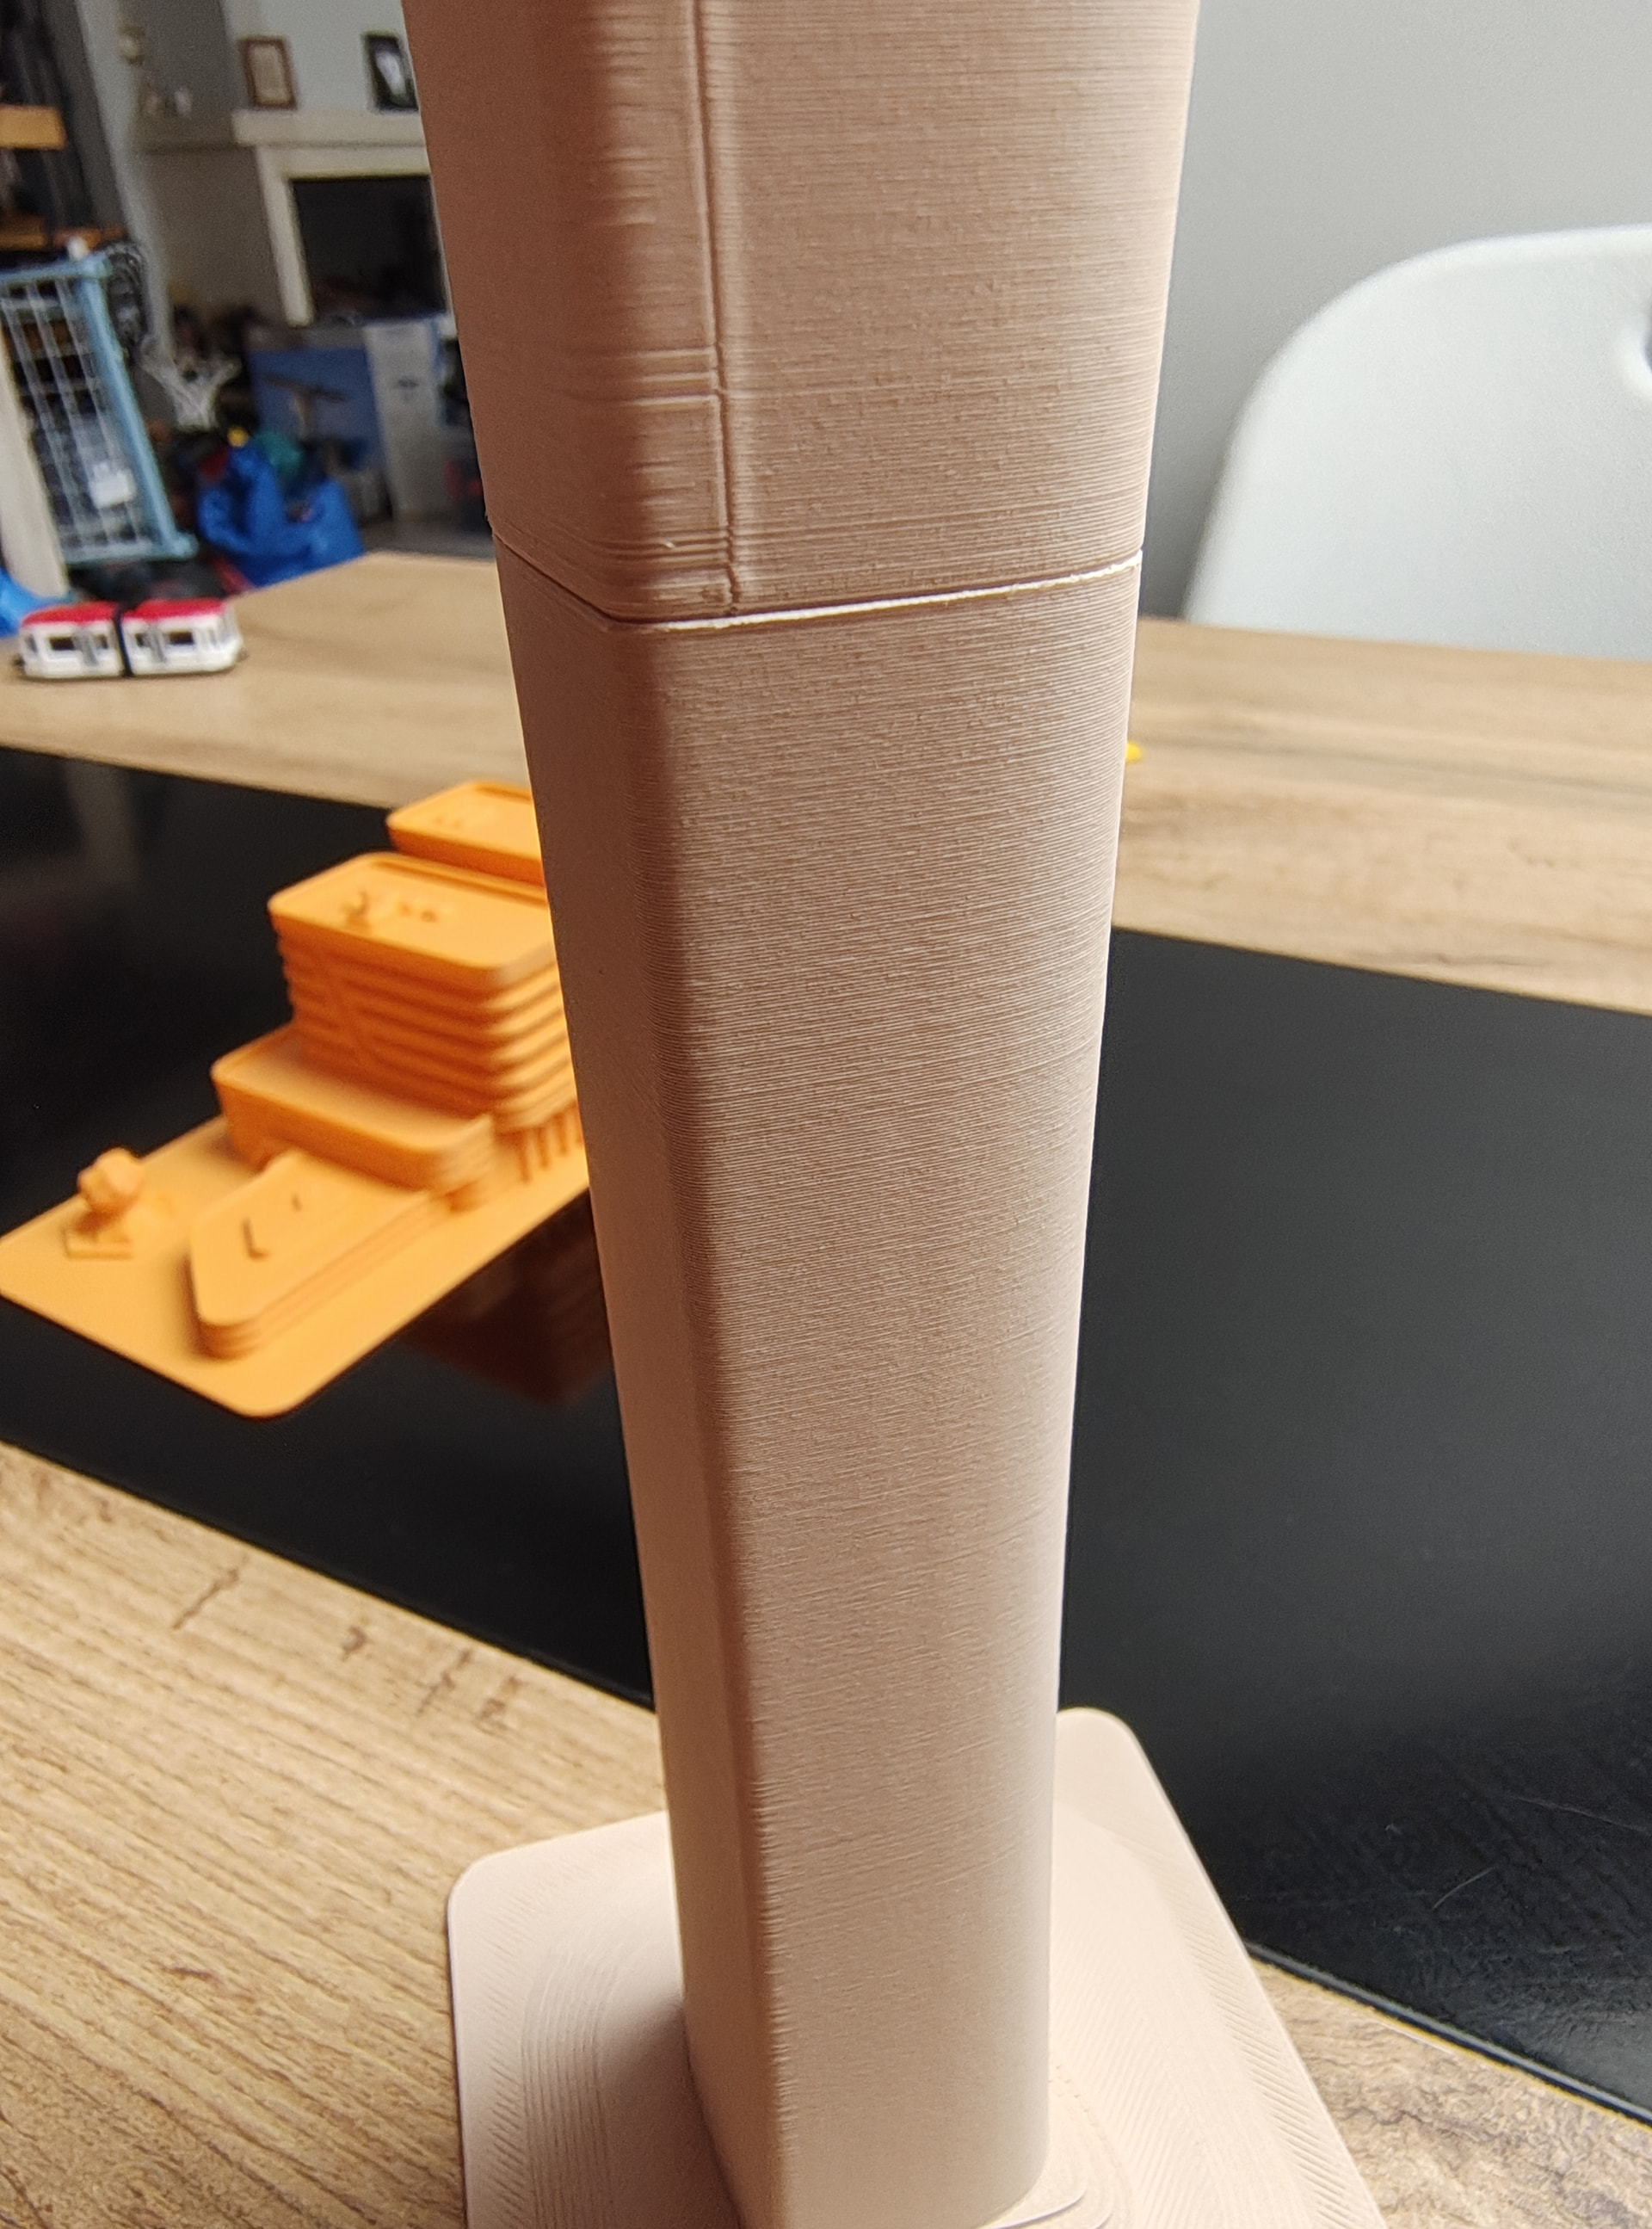
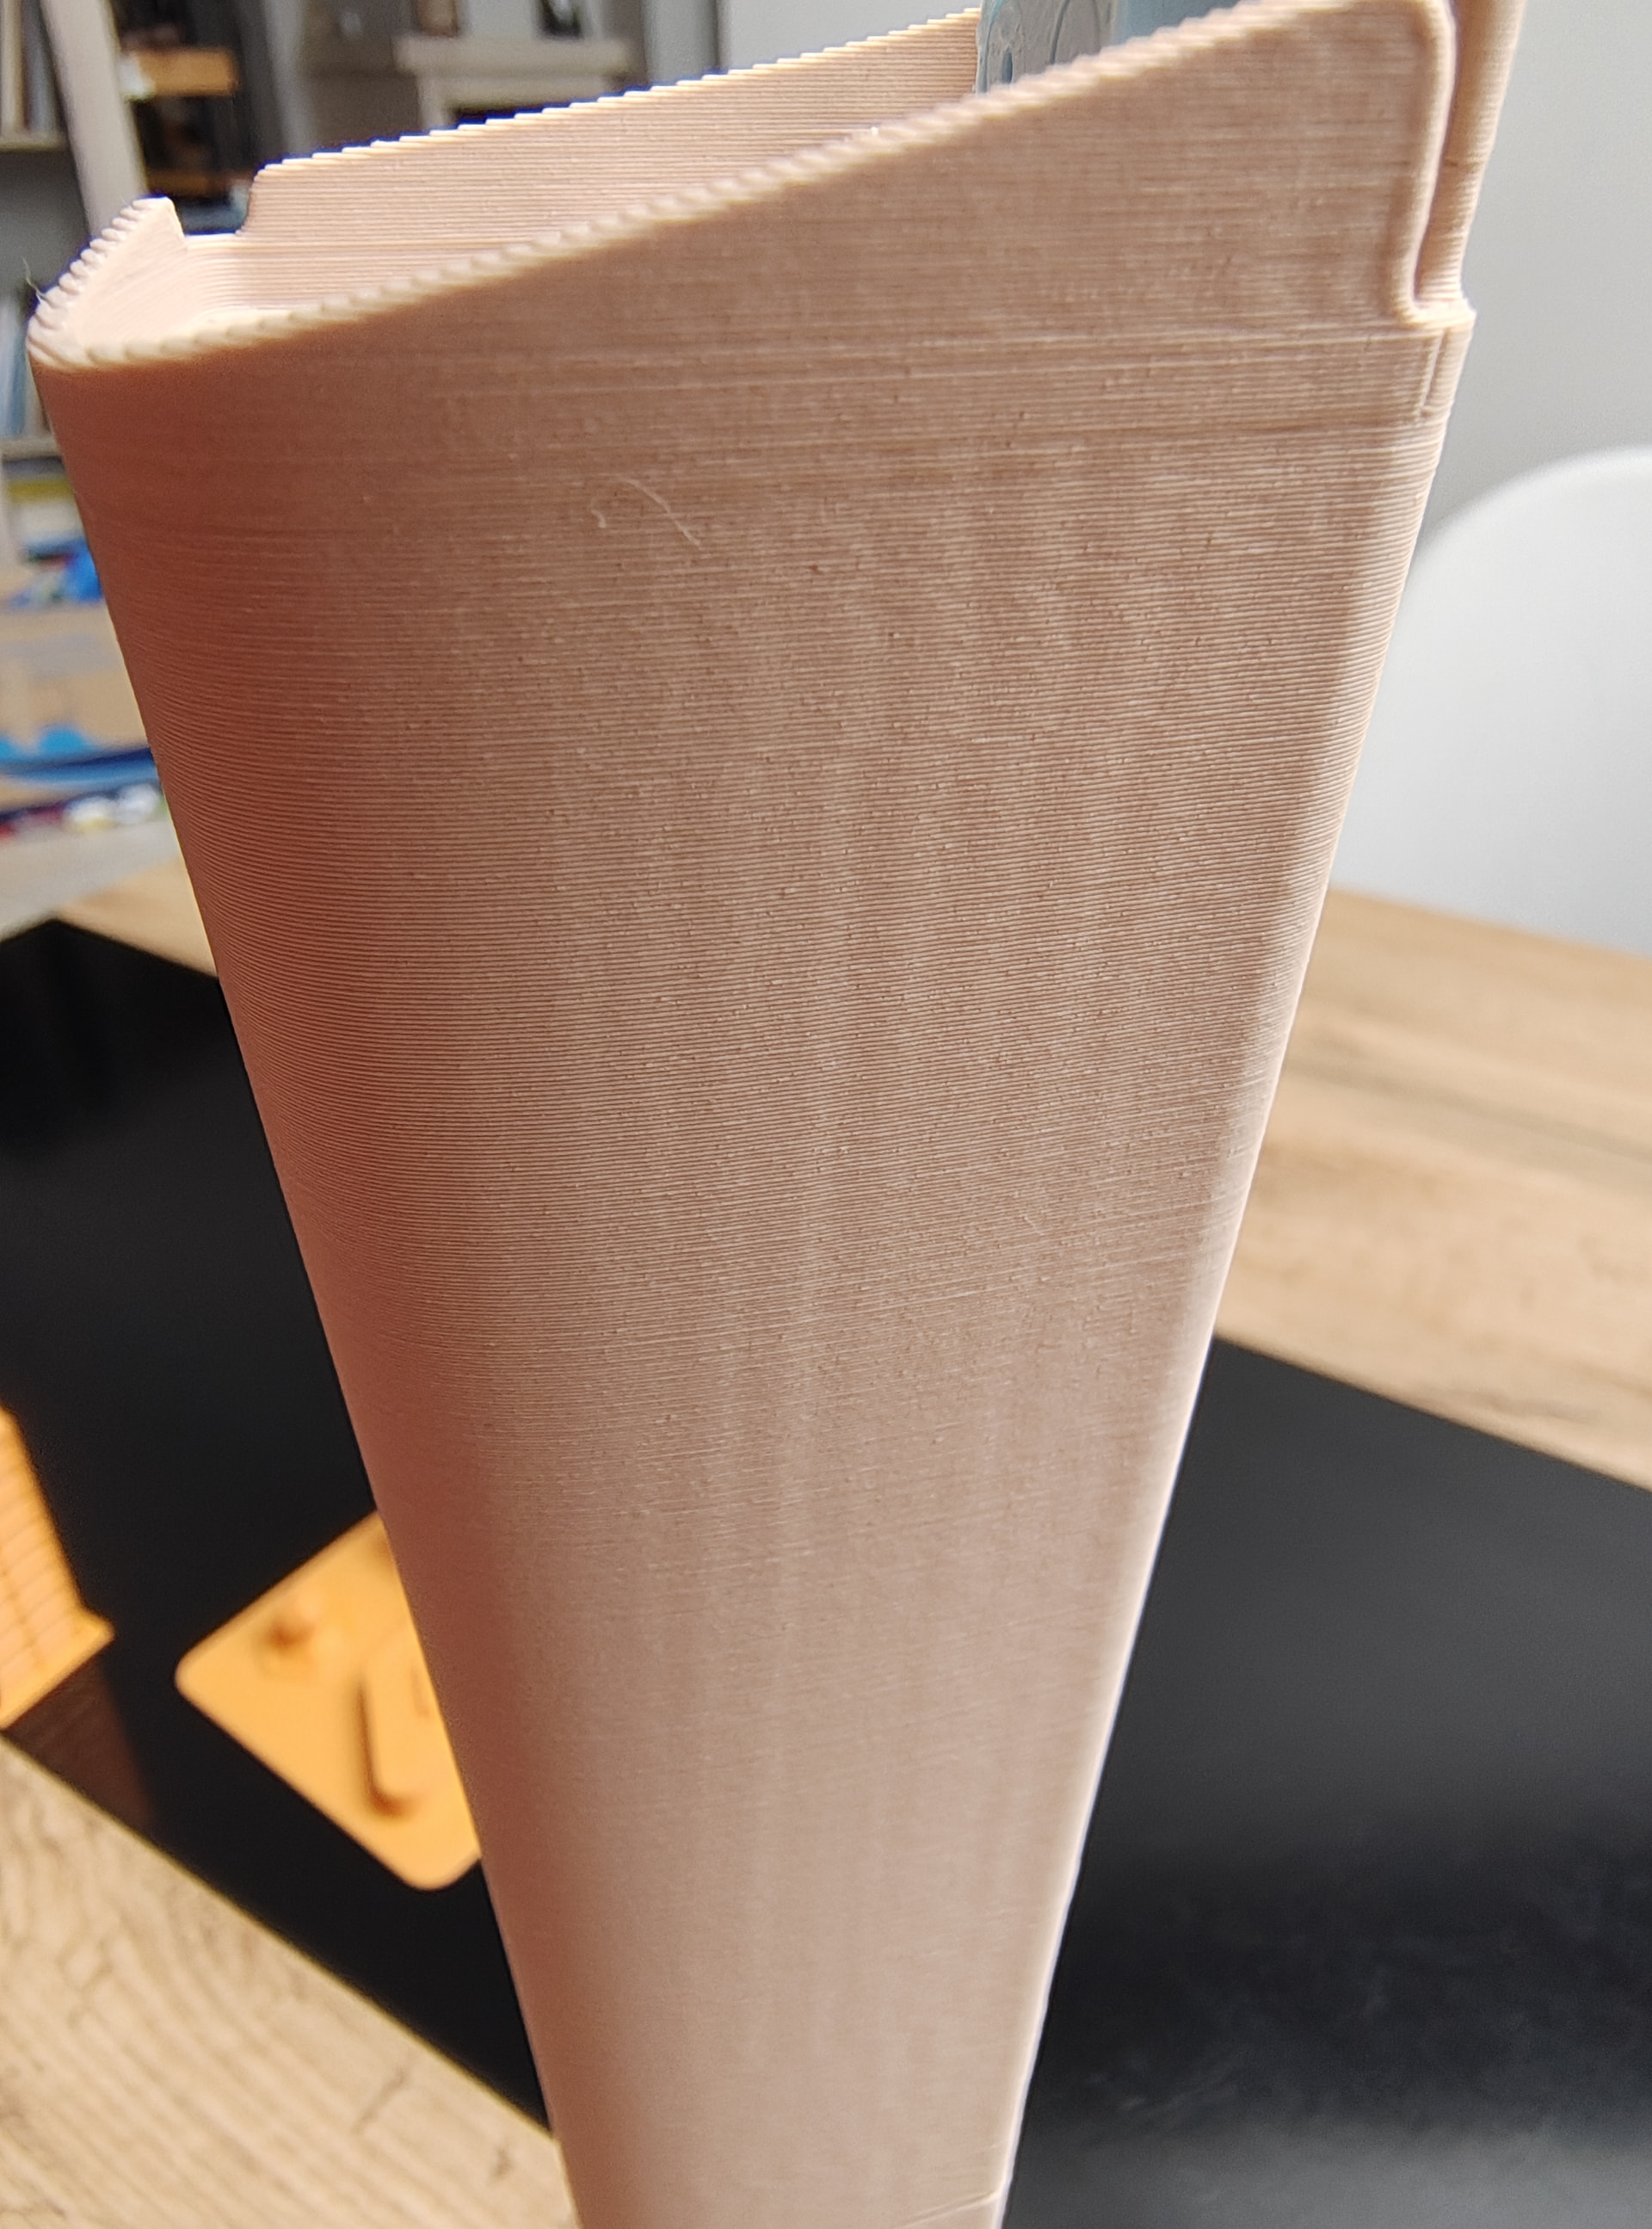
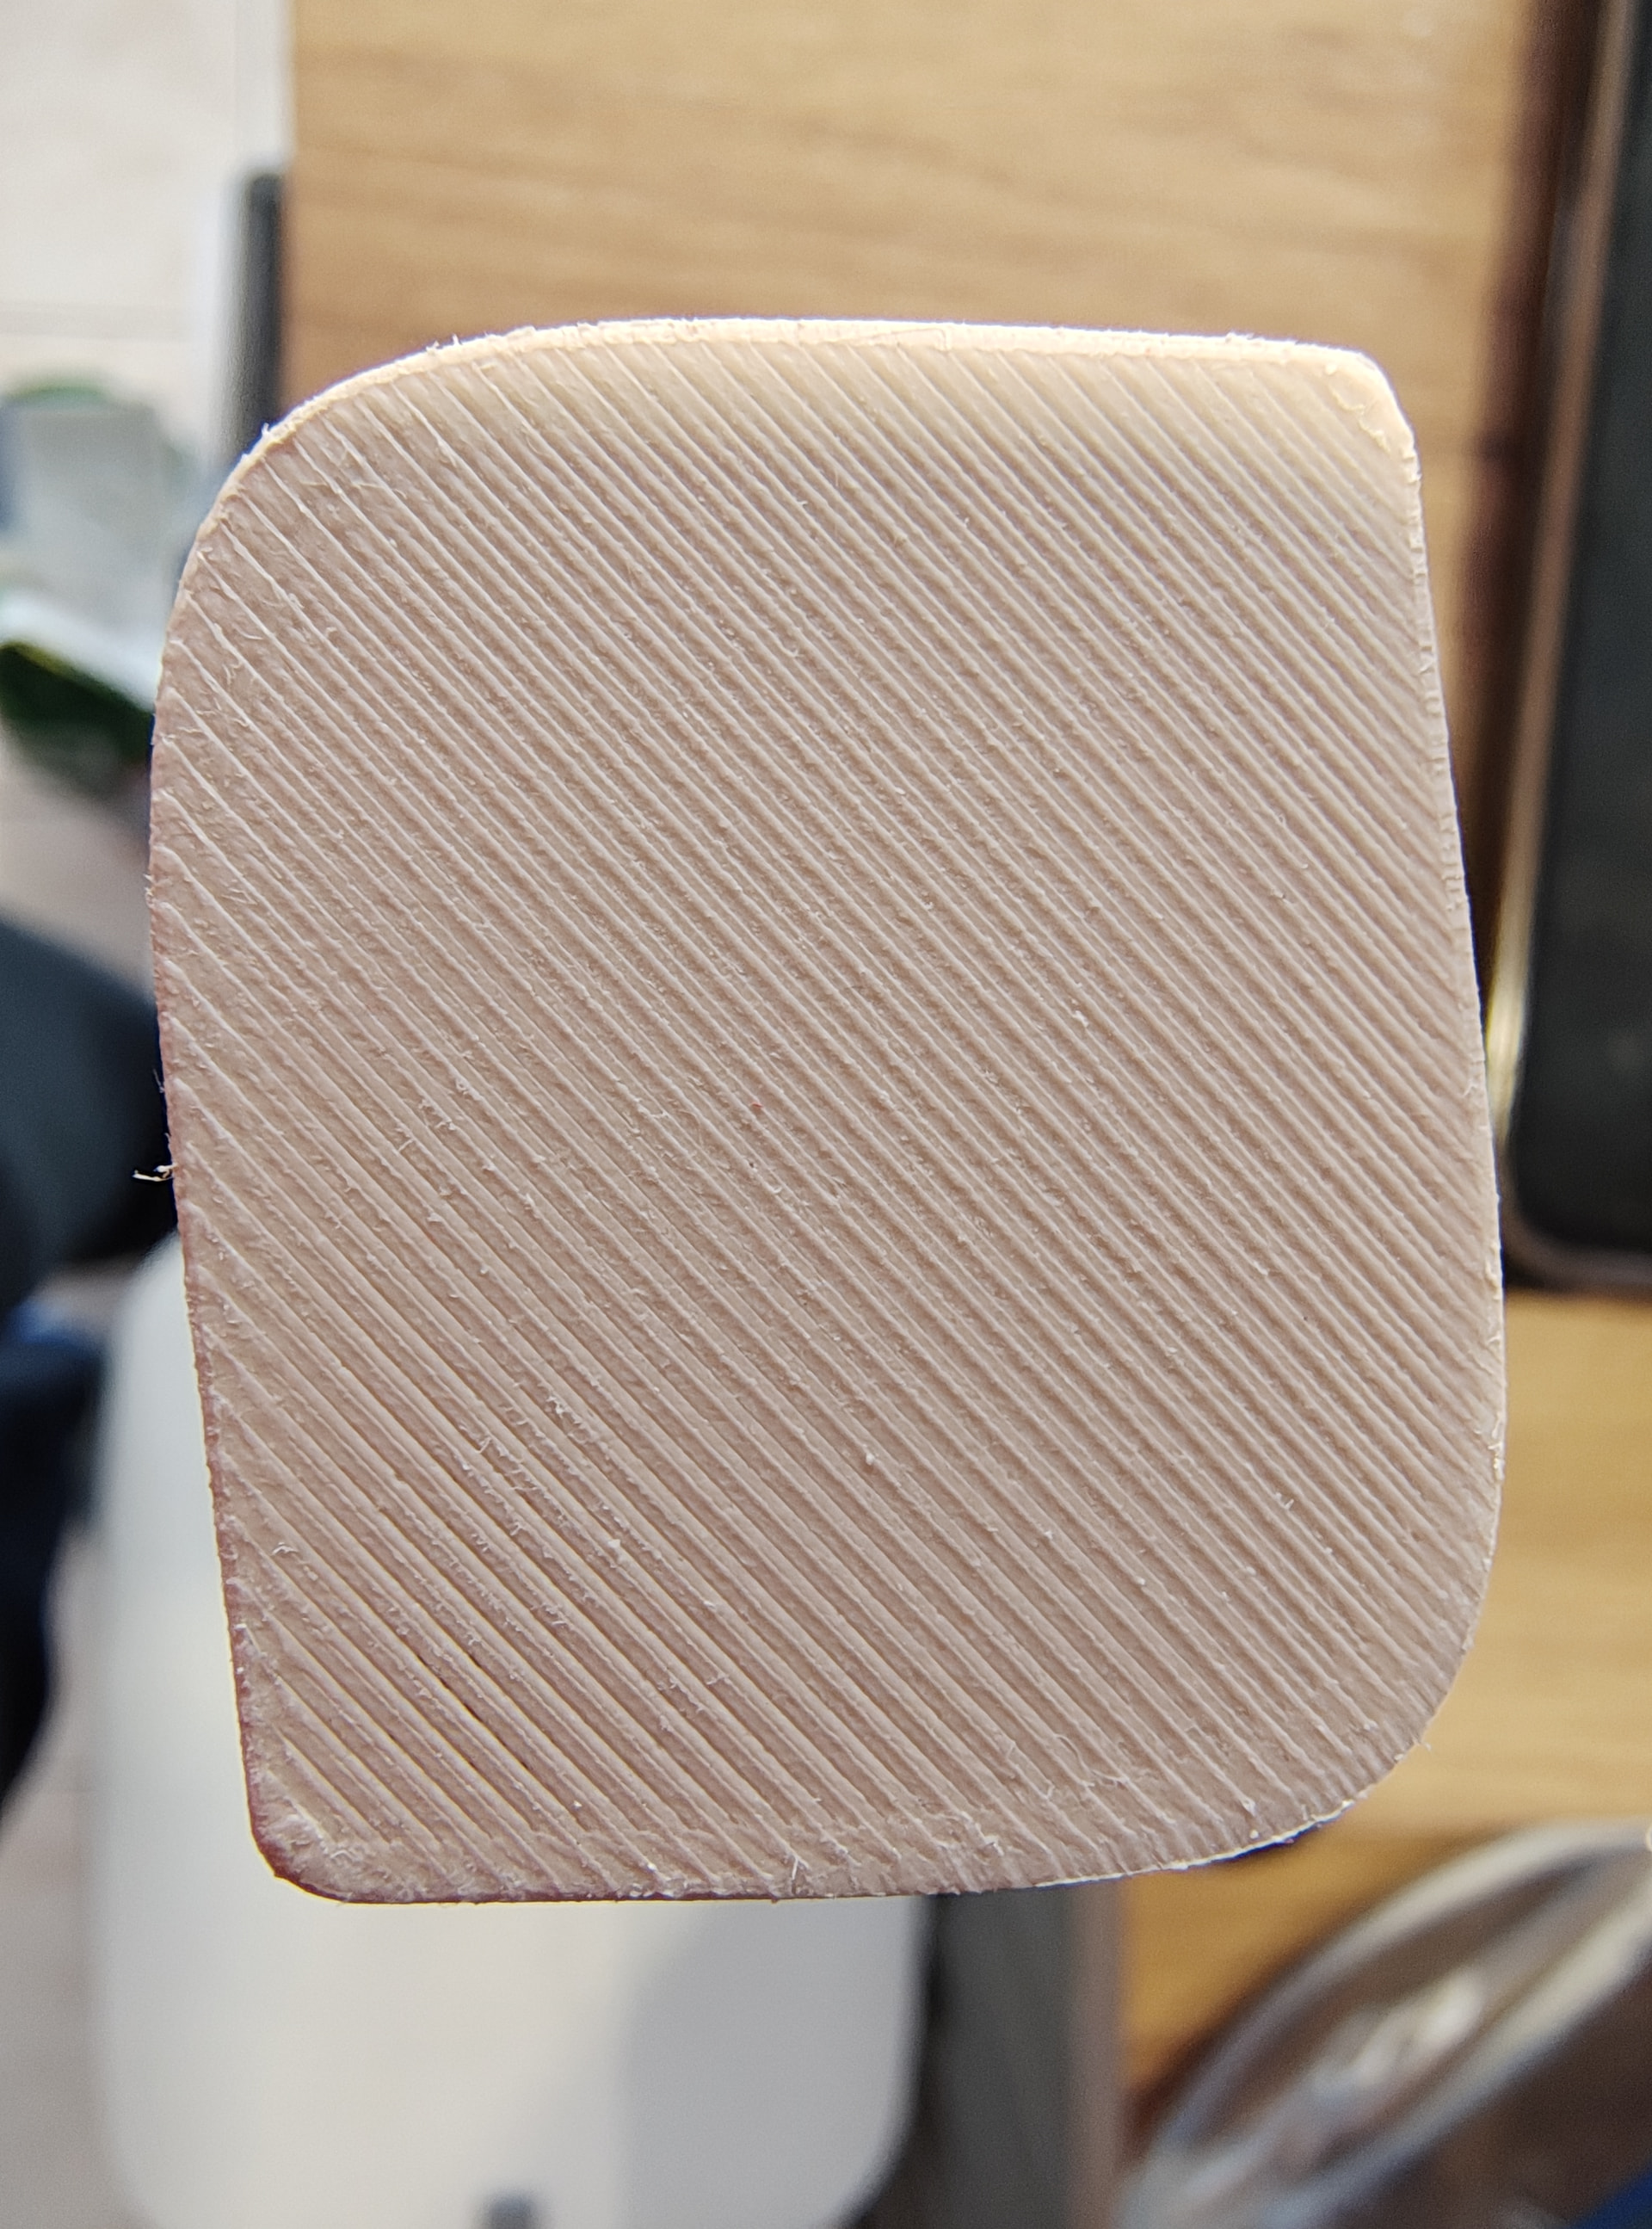
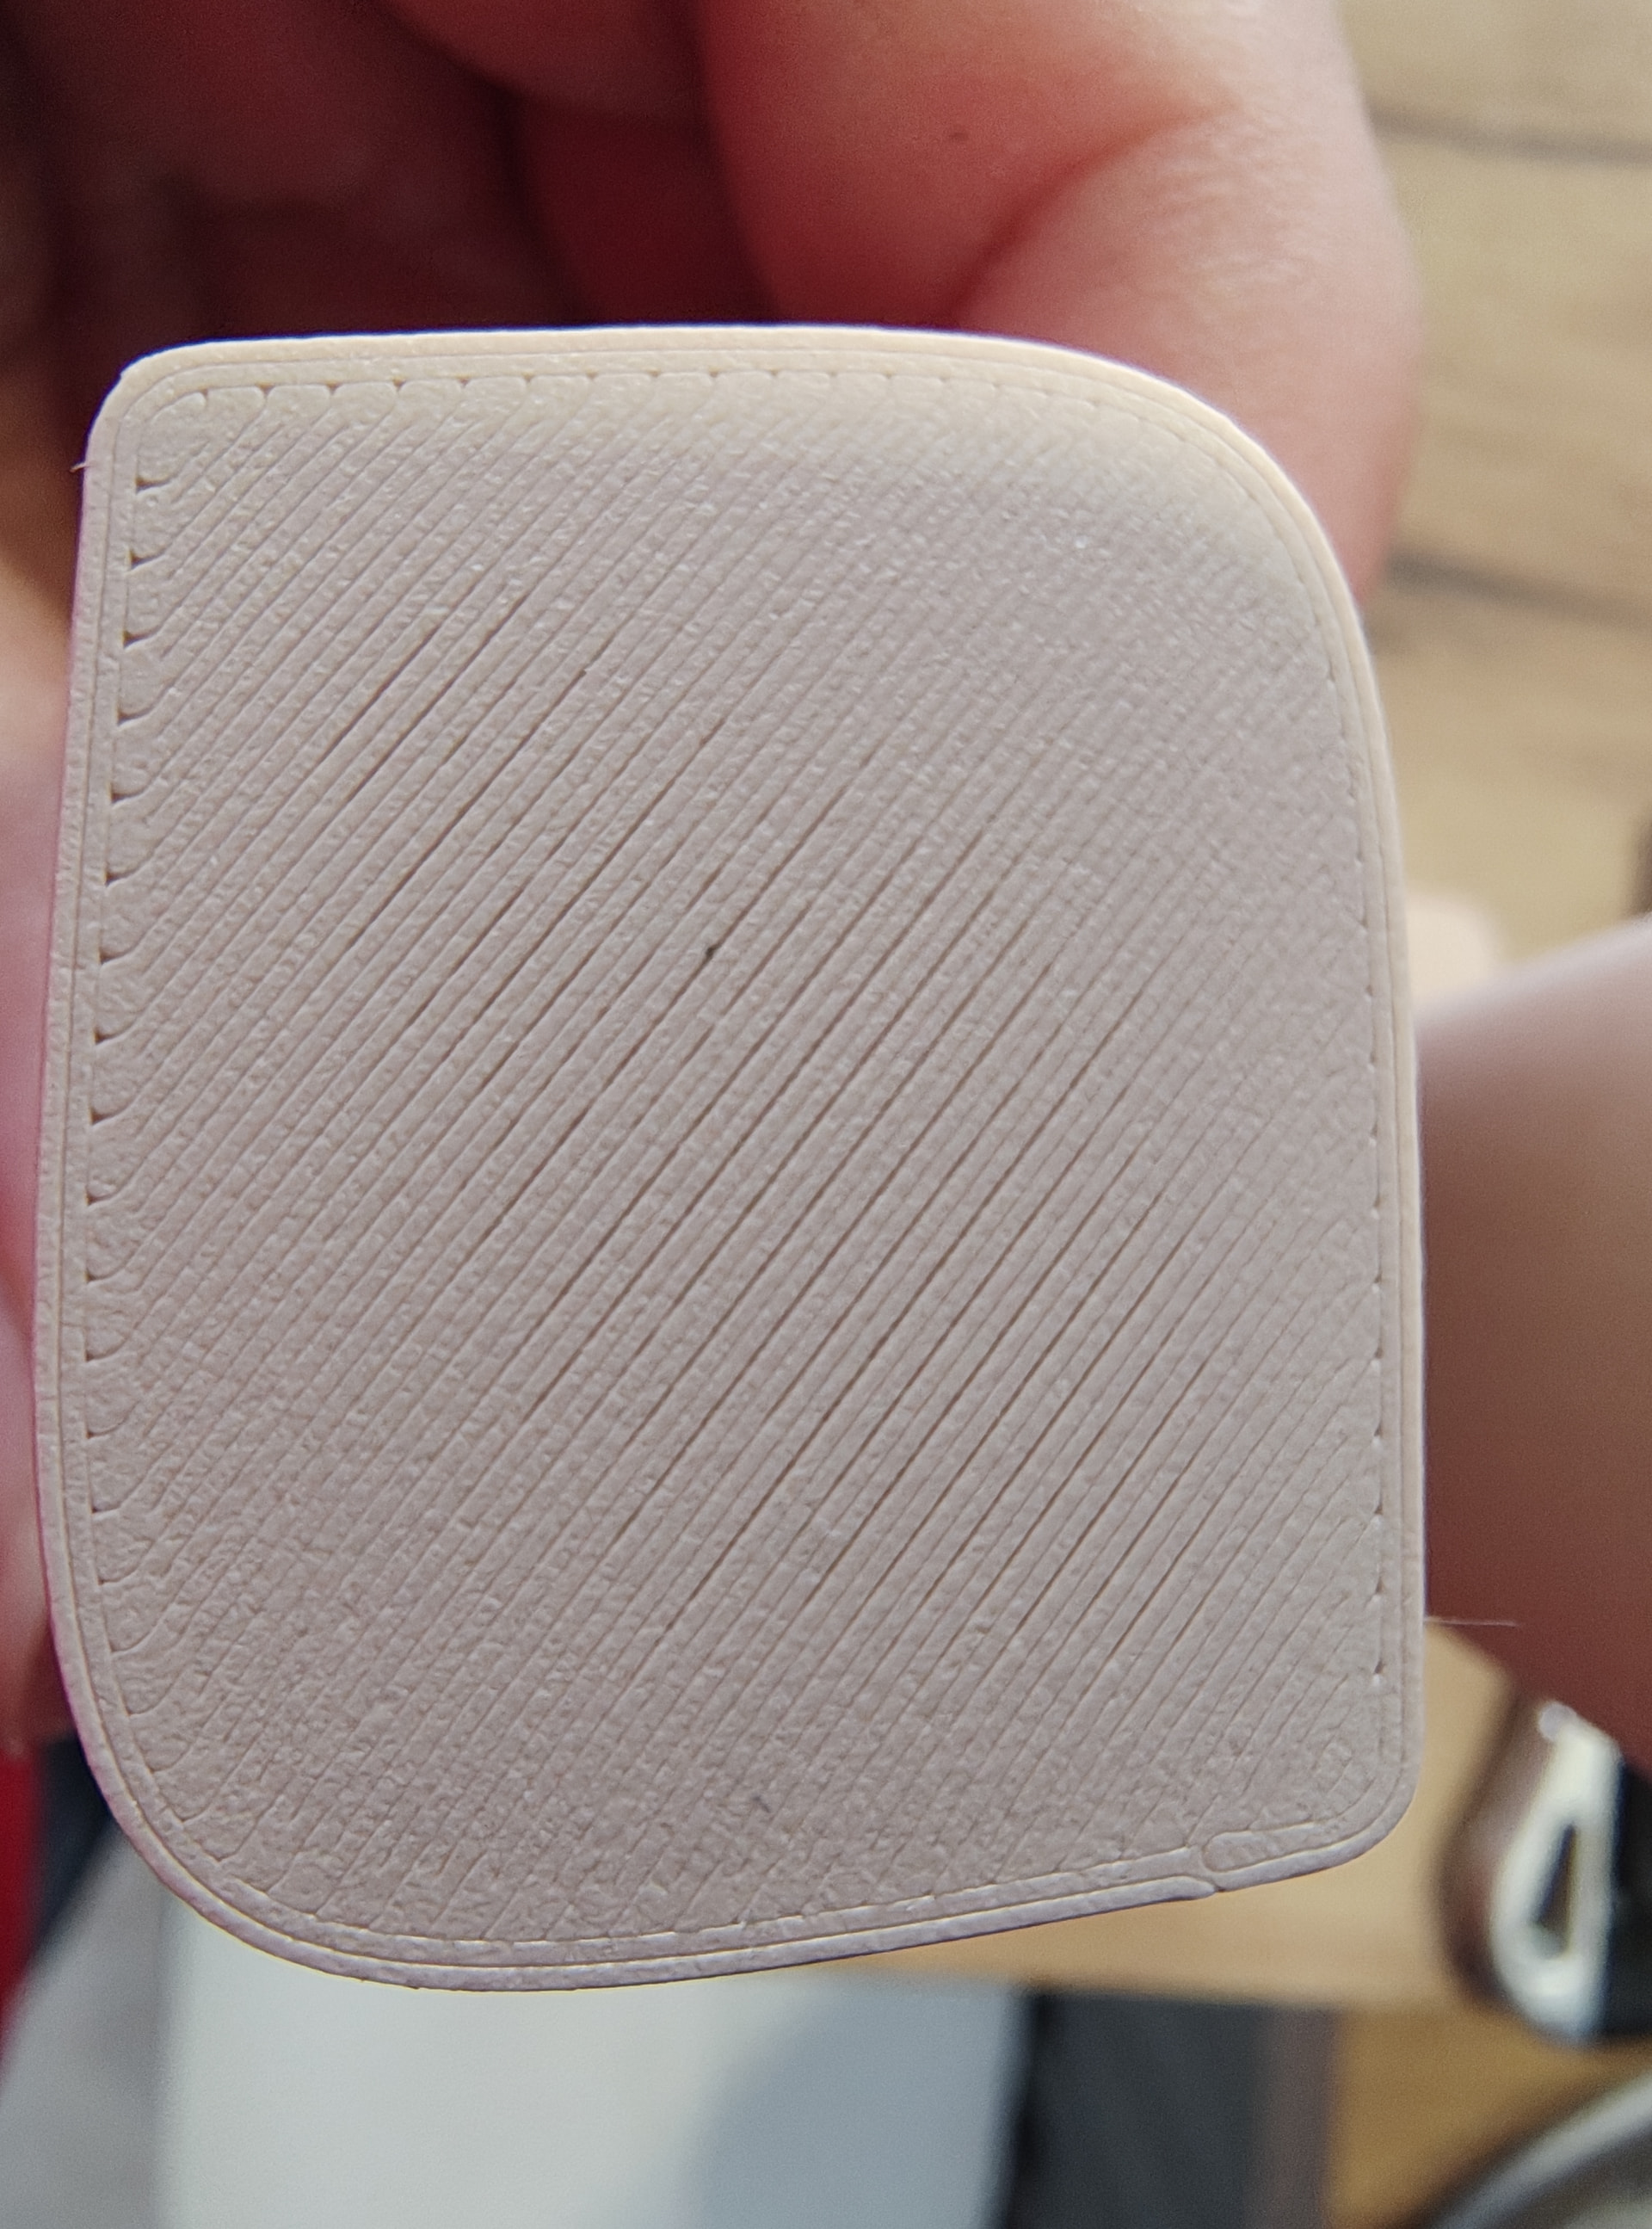
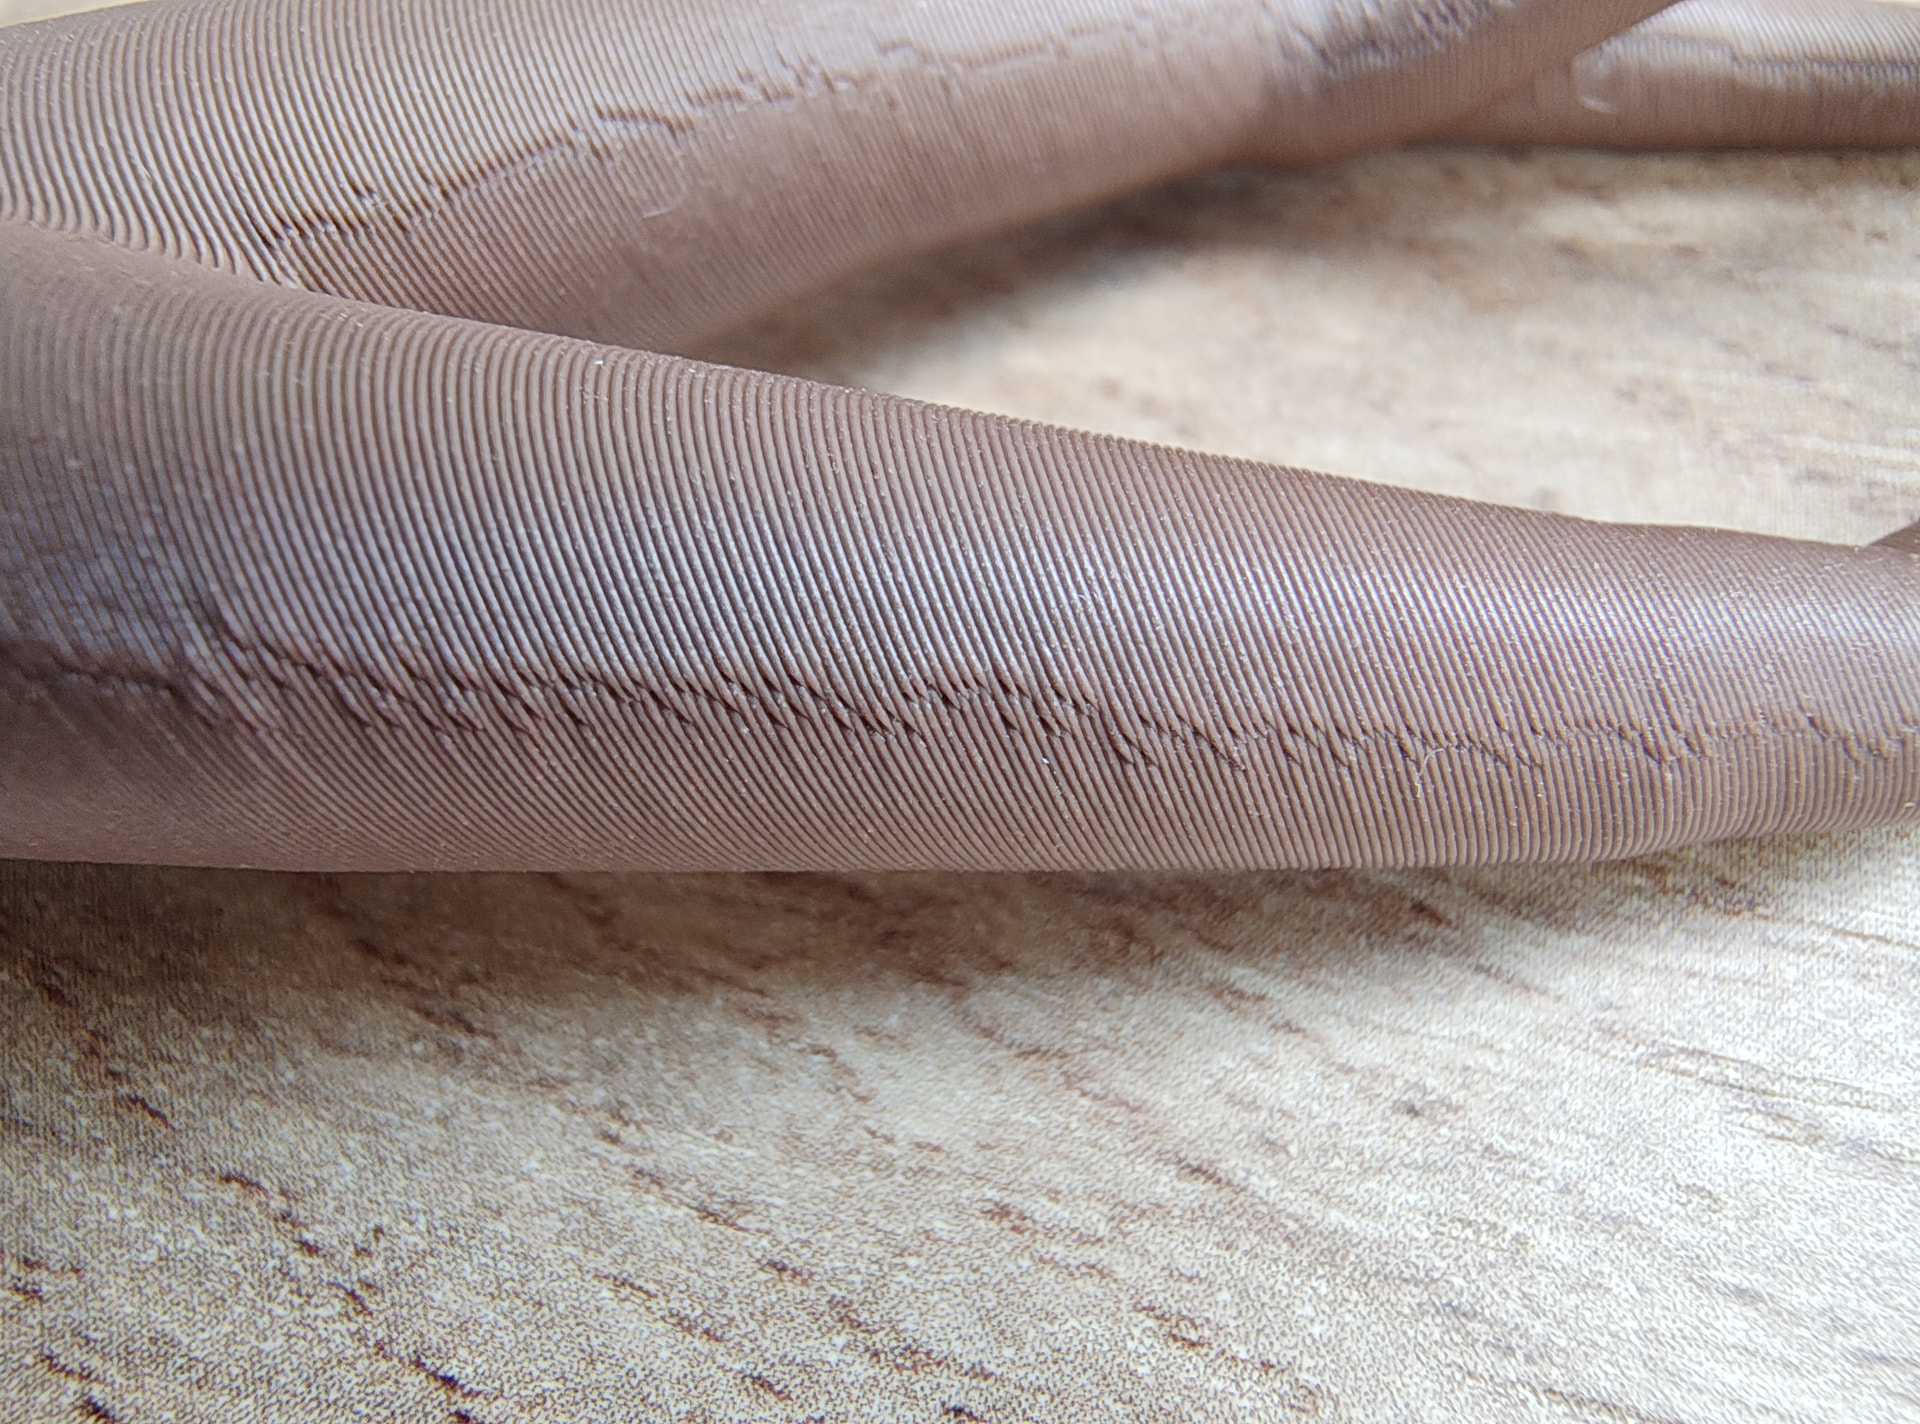
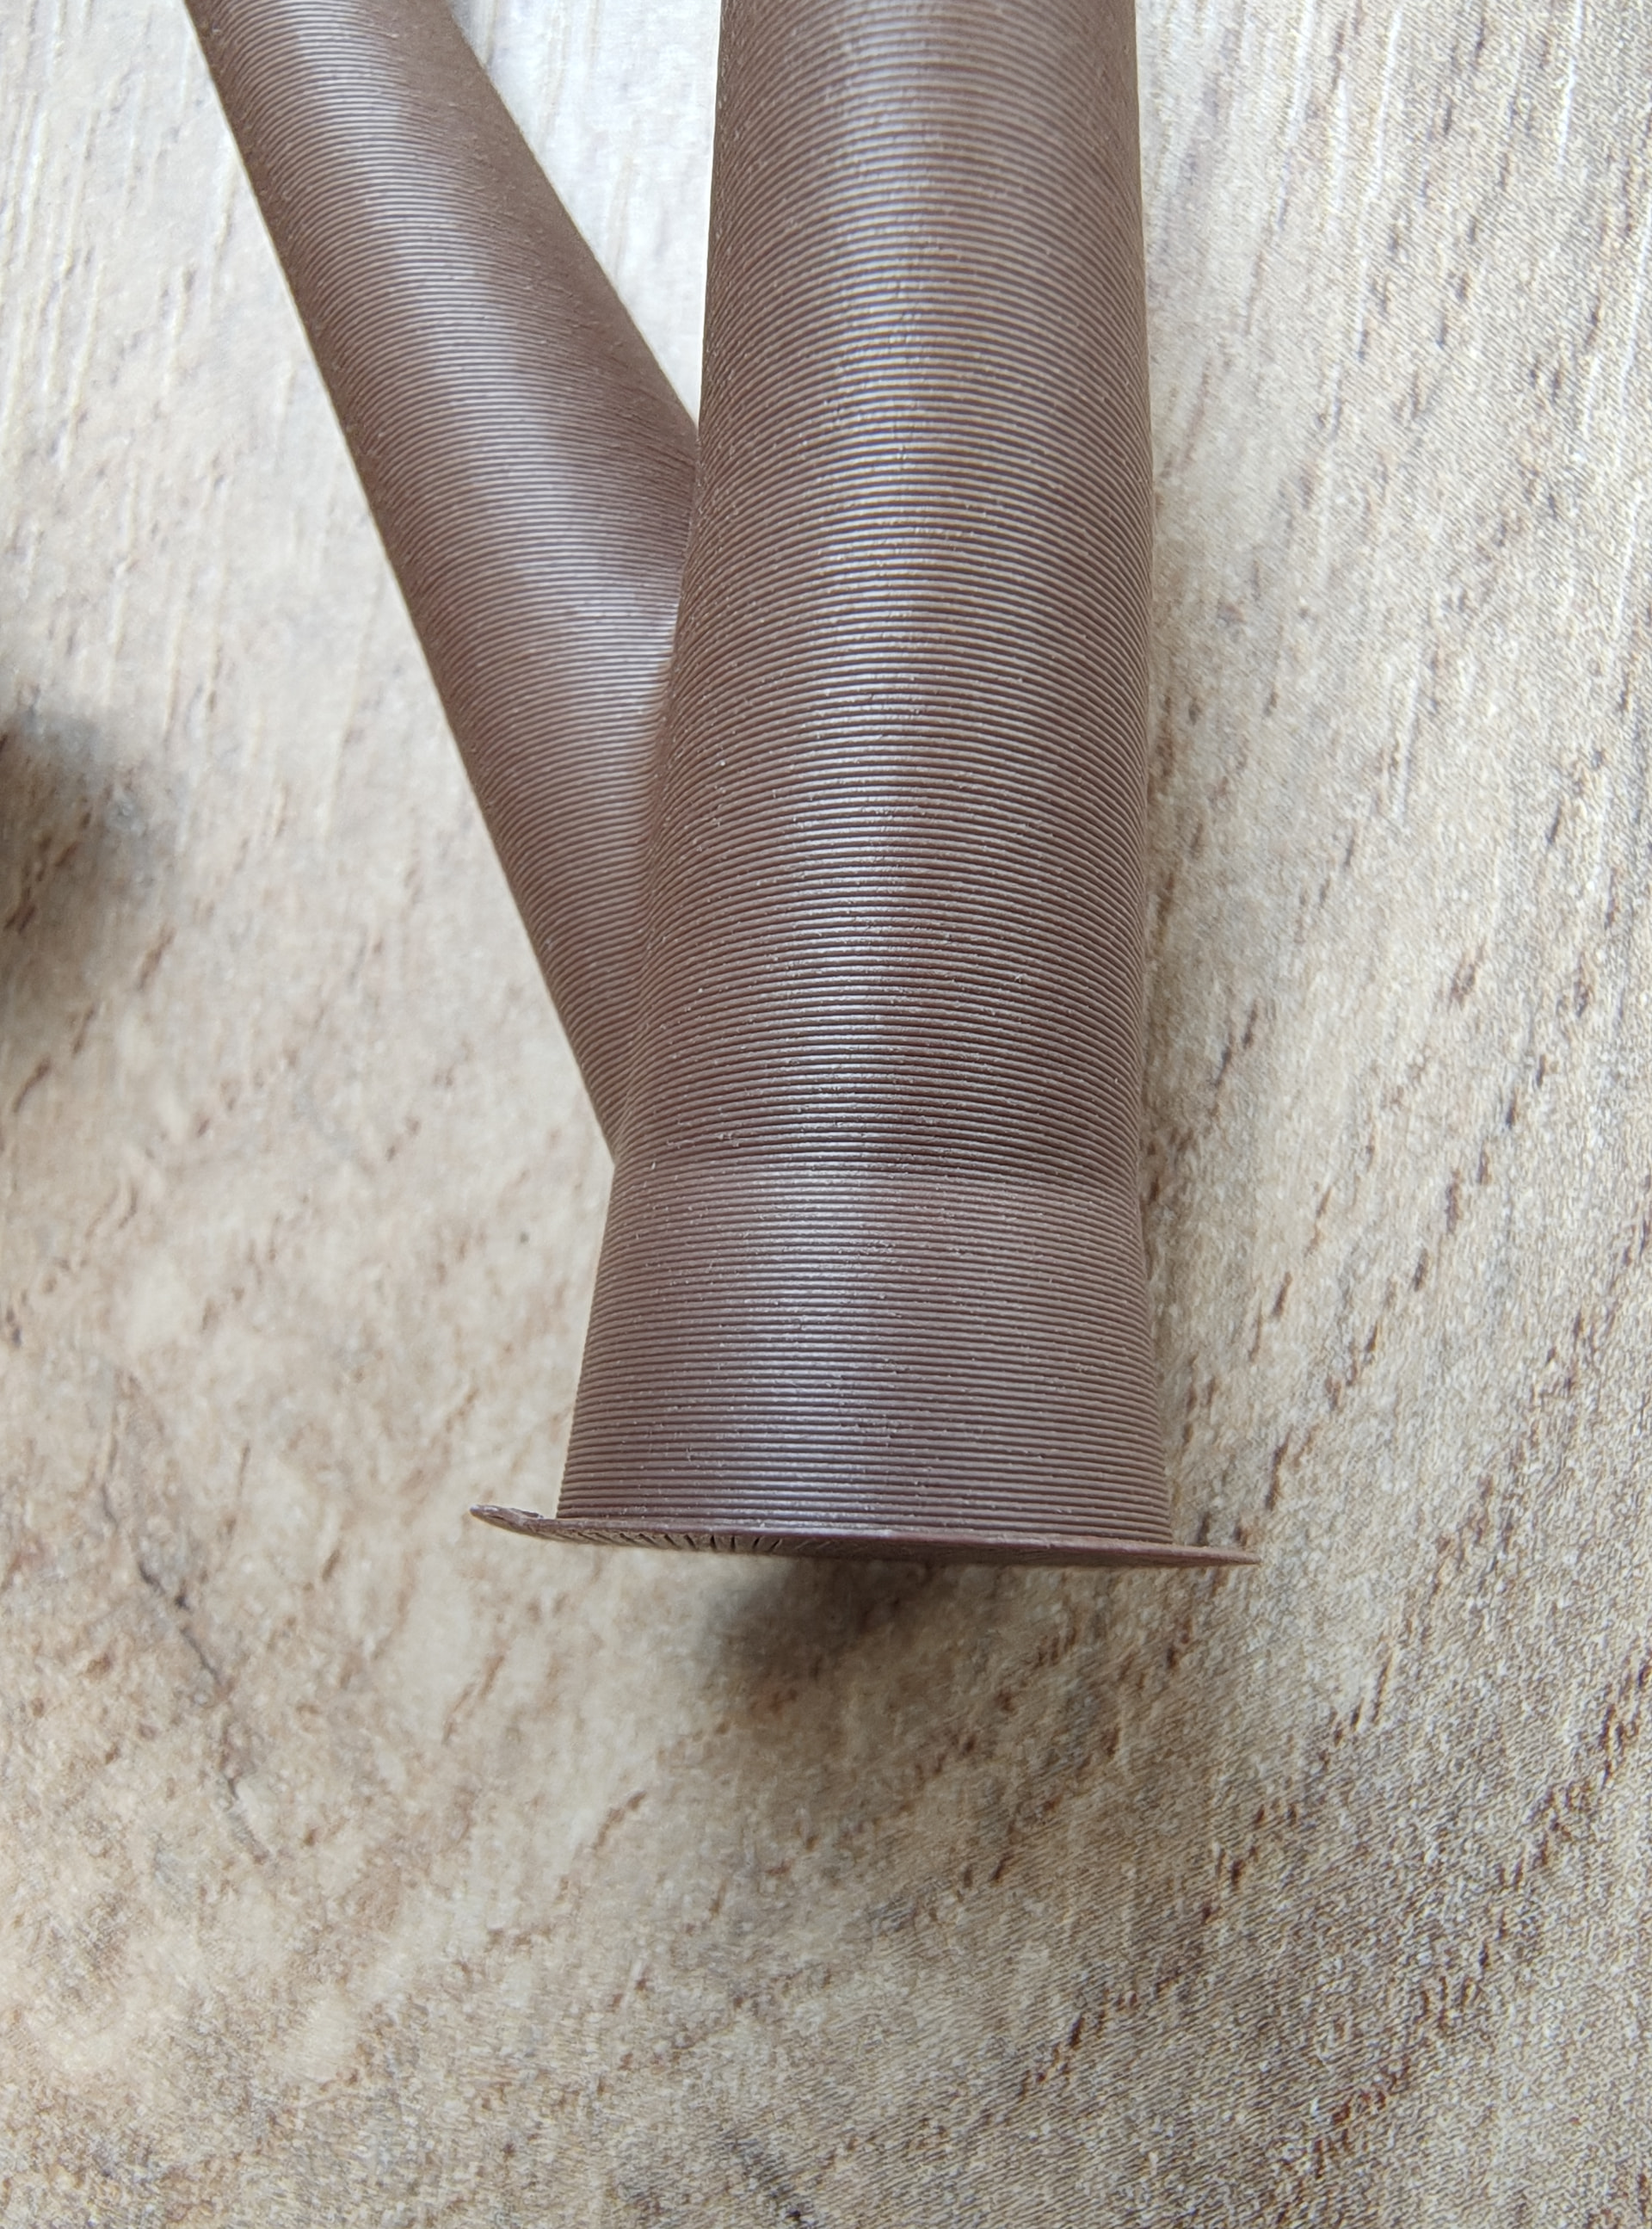
Recently I did some prints for small buildings and some garage toys. Auto calibration absolutely does not work correctly. Most of the time I have under extrusion on different places. Got one blob on the front of the camera which caused also adhesion problem, and also got other ends warped and loosing adhesion. This is with glue on the plate! The blob was not detected by AI camera, and I saw just by chance before it become a bigger problem.
Later I printed some parts from the garage which required big tree type support, and for the trees with hollow body the surface is absolutely flowless. Seams are also looking very good. On the other side on one building with smooth surface I see all kind of defects and artifacts all over the place and big seams.
So for me it is inconsistent, and the walls, tops and bottoms are kind of hit or miss. And I see random under extrusion on many different places.
And I did not bought this printer to spend my days printing calibration charts! All this happens with PLA from Bambu and Polymaker. Which should be the simplest and flowless material to print.
Some examples:

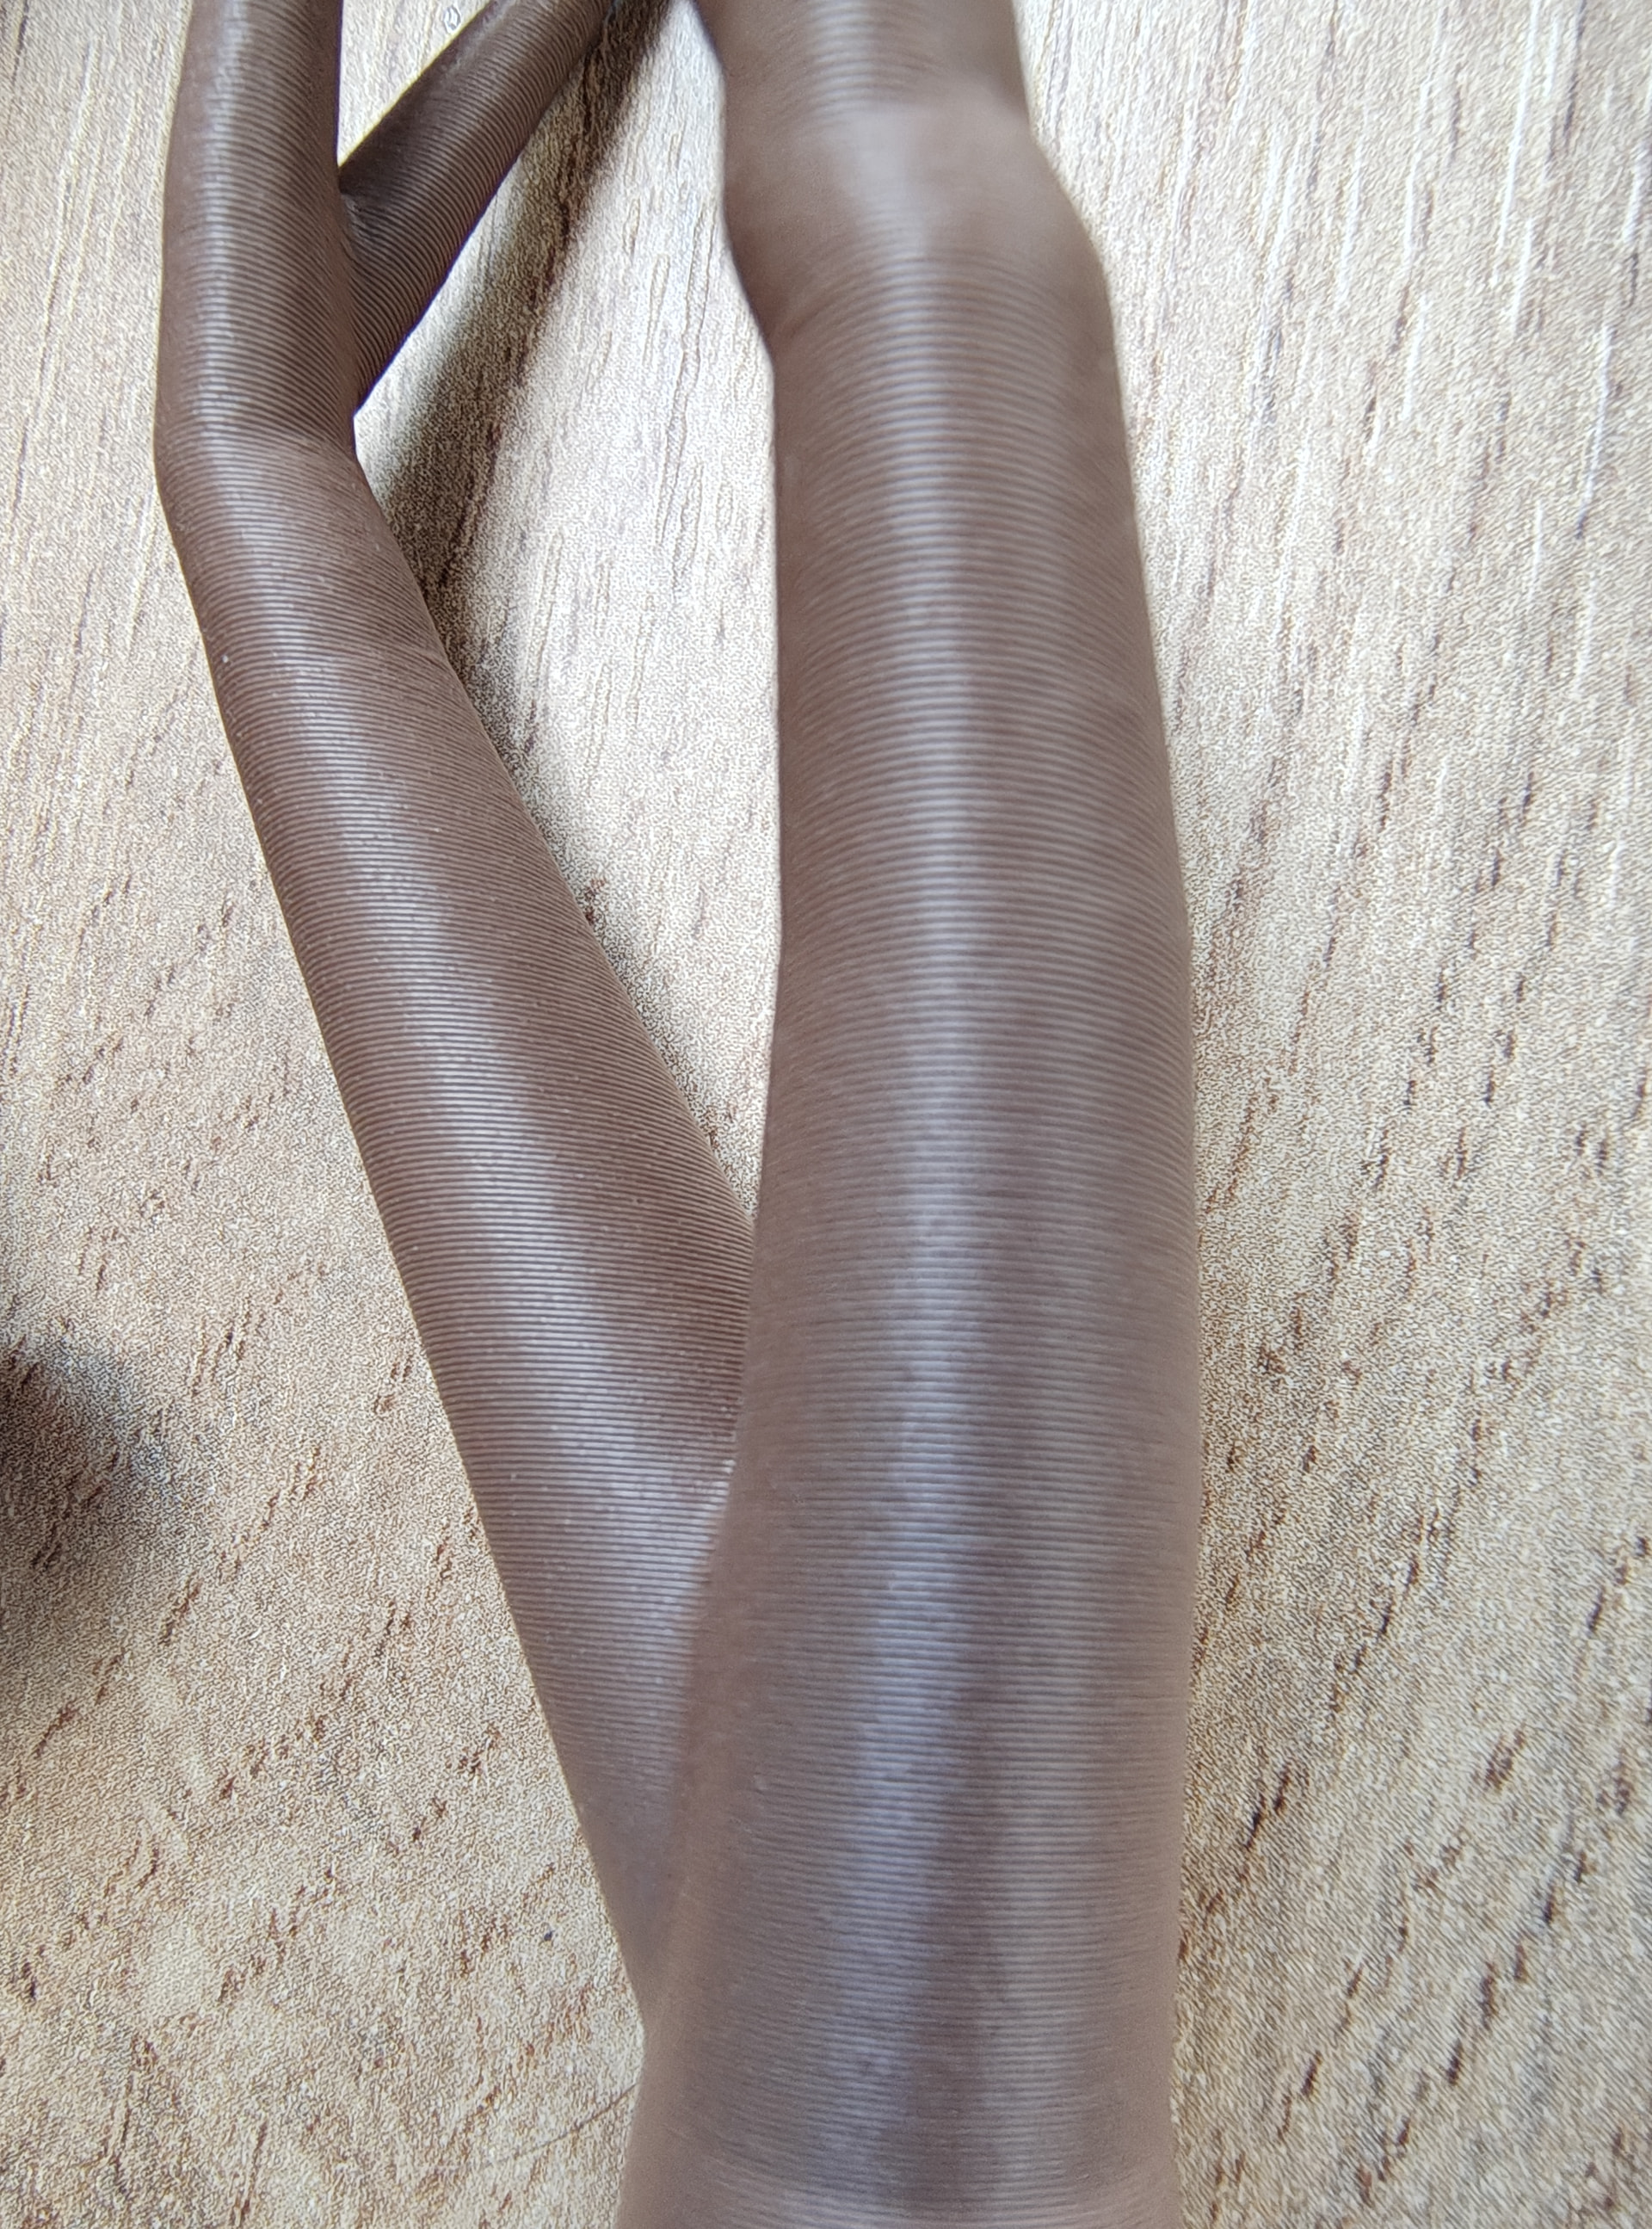
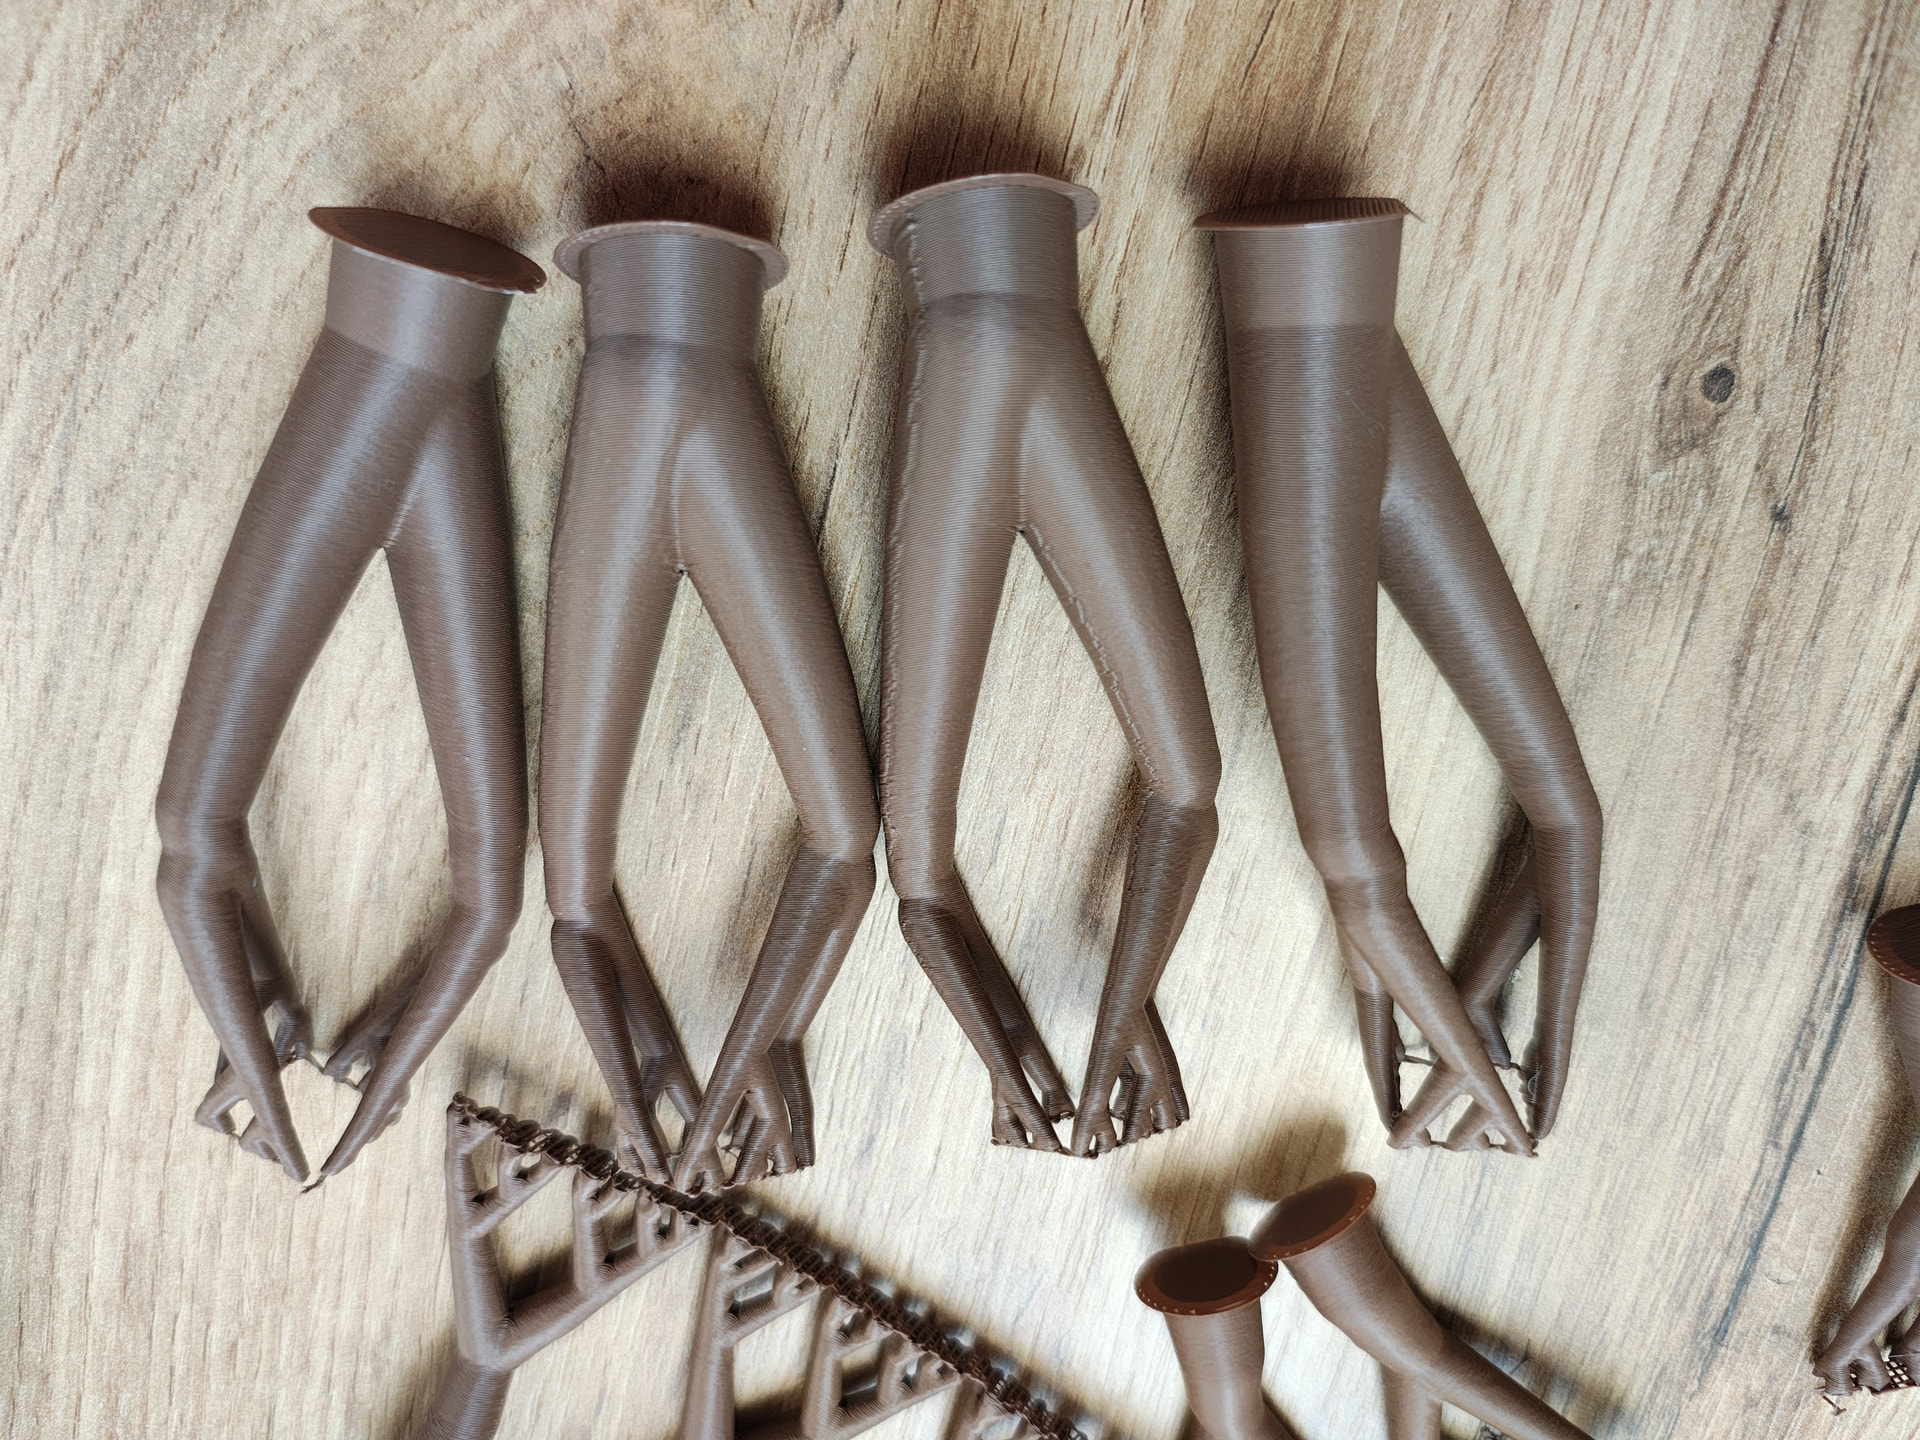
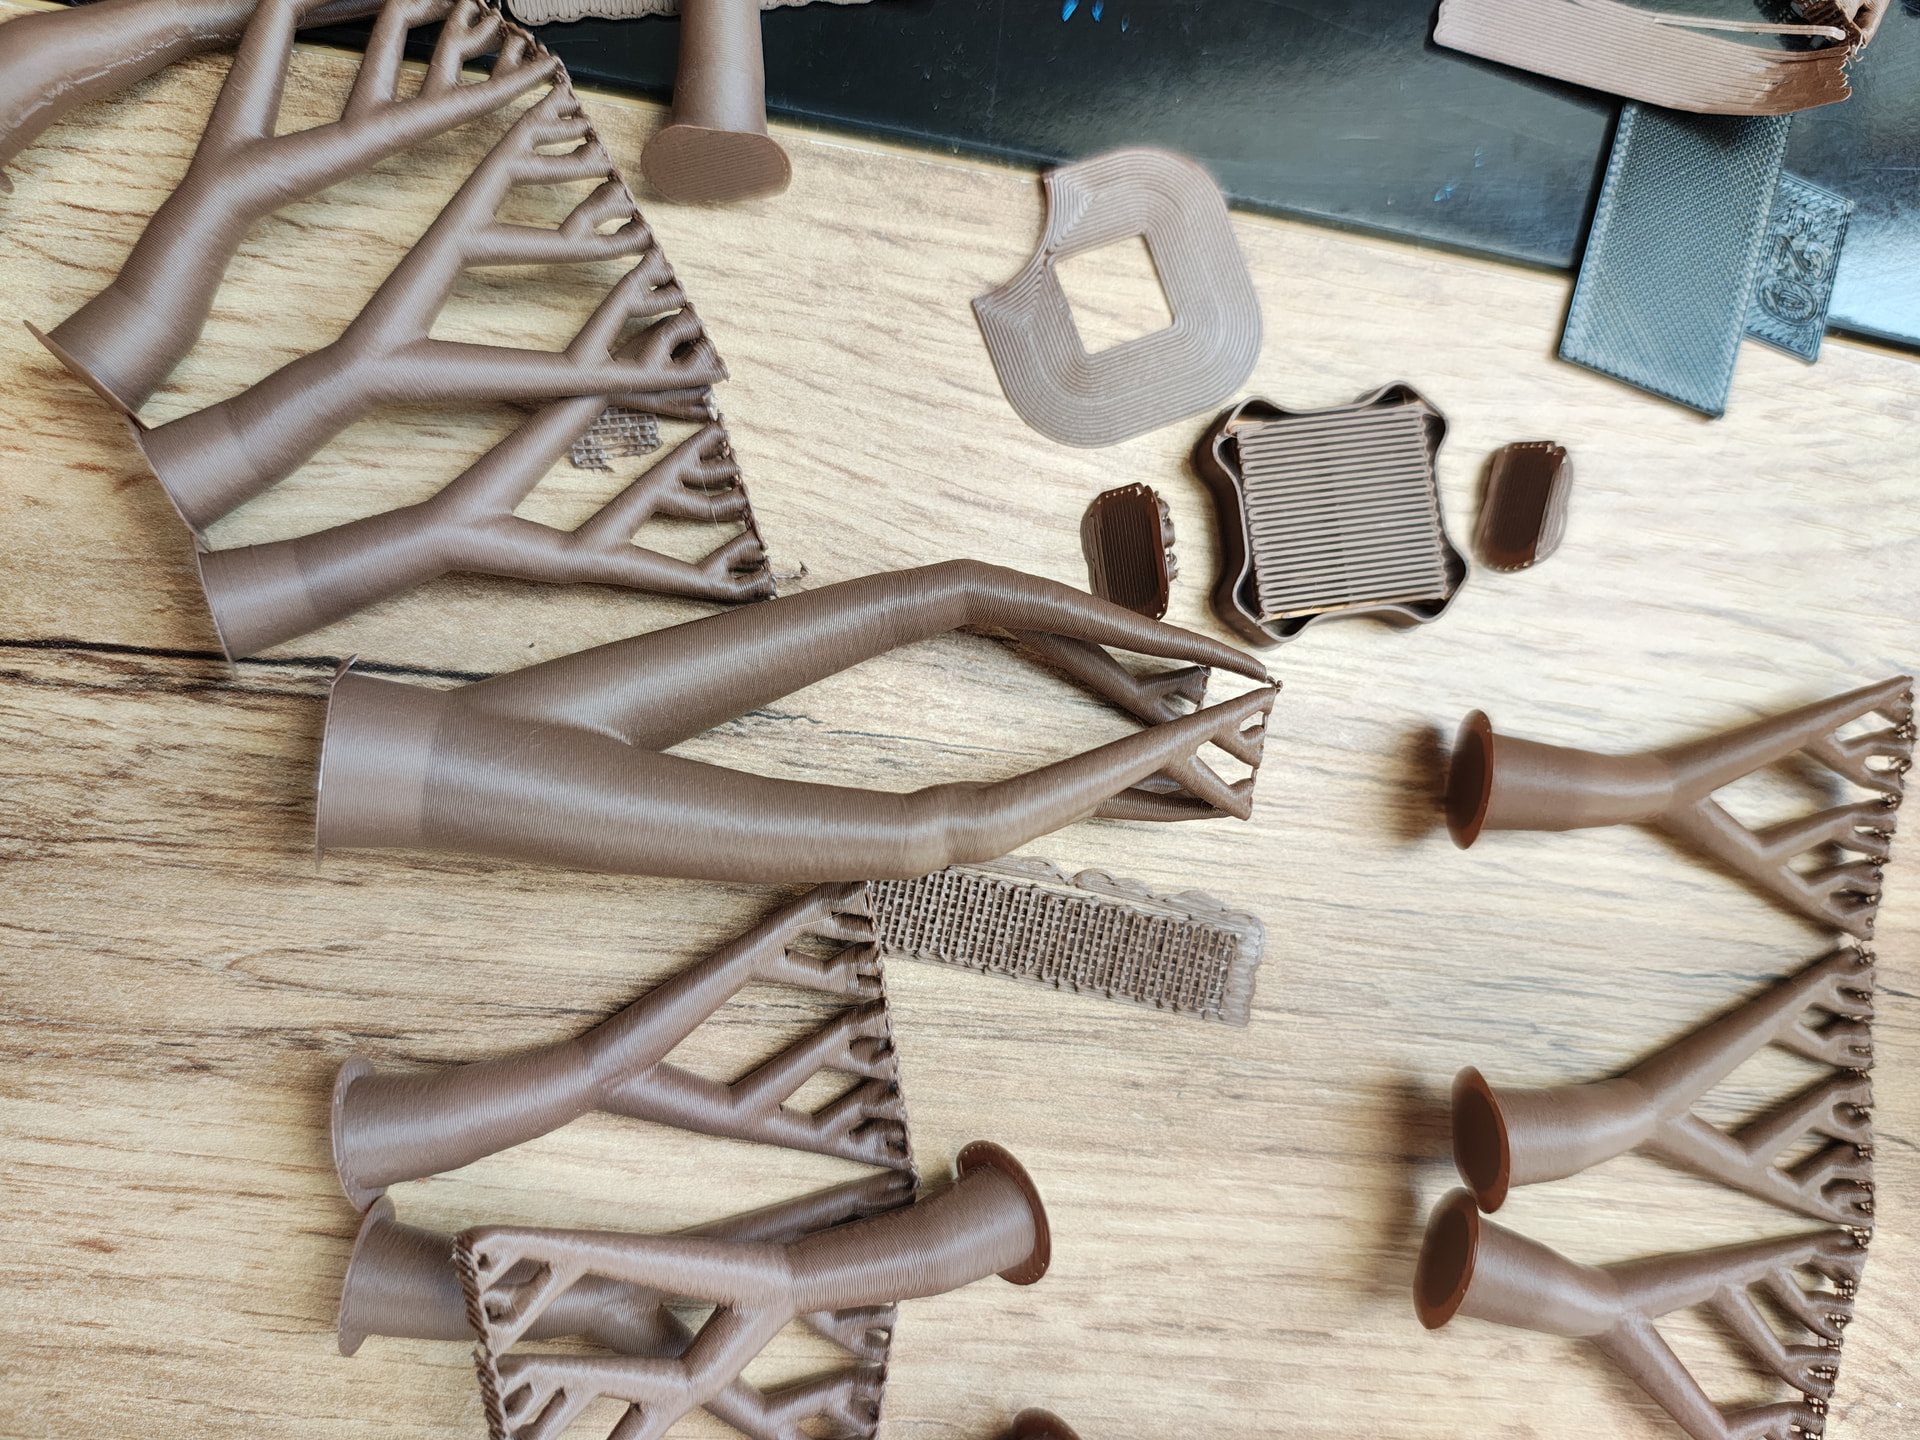
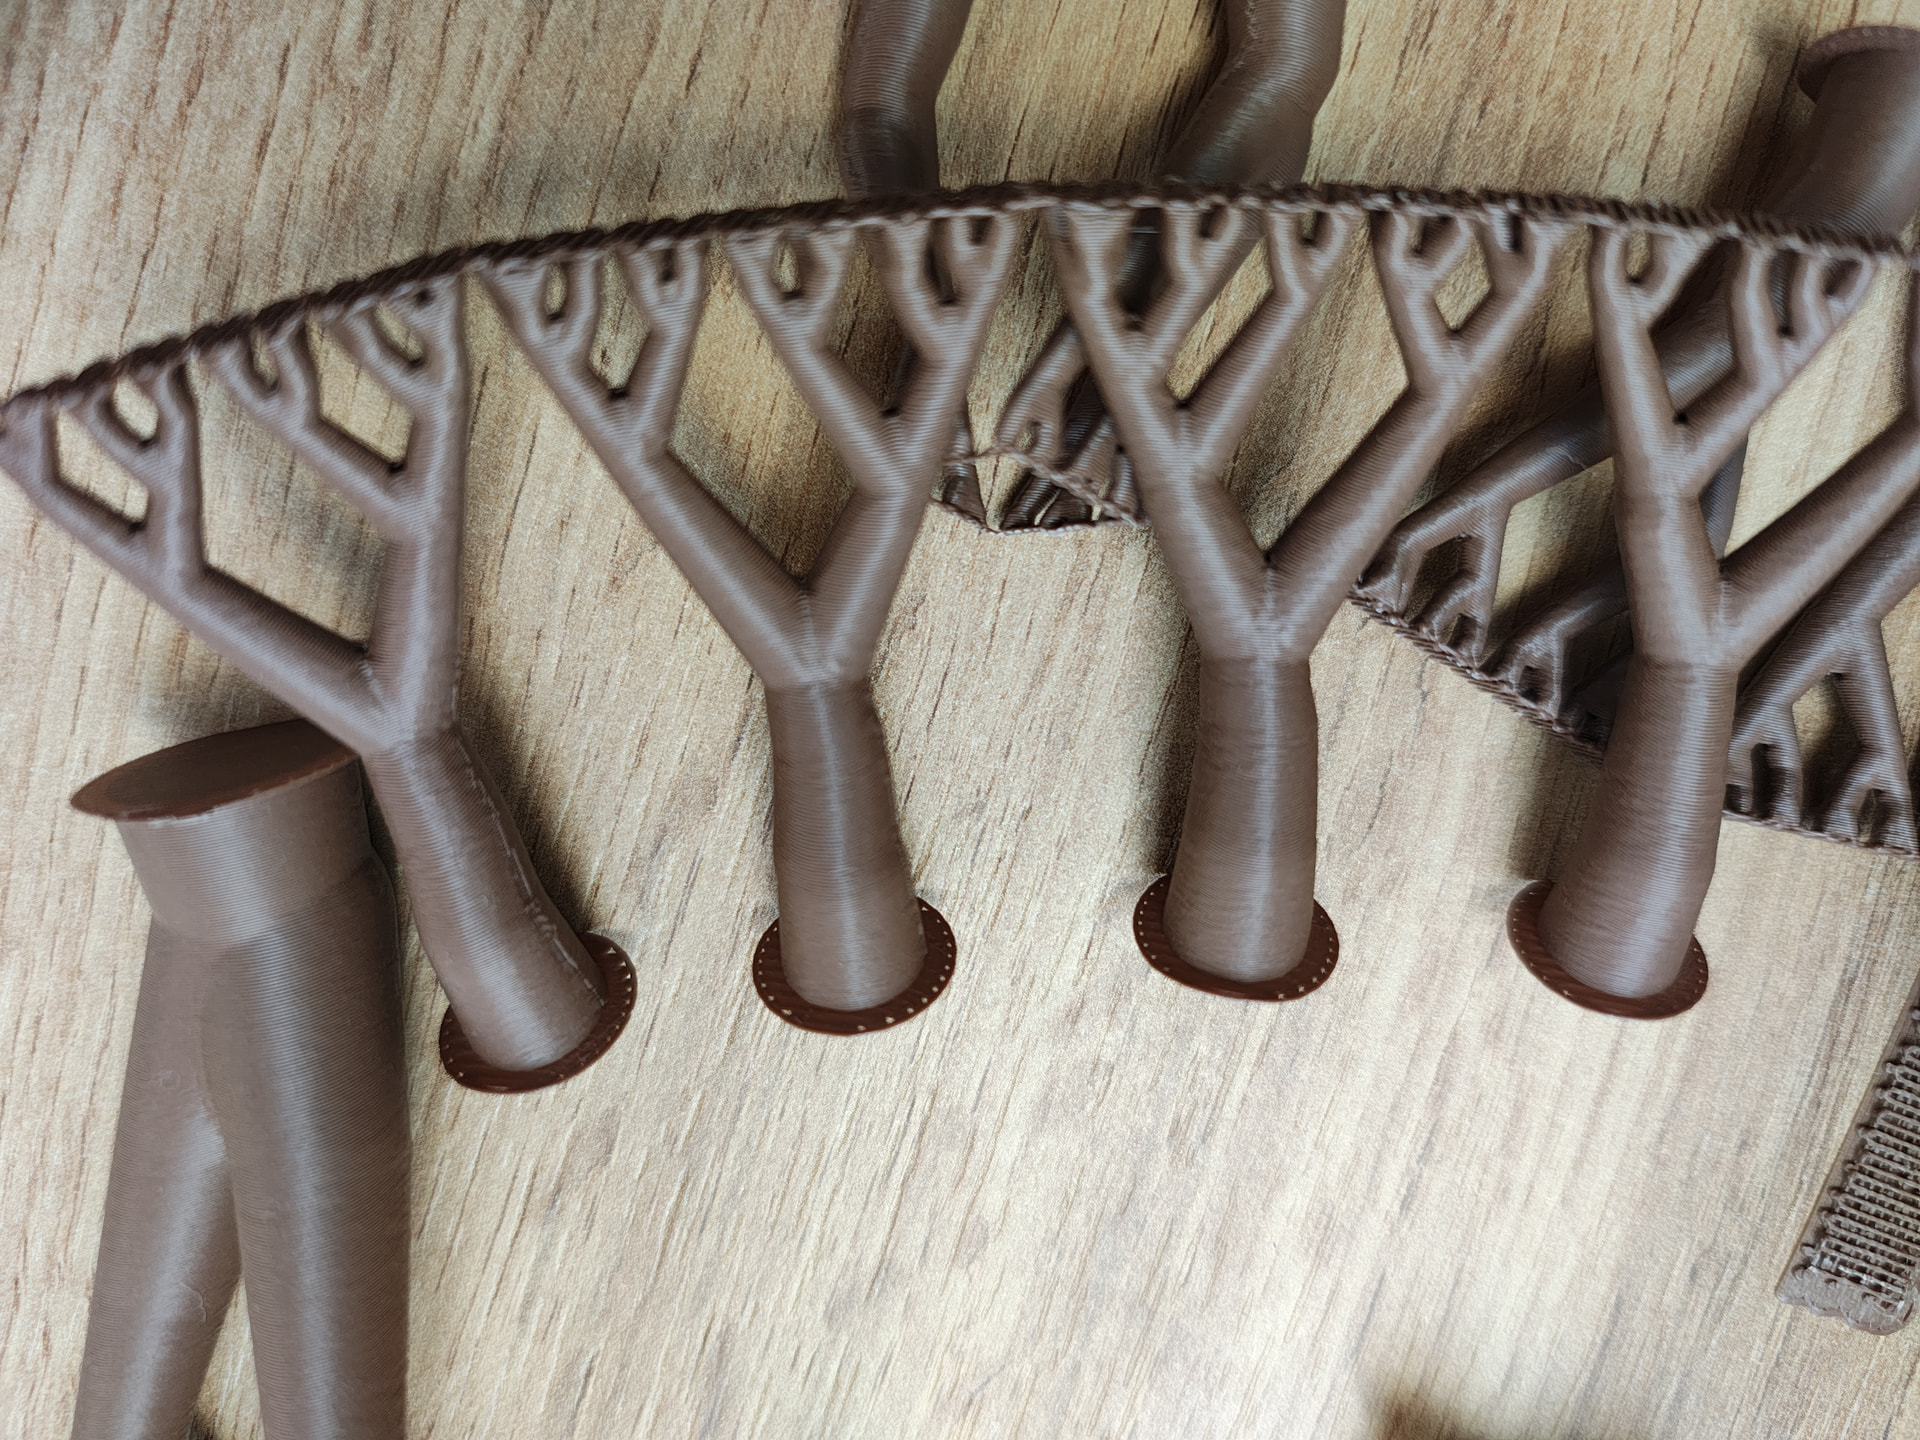
Thanks for confirming it is actually a very good printer as well  I’ve seen certain reviewers praise it as well, auroratech also has it as the best printer now. I’ve ordered it last week based on the many reviews and your comment. I can’t wait to give it a spin and see how it compares with my p2s with the upgrades, especially the new belt that should give less VFA’s.
Today I was caught by surprise and still kind of wondering:
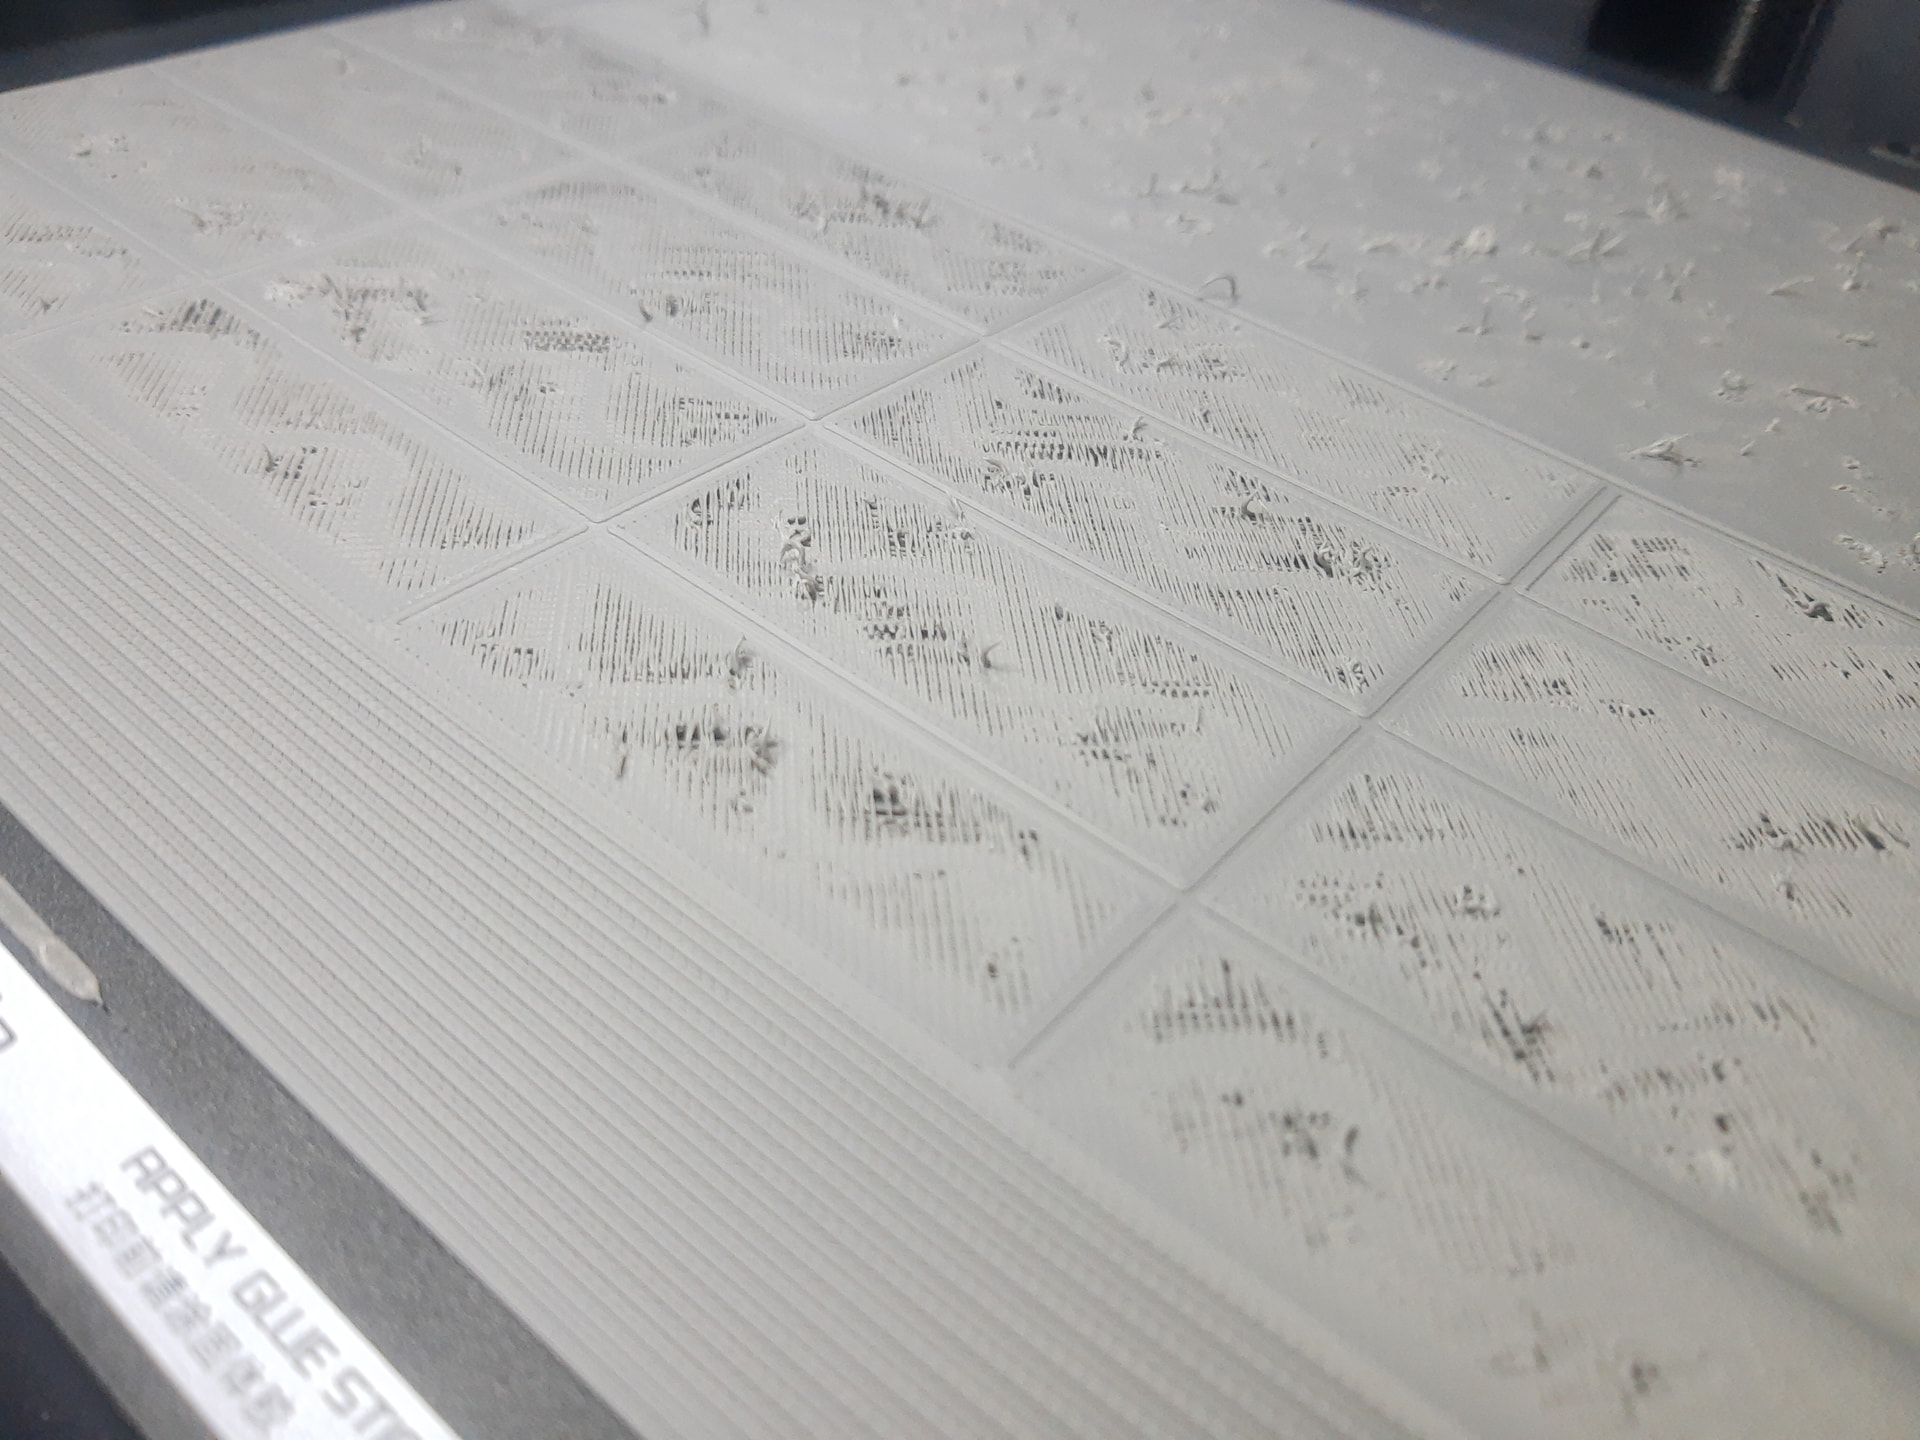
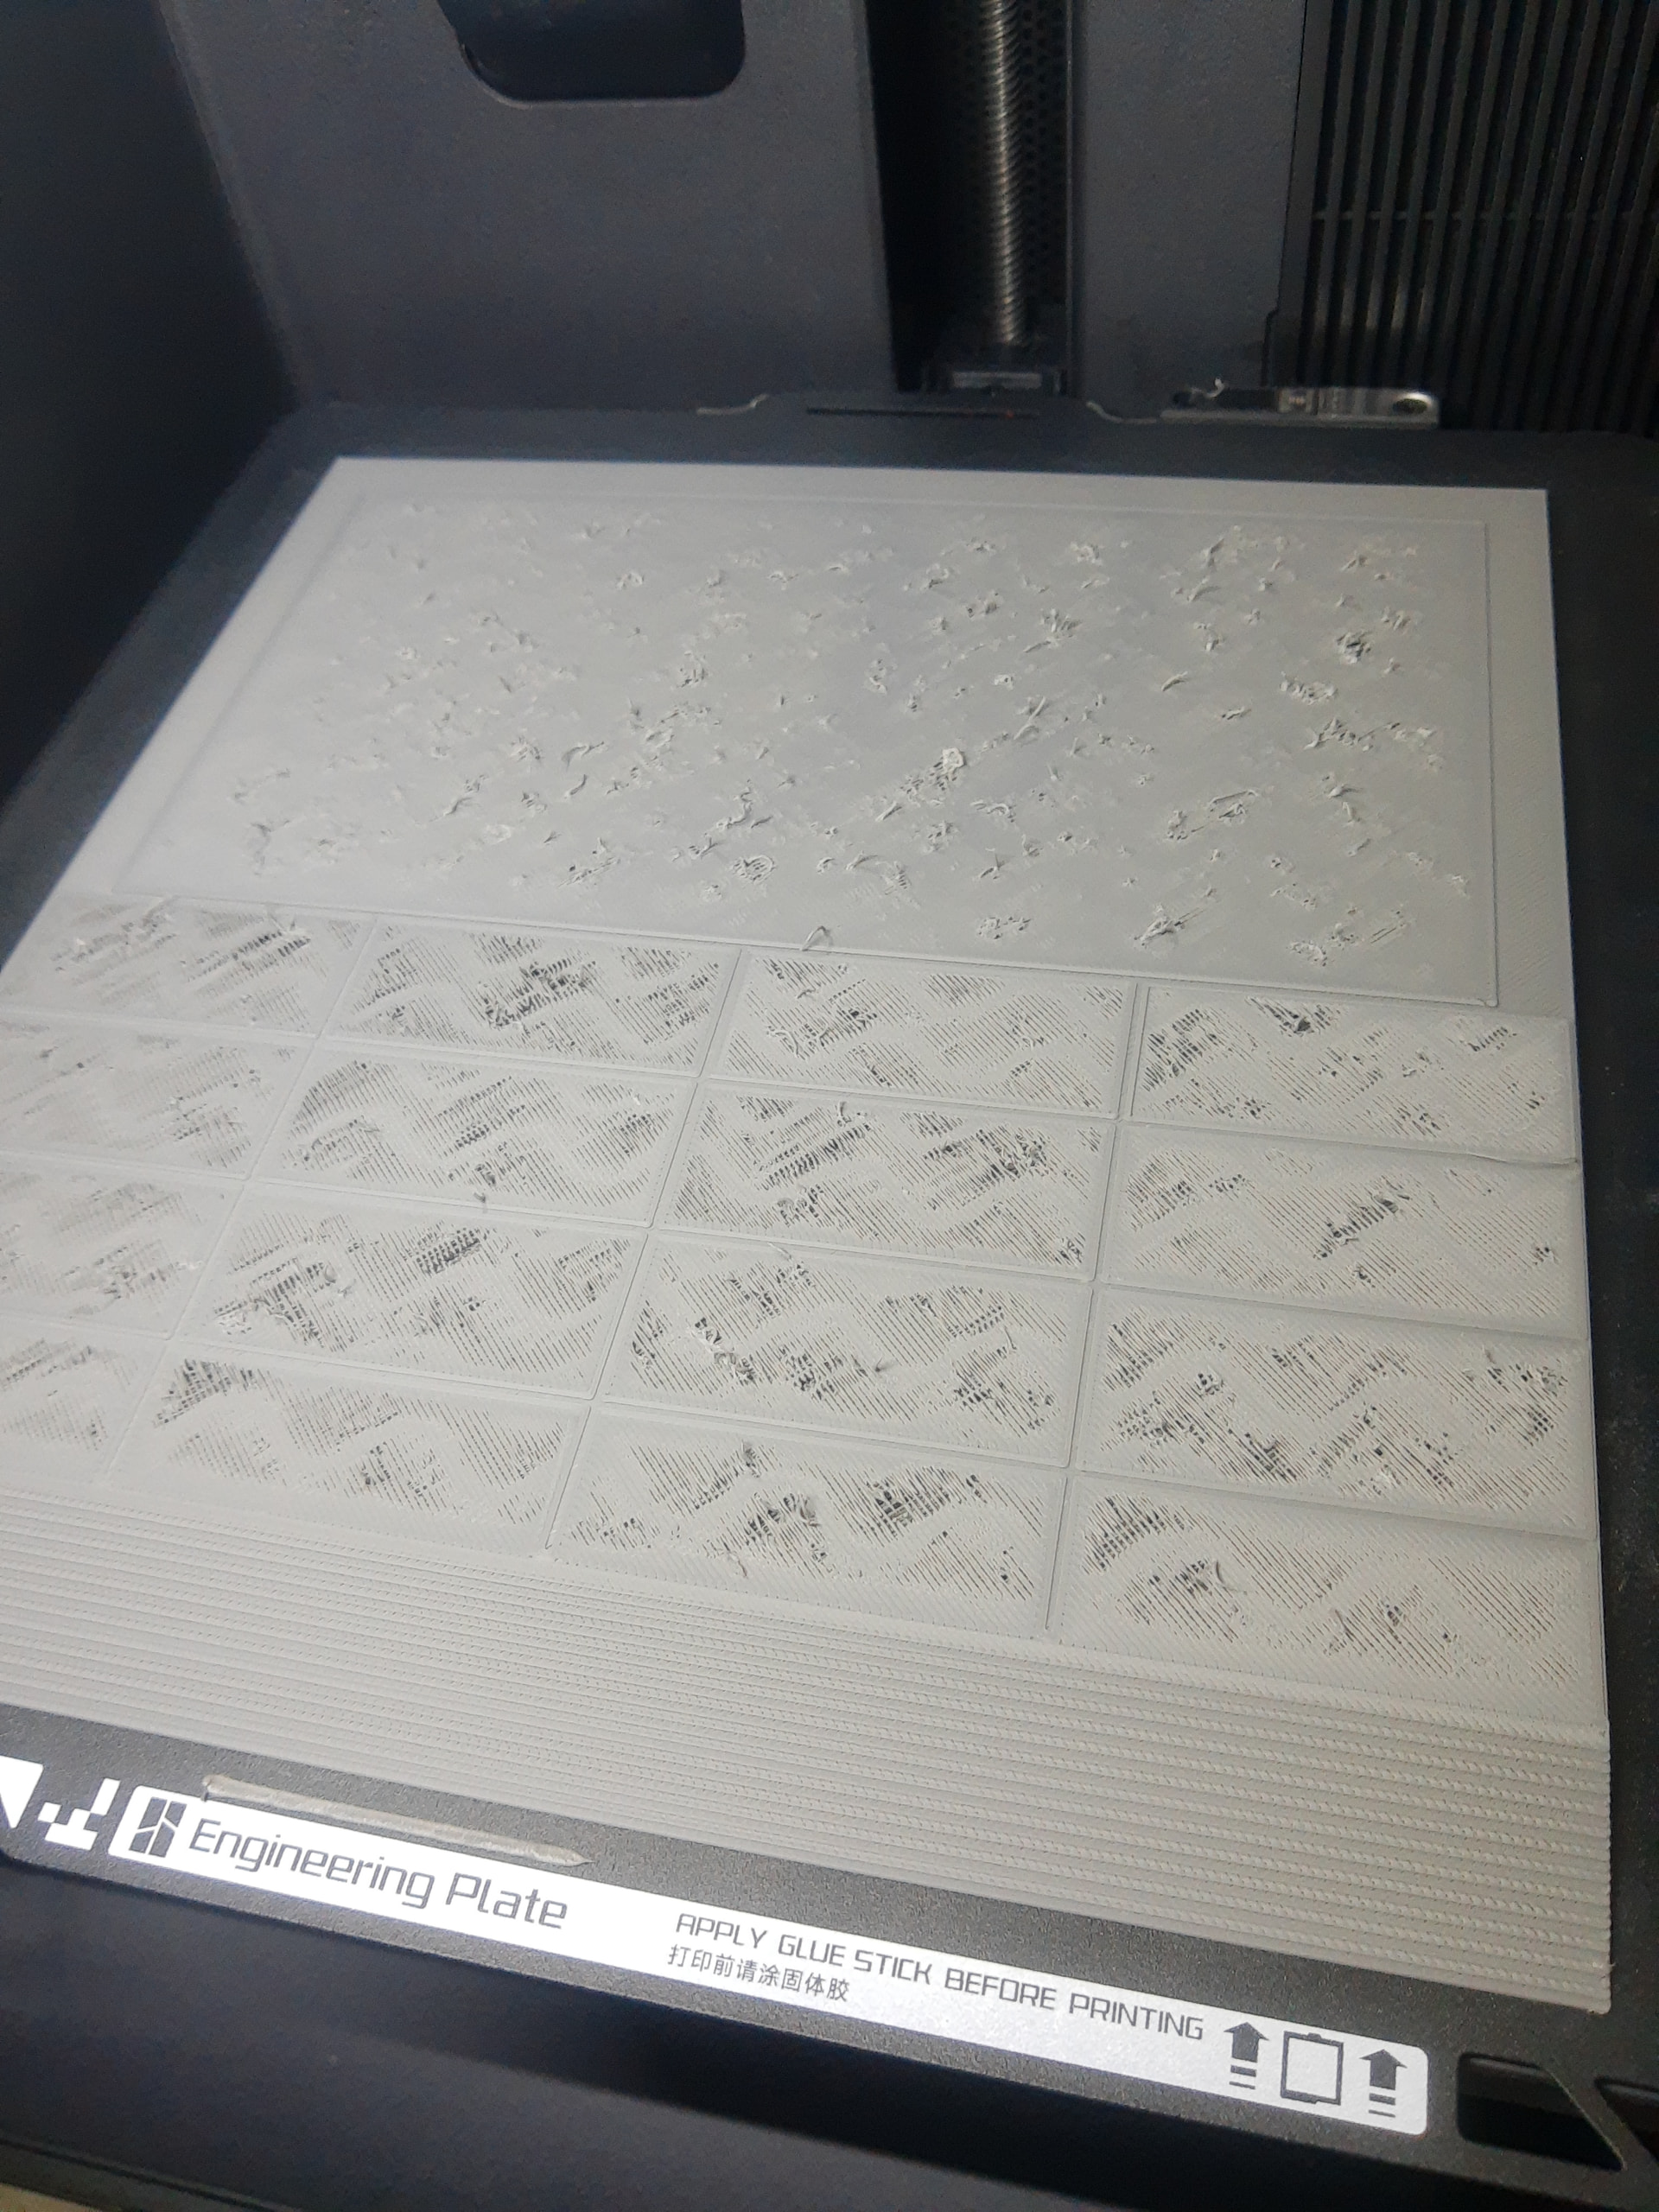
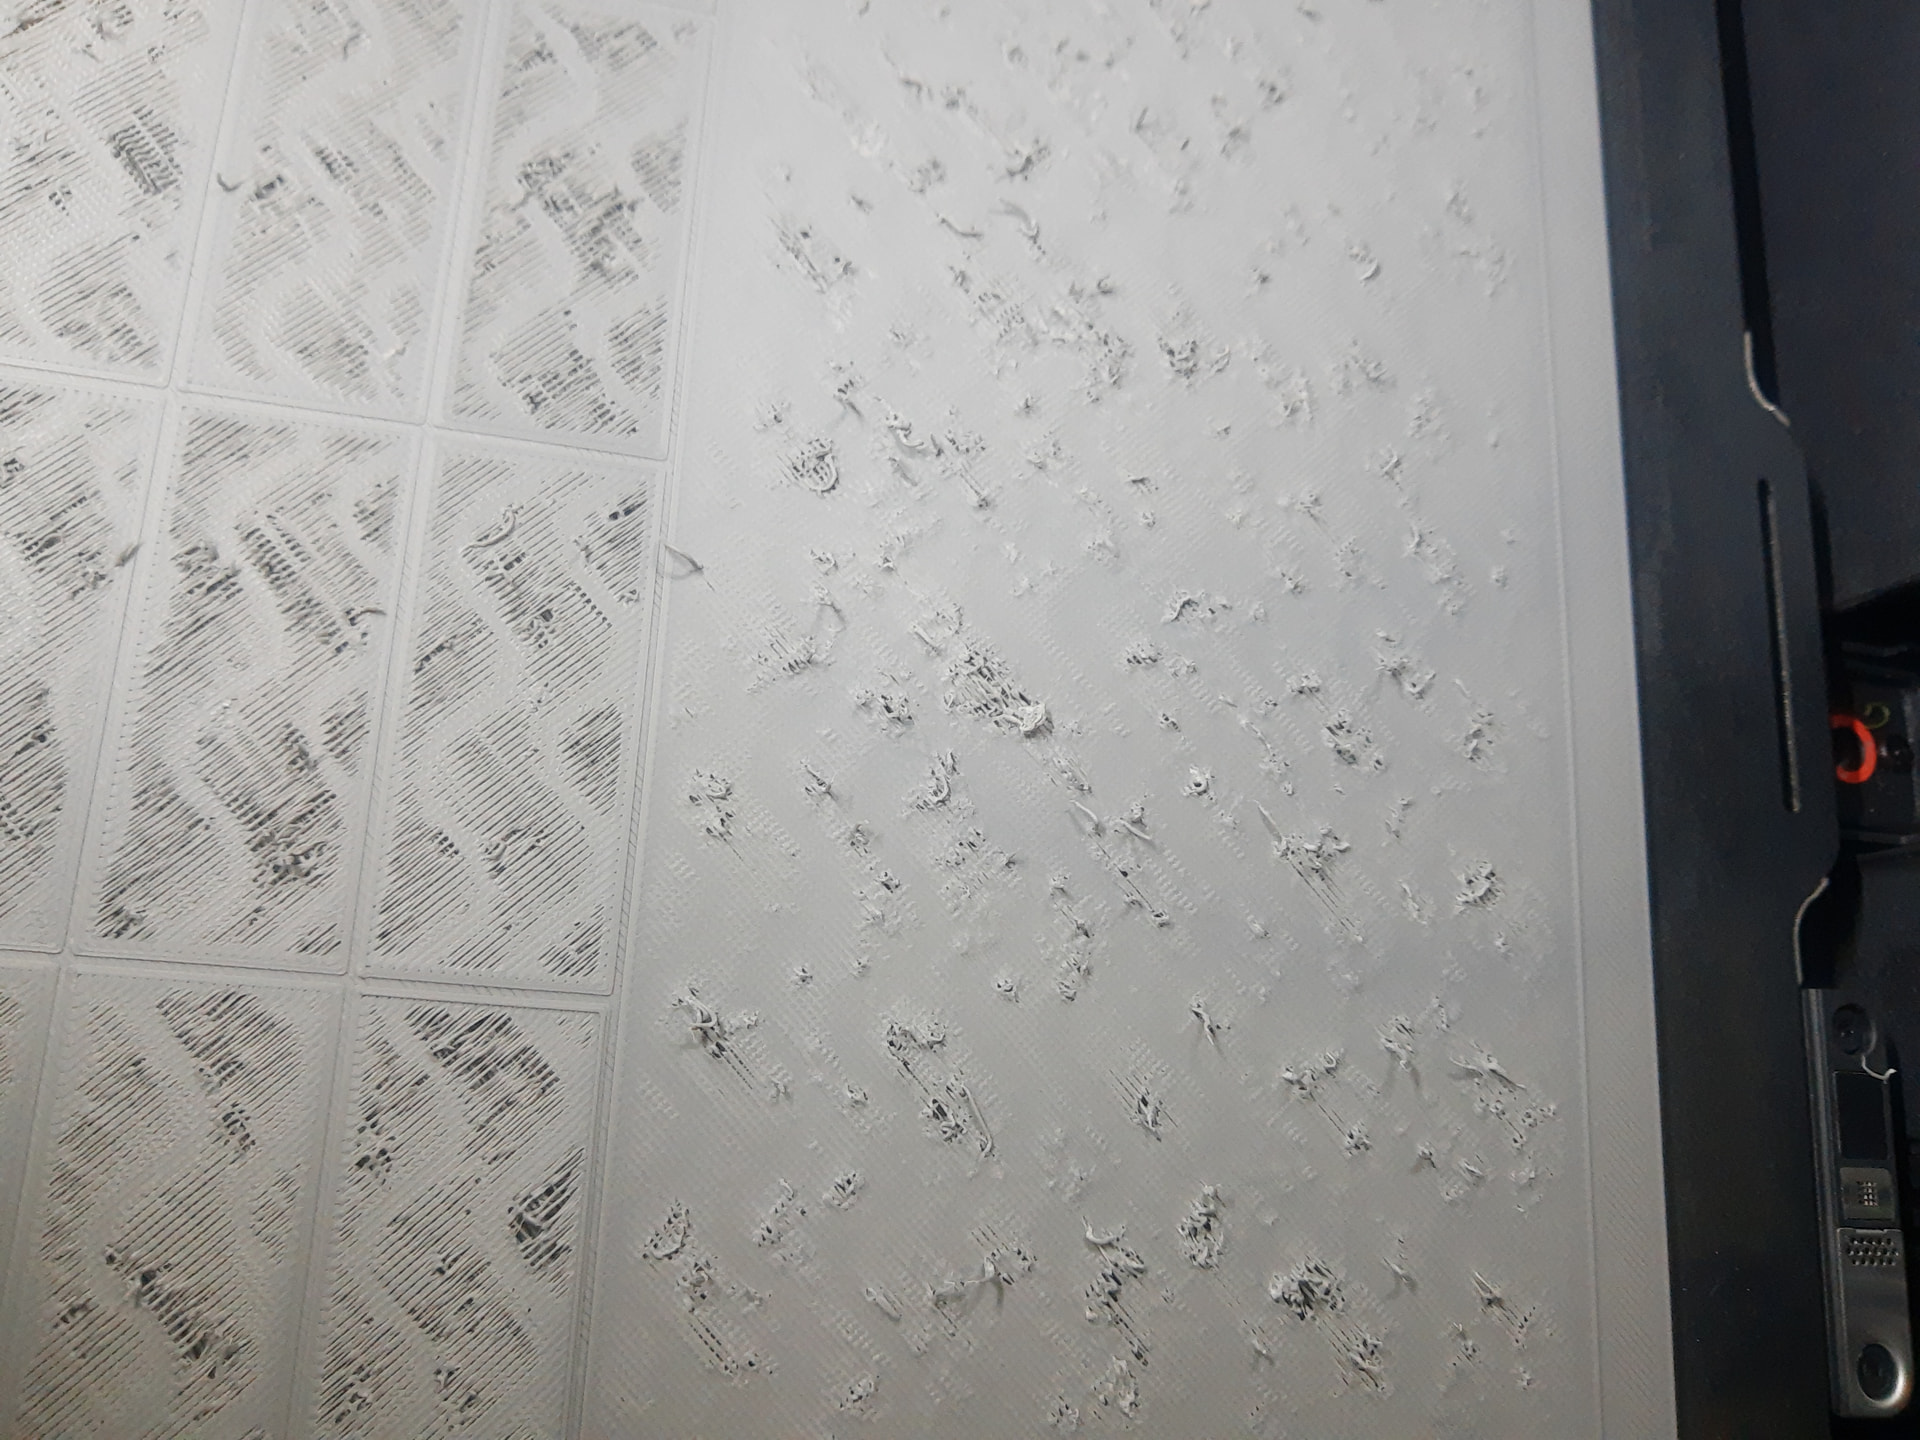
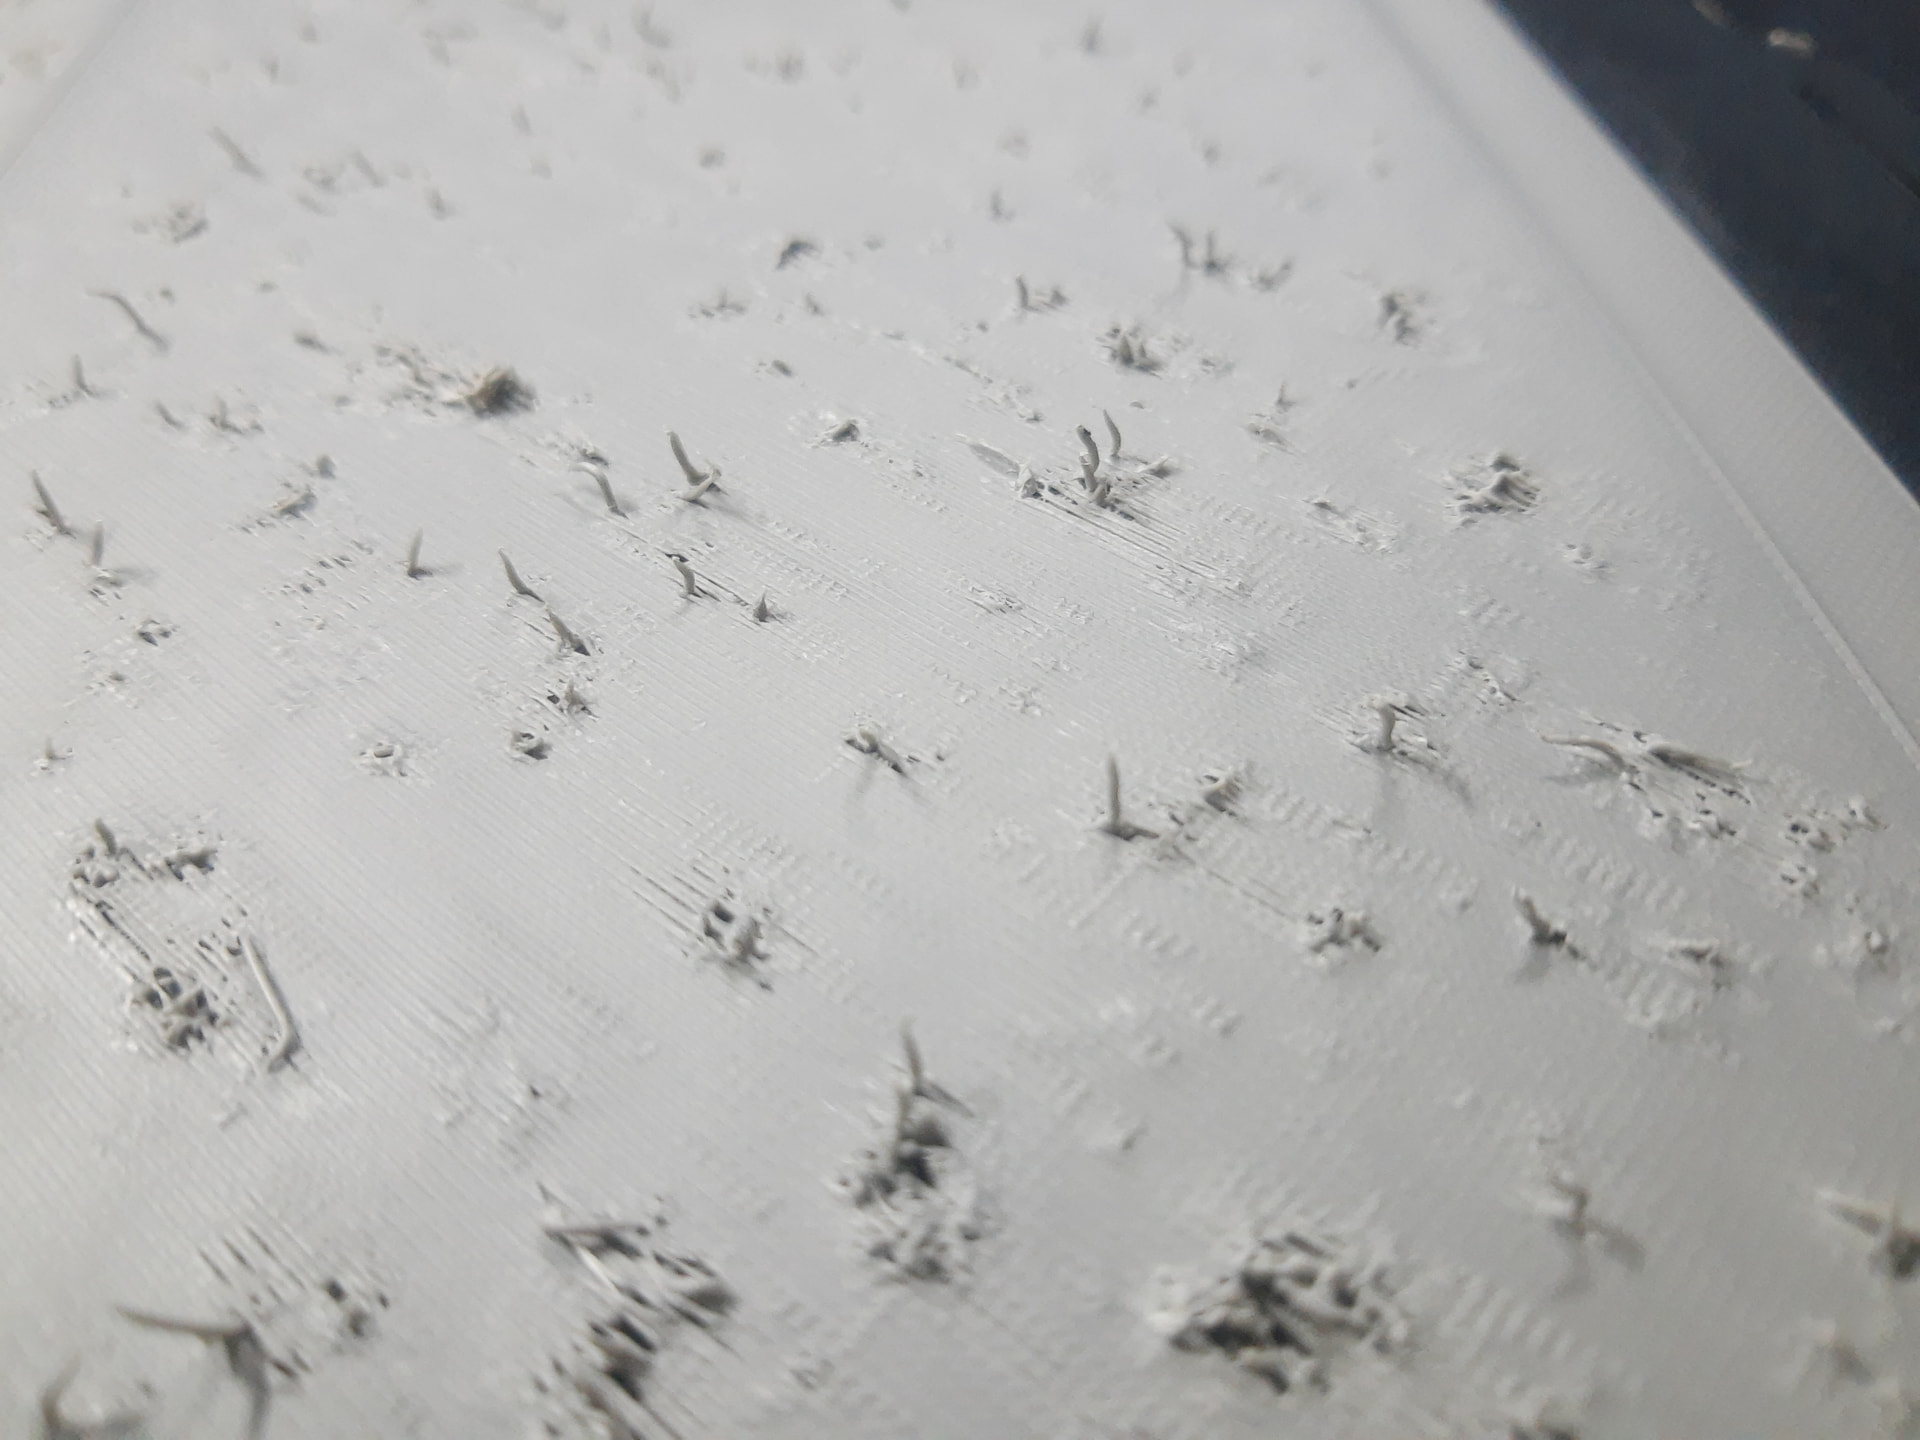
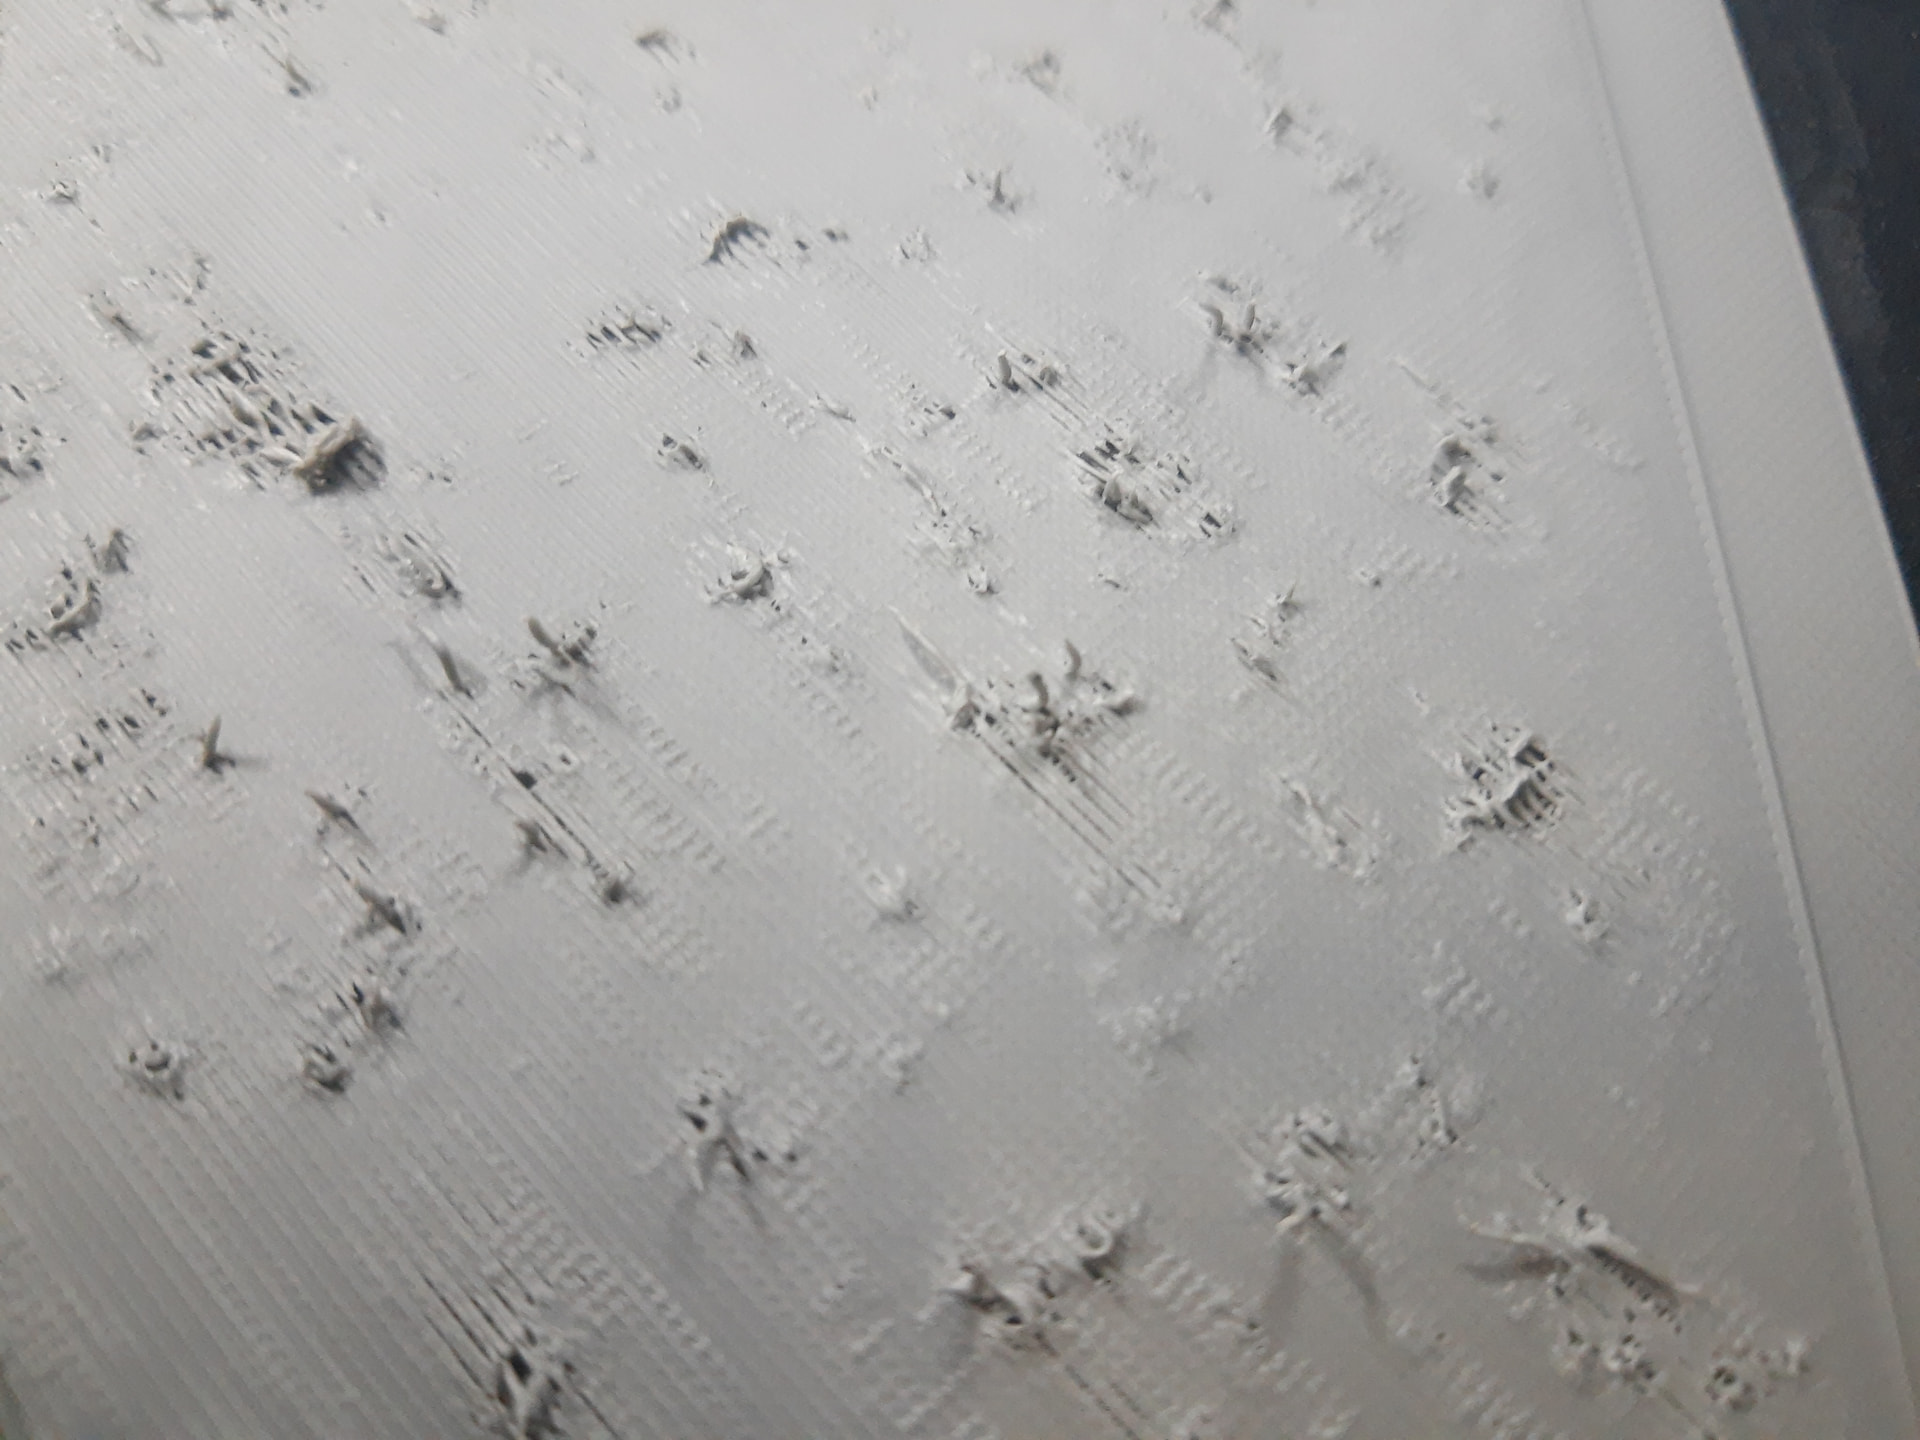
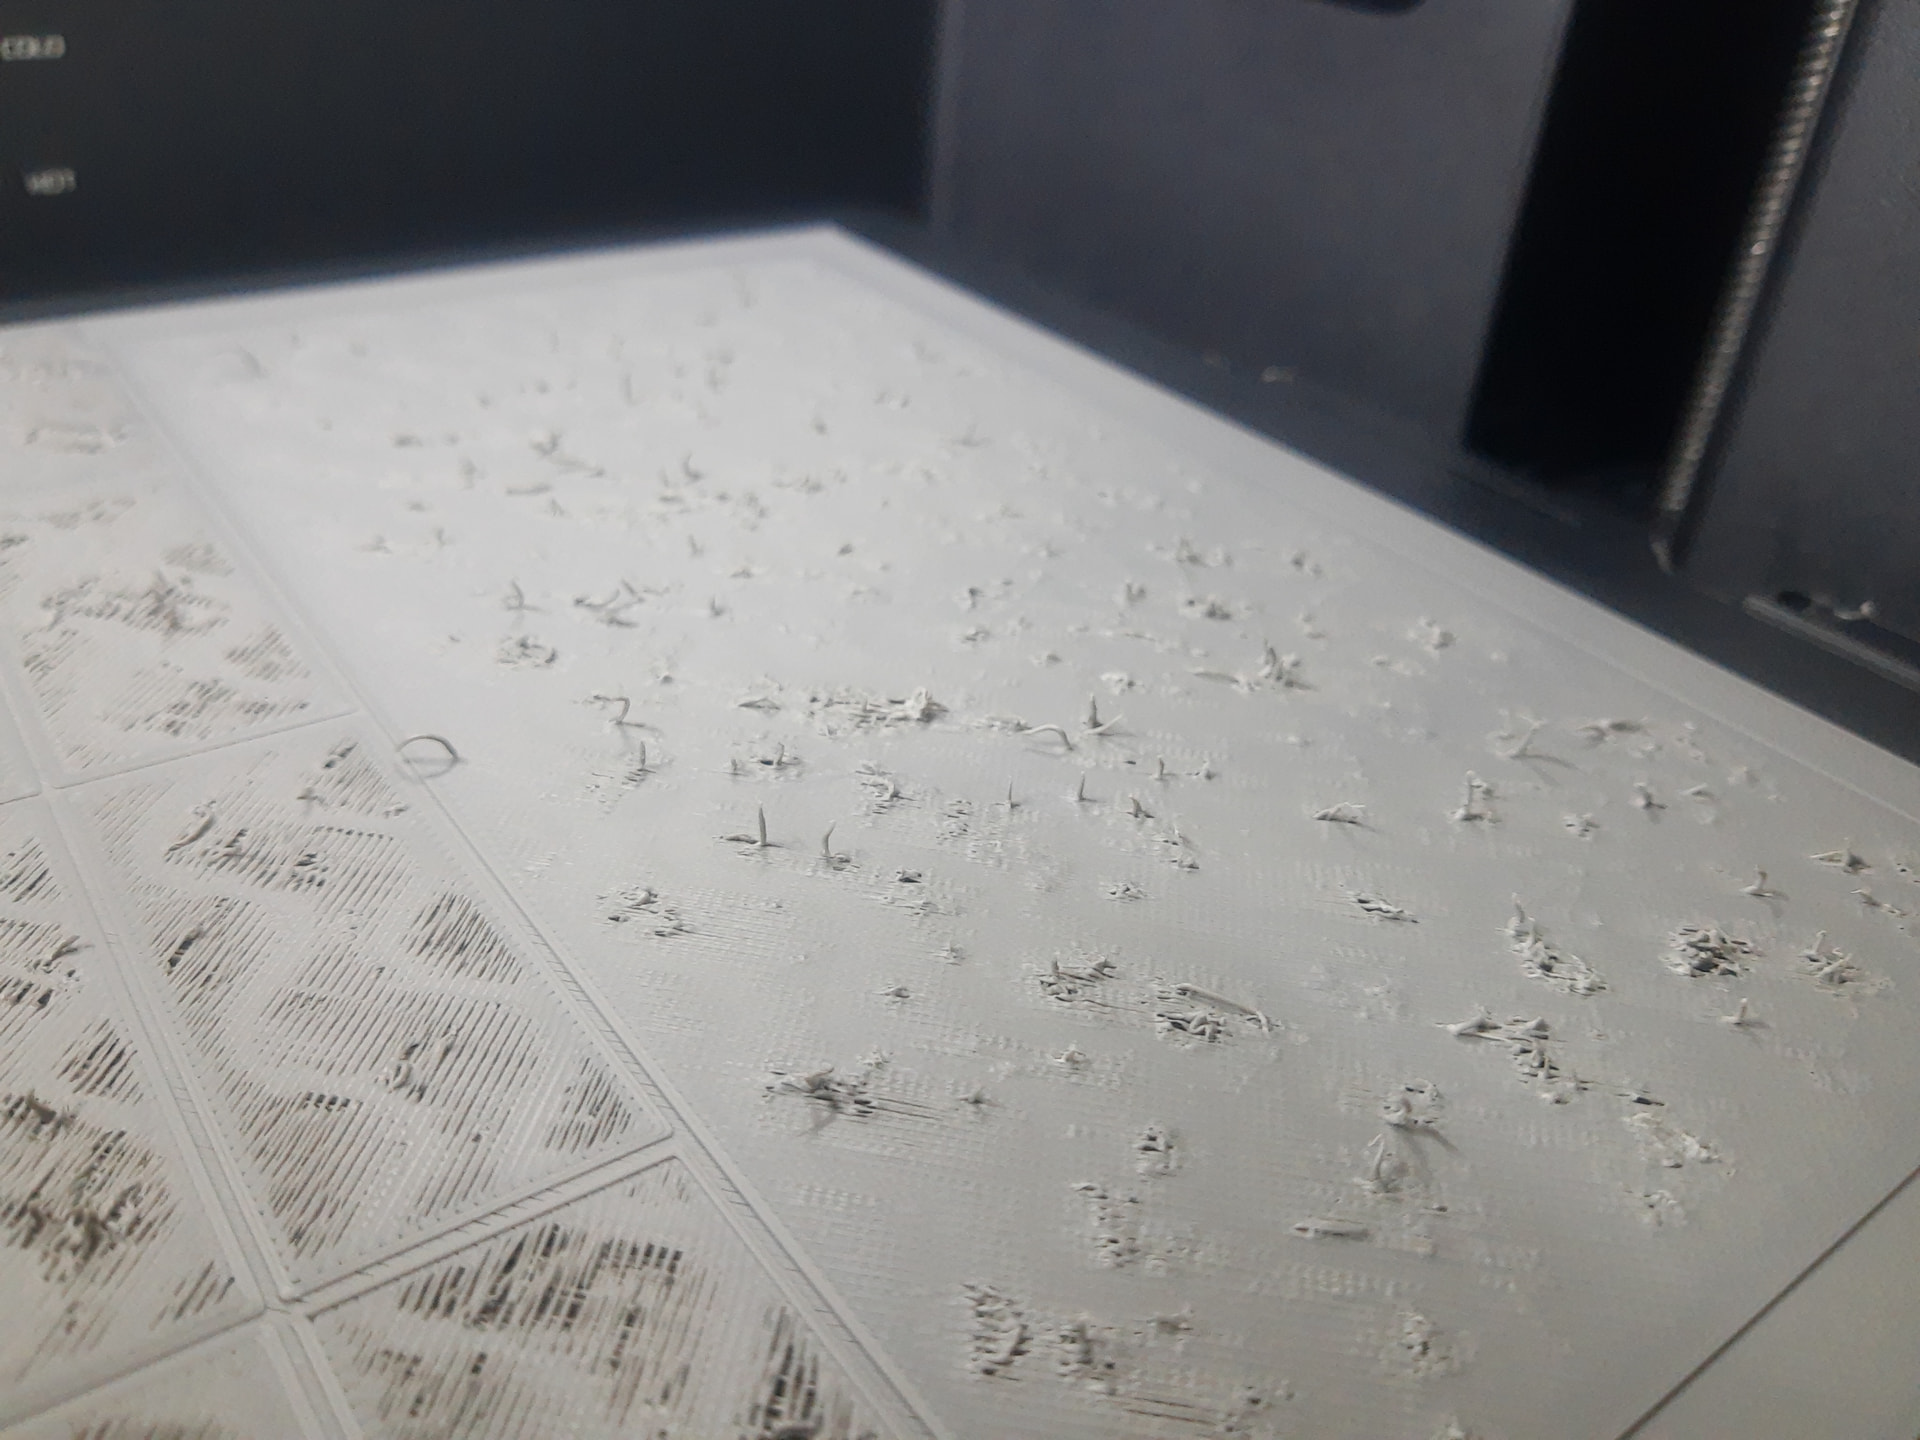
And this is how the looked after scraped them out with razer.
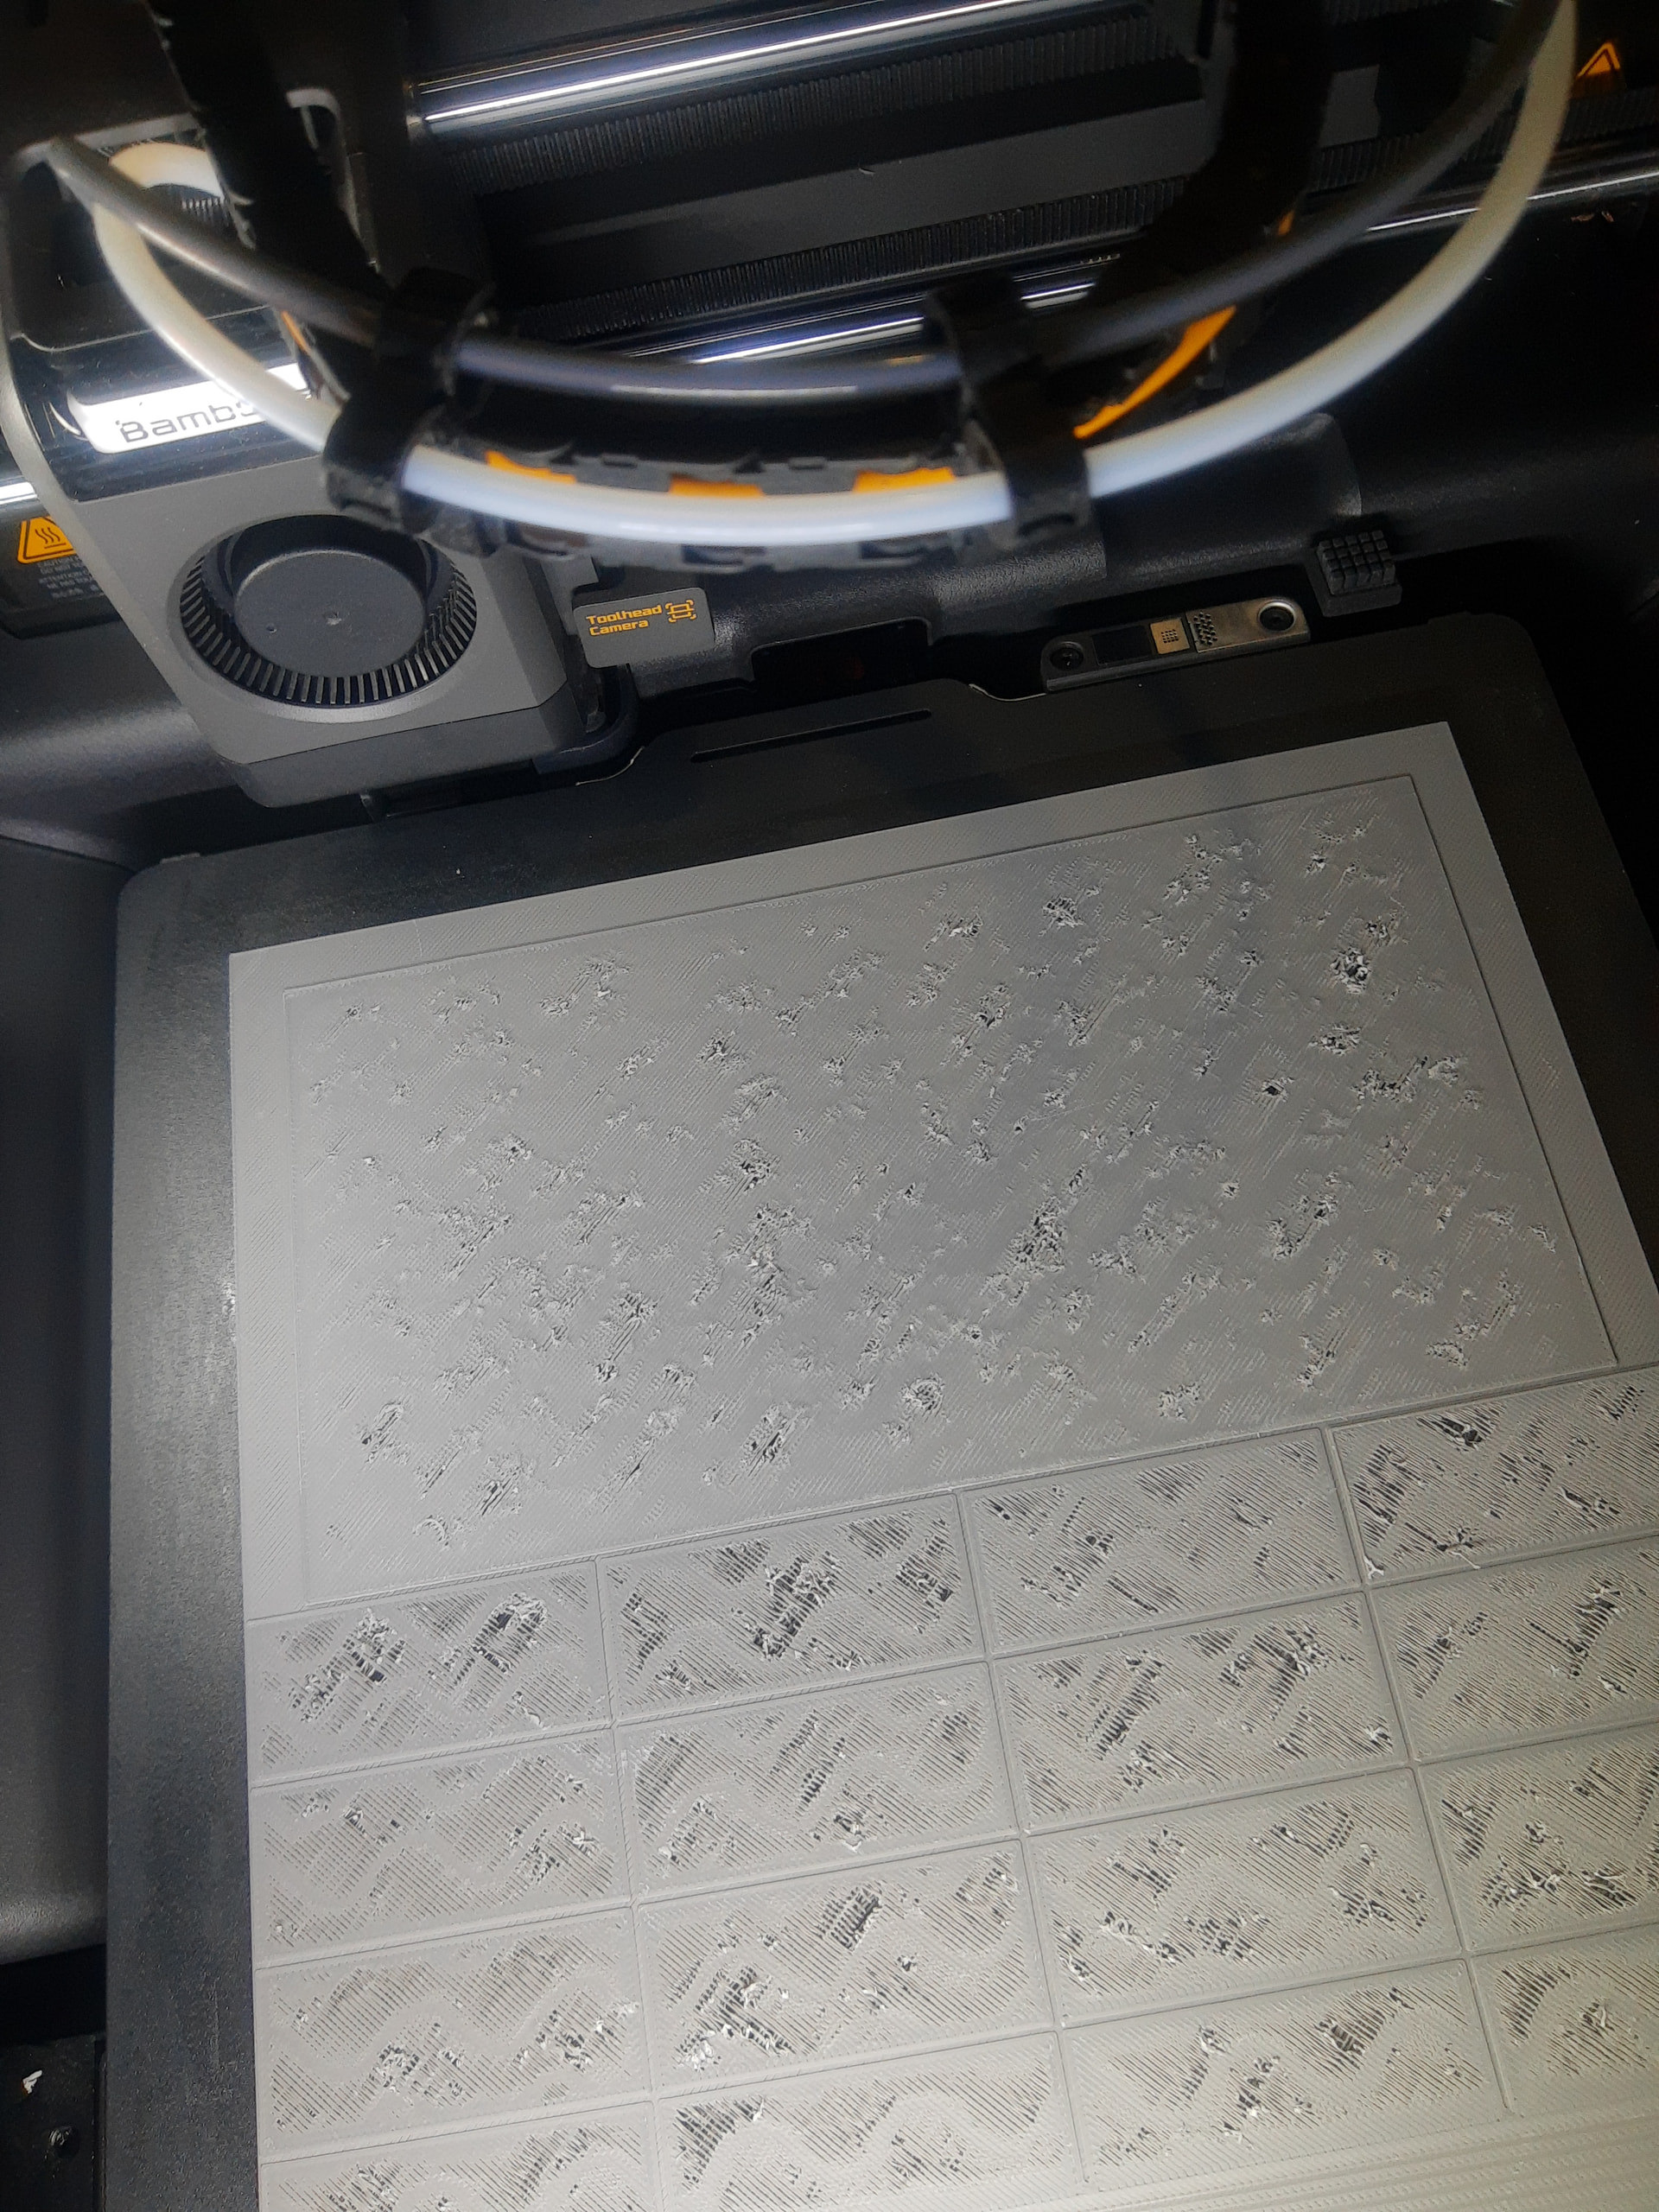
This is the base plate from this model:
With 0.16 high quality profile.
Looks like it warped so much that it kind of start hitting the nozzle and it shred it around?!?!?!
Or I am not really sure what exactly happened, Do not have time lapse.
It just finished seems like I was able to save the 5h+ print but…
Sorry for not perfect quality of the prints but today my newer phone screen broke…
Please do not forget to tell us how it goes. Especially consistency of the layers, calibration and ironing.
Internal bridge layer over the support, before the top layers come in. Looks like some of the bridge spans broke and warped upwards. That first bridge layer is always gonna be a little crap, which is why most profiles use 4+ top shells. Did you let it complete to see?
Is this matte filament?
Ahh yes it is done, looks almost flawless . If we do not count the normal under extrusion.
it was after 4th hour so I did my best to save it. Bridges really looked like crap, but nothing suspicious at that time. As I am not looking all the time just checking from time to time, and got surprised by what I saw .
This is Bambu’s Matte PLA Nardo Grey.
Now the journey with the bambu profiles and calibration seems to be endless.
I have proceeded with the print of the garage but though to make one calibration to help a bit with the under extrusion. I found there is auto calibration for the flow pressure advance and did it for all four rolls that I have in the AMS and it failed … There is a mix of Bambu and Polymaker rolls PLA matte. Then I ran it one by one and it passed and provided with K values between 0.021 for the PLA Nardo gray and 0.016. Basically every spool got different value. This was looking kind of logical/normal. Then I ran the flow rate calibration but this time I paused the job exactly after the first layer. And what I found all instead +10 and above has under extrusion in the first layer. Then a left it to finish and the best top layer was +5, and + 10 is more like start having over extrusion. Re-read the docs and it said pick the one without under extrusion. BUT they talk about the top layer! The fine test I stopped it after the first layer, as it goes from 0 to minus something and all with minus got under extrusion. So I ended up with flow rate 1.106!
Then I continue with the print of the roof of the garage. And for the first time I saw the first layer so good on this device . I was about to start celebrations but it reached the bridge section over the infill. And it completely collapsed all the bridges . Complete sagging on all bridges… Now first I though that I maybe got some bad settings for the bridges from the downloaded 3mf model file. But I have checked around and found that I am using the Bambu’s defaults for X2D. And all process profiles 0.16 and below has bridge flow to 1.5 by default. And I compared to A1 and P1 profiles and it seems all of them by default are set at 1. For 0.2mm and above X2D profiles are also default to bridge flow set to 1. There are also differences in speed settings and who knows what more. So I opened the lid to gave it some more cool air, and left it as I can not change the settings while it prints. There were some filament here and there starting to stick out, then I hit the pause and put them down with my nail. Then resumed the print and the above layer was better, wondered what to do to help it a bit more, and the above layer now was faster and sagged at some places. So I remembered about the silent mode, and switched the printer from normal in silent mode, and this dropped the speed, so this made the second layer above the infill bridges better, with more time to cool. I waited to have 2-3 layers above to clean the surface, there were like 50 min left so I thought I will bring it back to normal mode to speed it up, what could possibly go wrong, layers are now flat… Set it to normal and brought back the lid slightly open. Just a 10-20 layer lines and it developed warped waves after the freshly printed lines  . So fast opened the lid and brought the speed down again with silent mode. What a journey for simple PLA roof of the garage …
The lesson we can draw from this journey:
For the manual calibration looks like we need to look for both bottom and top layers.
There is ratio between bottom and top layer and so far I can not get both of them right. Wondering if again Eddy sensor issue or some firmware/setting?
Default Bambu process profiles for X2D are real garbage. Especially the one below 0.20mm. I can not imagine what mess it could be for other nozzle sizes and high volume…
I am wondering also what are the usual values that you get for calibrated Bambu PLA Matte filament? Is this 1.106 real/good/normal value or show some other problems?
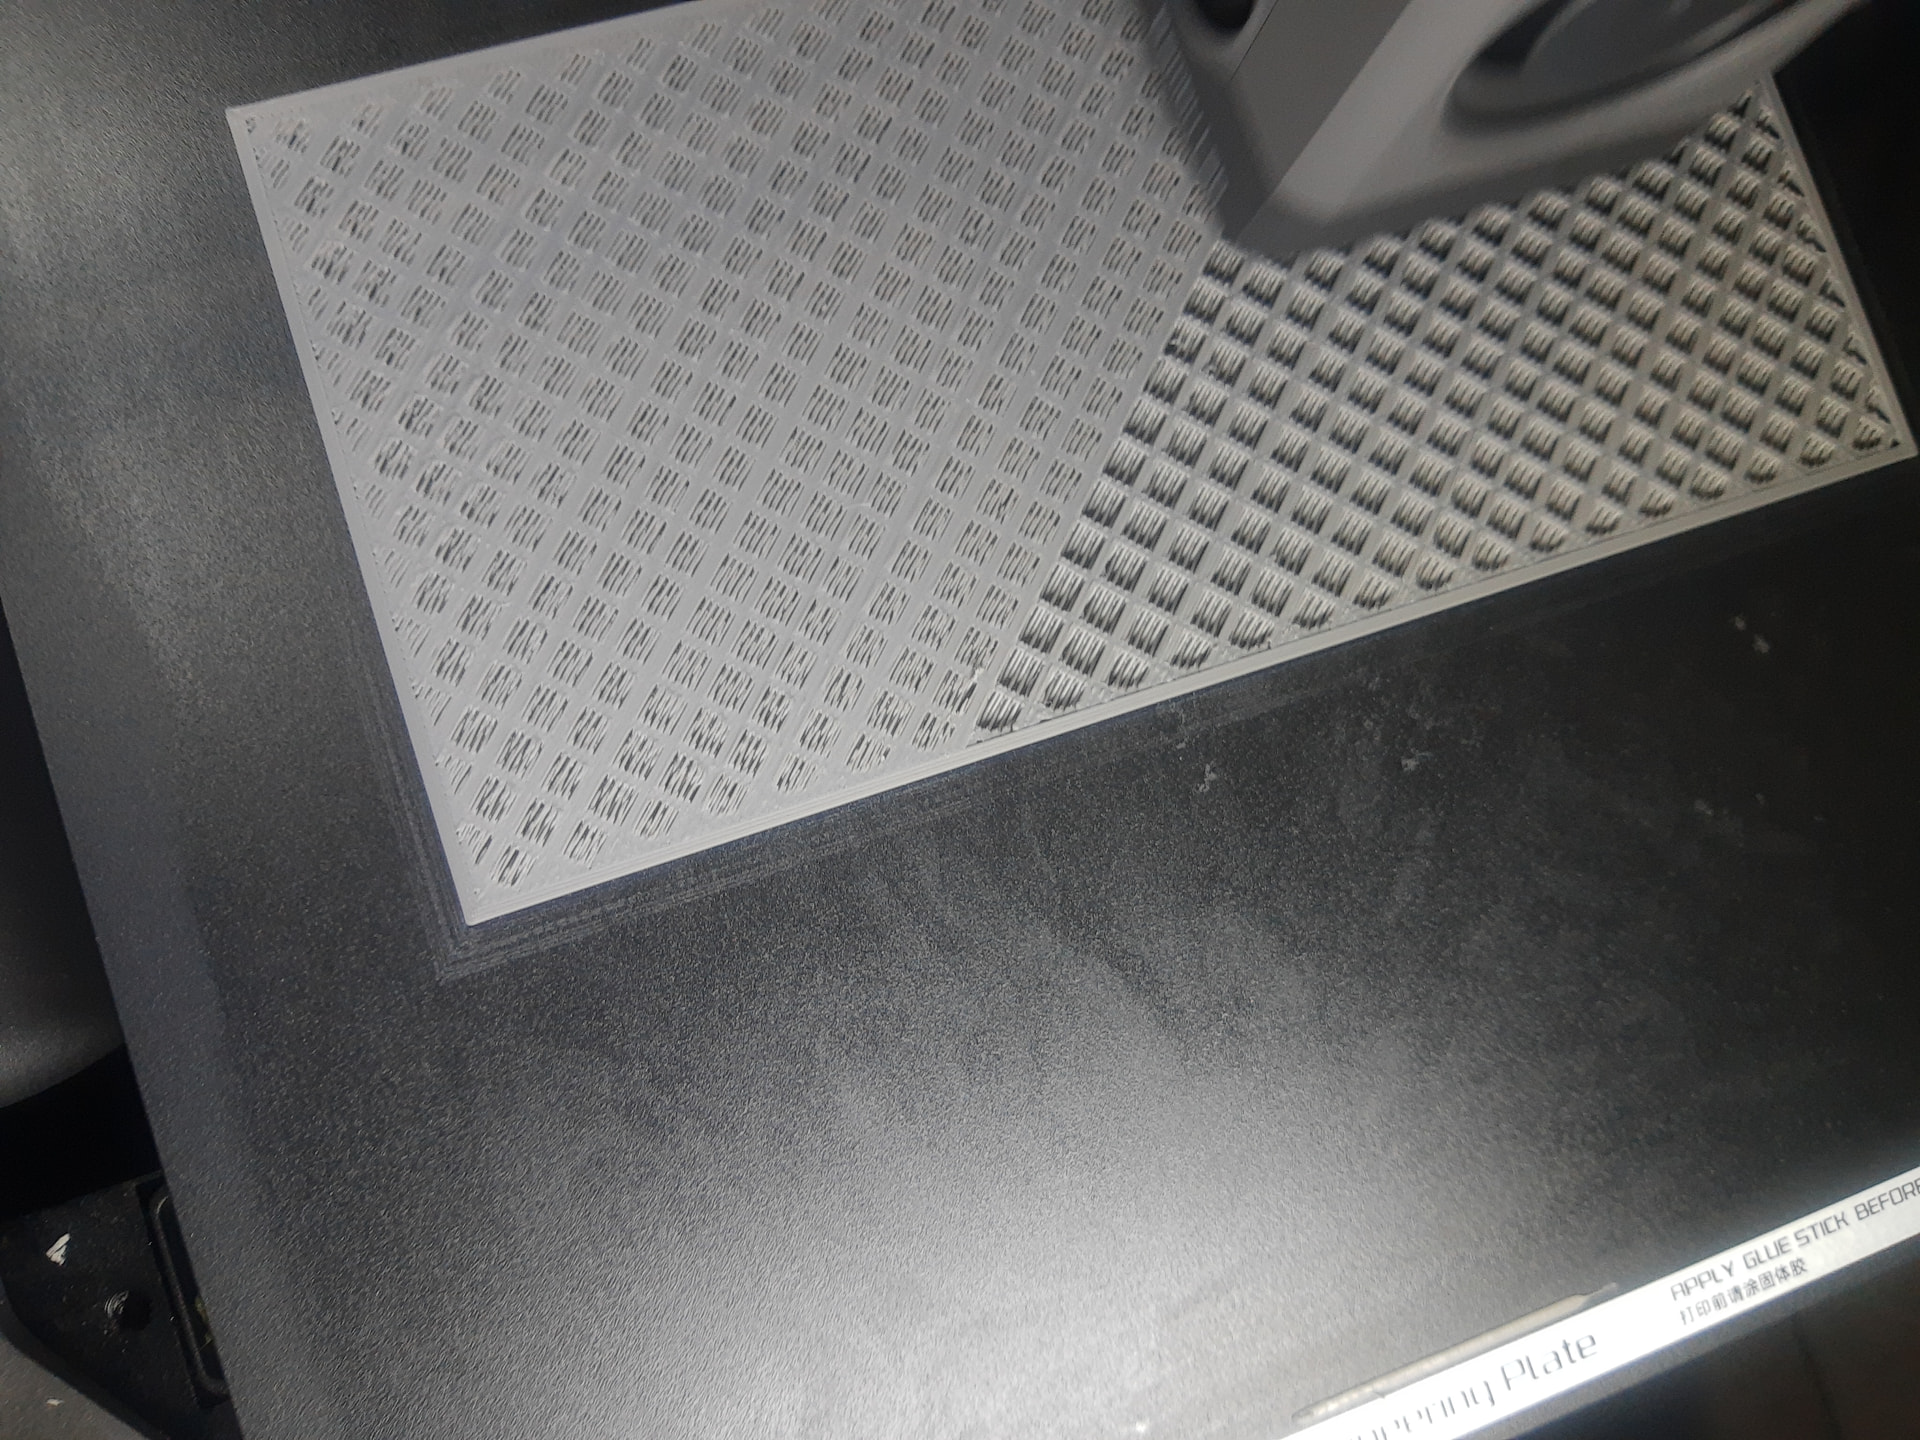
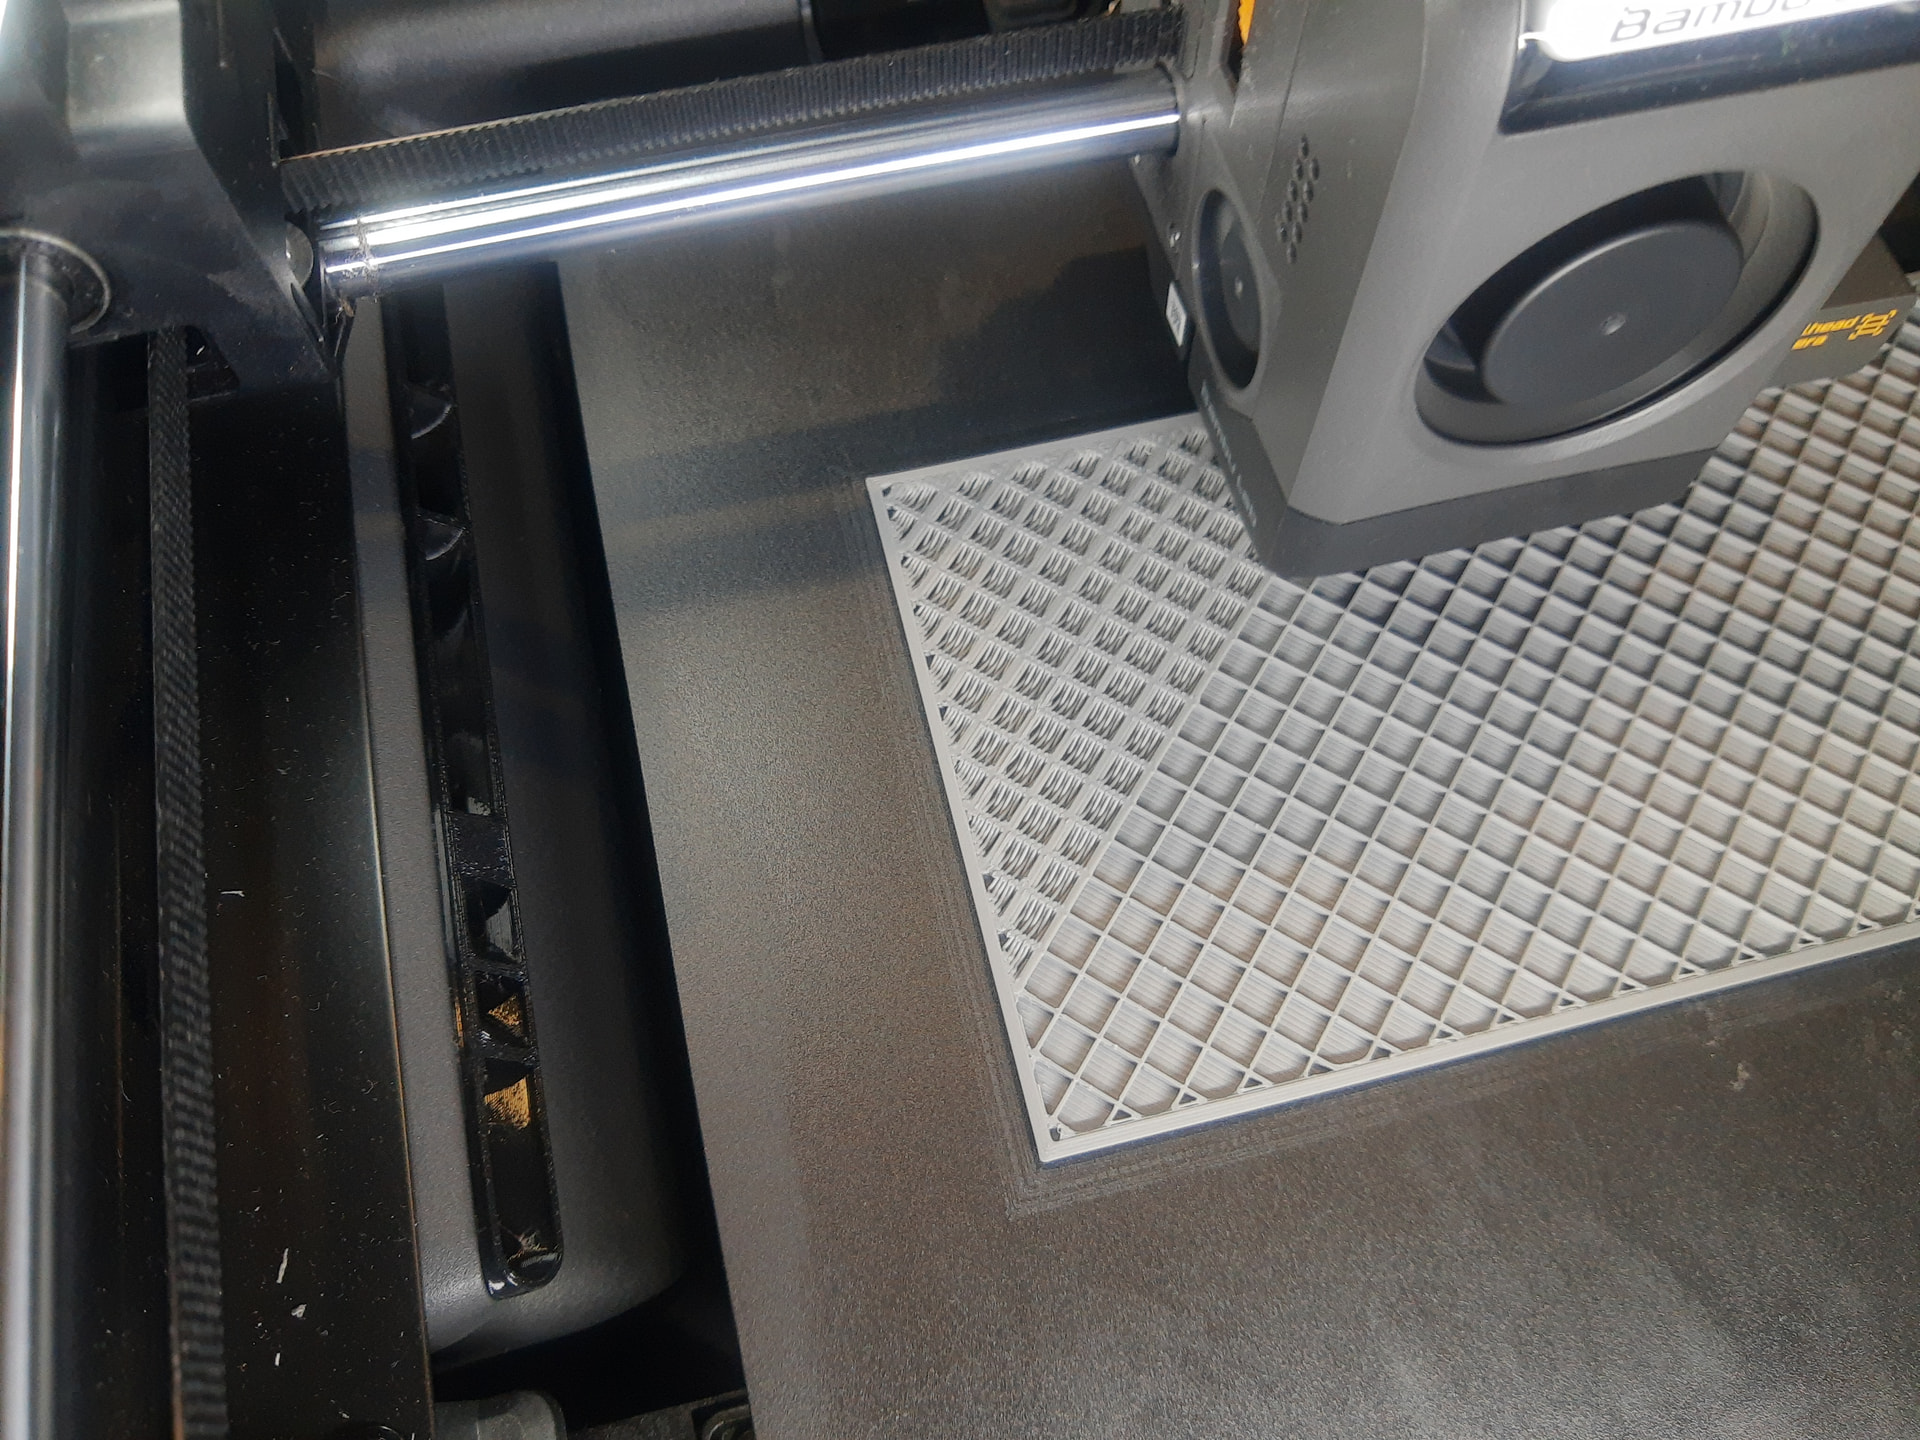
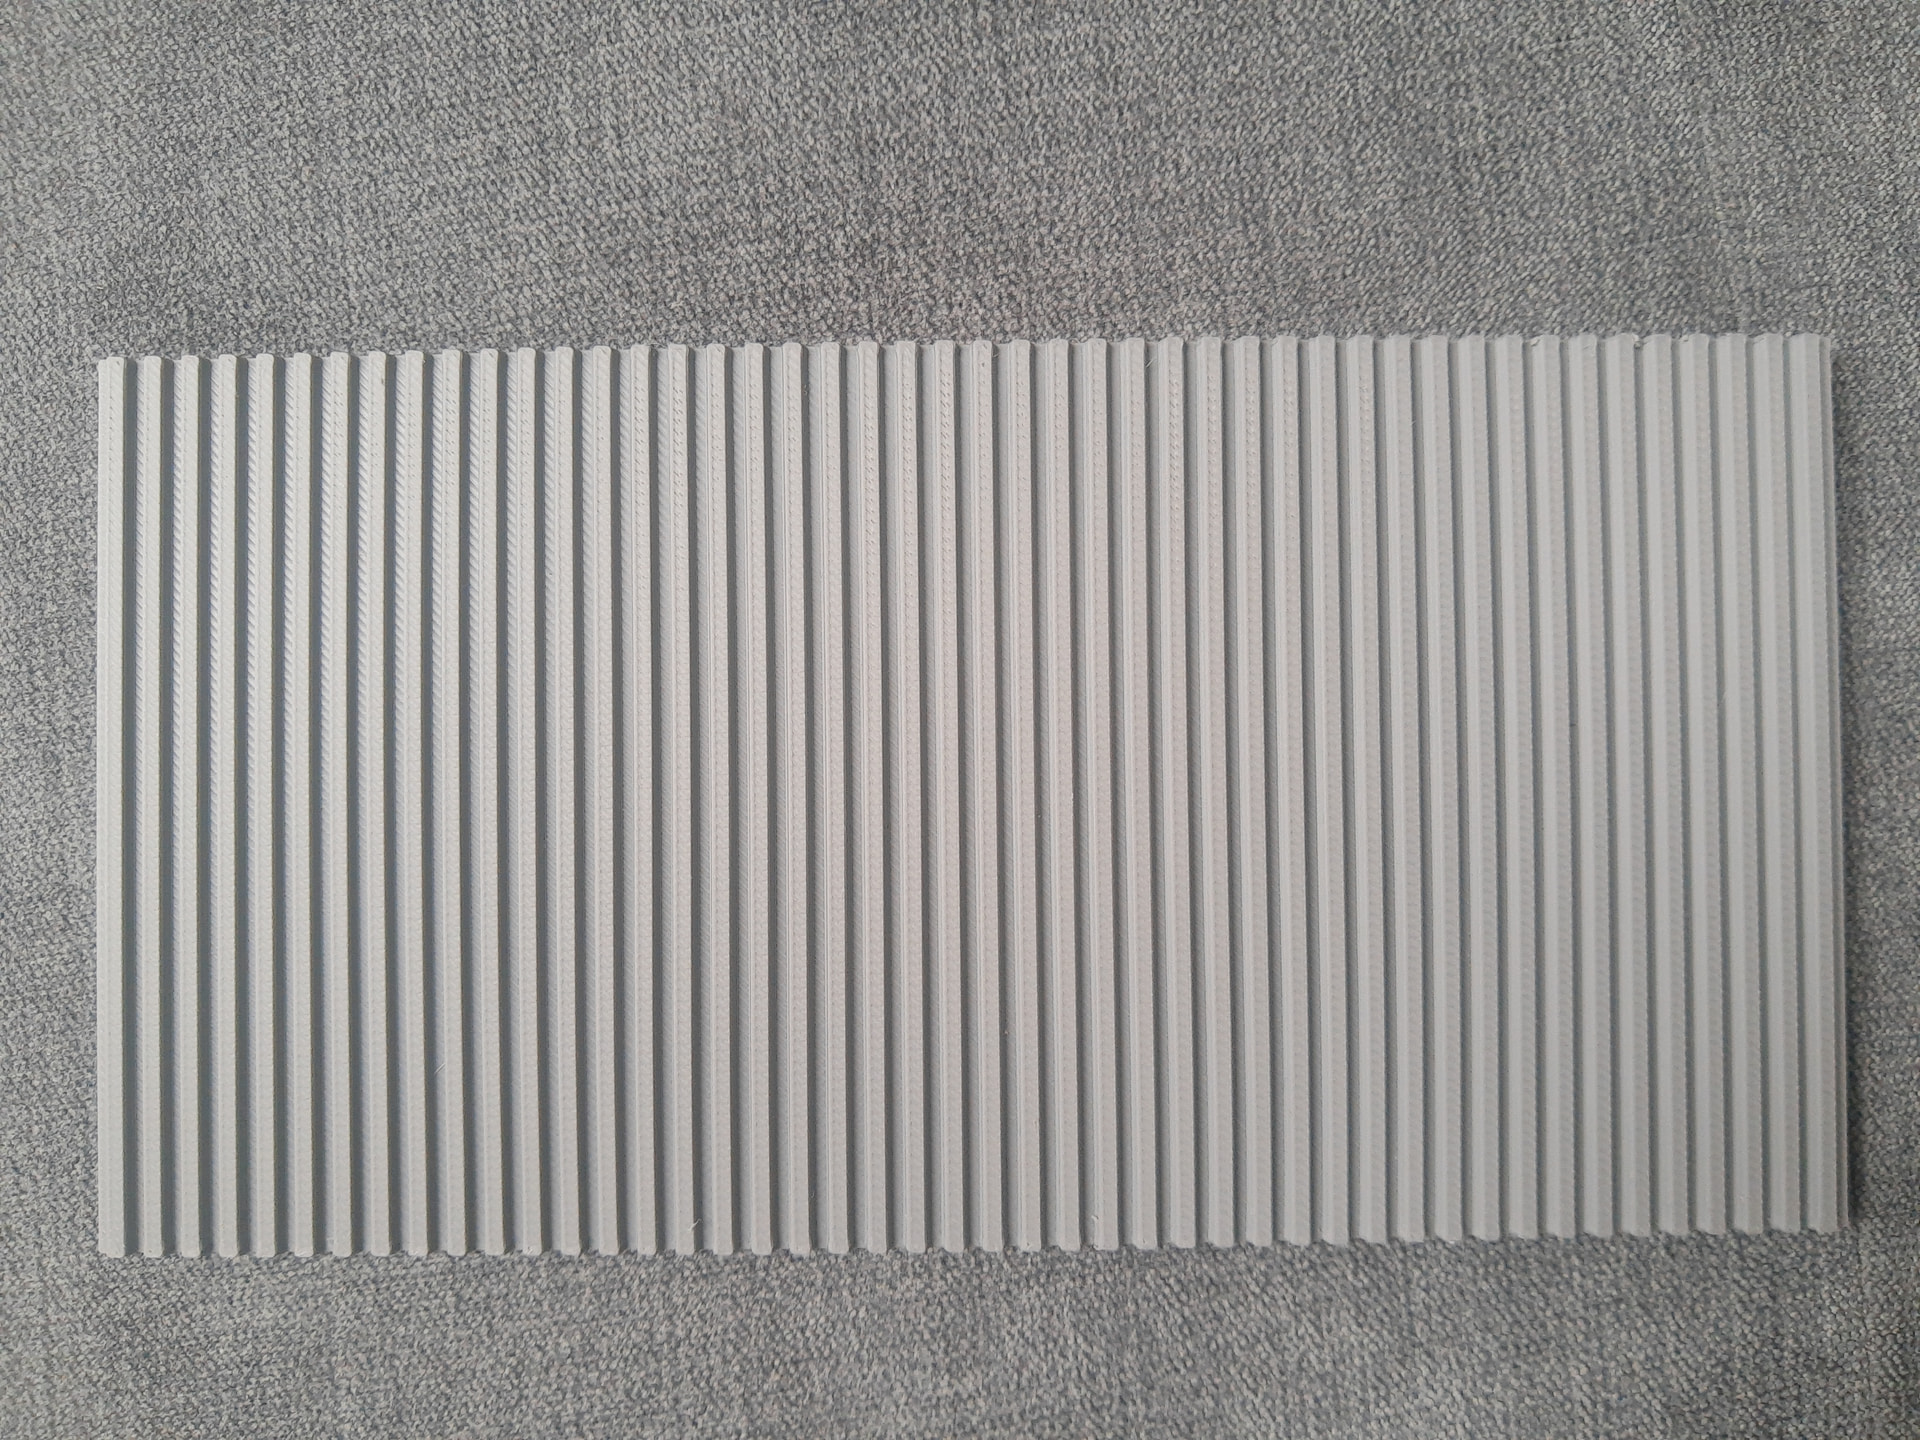
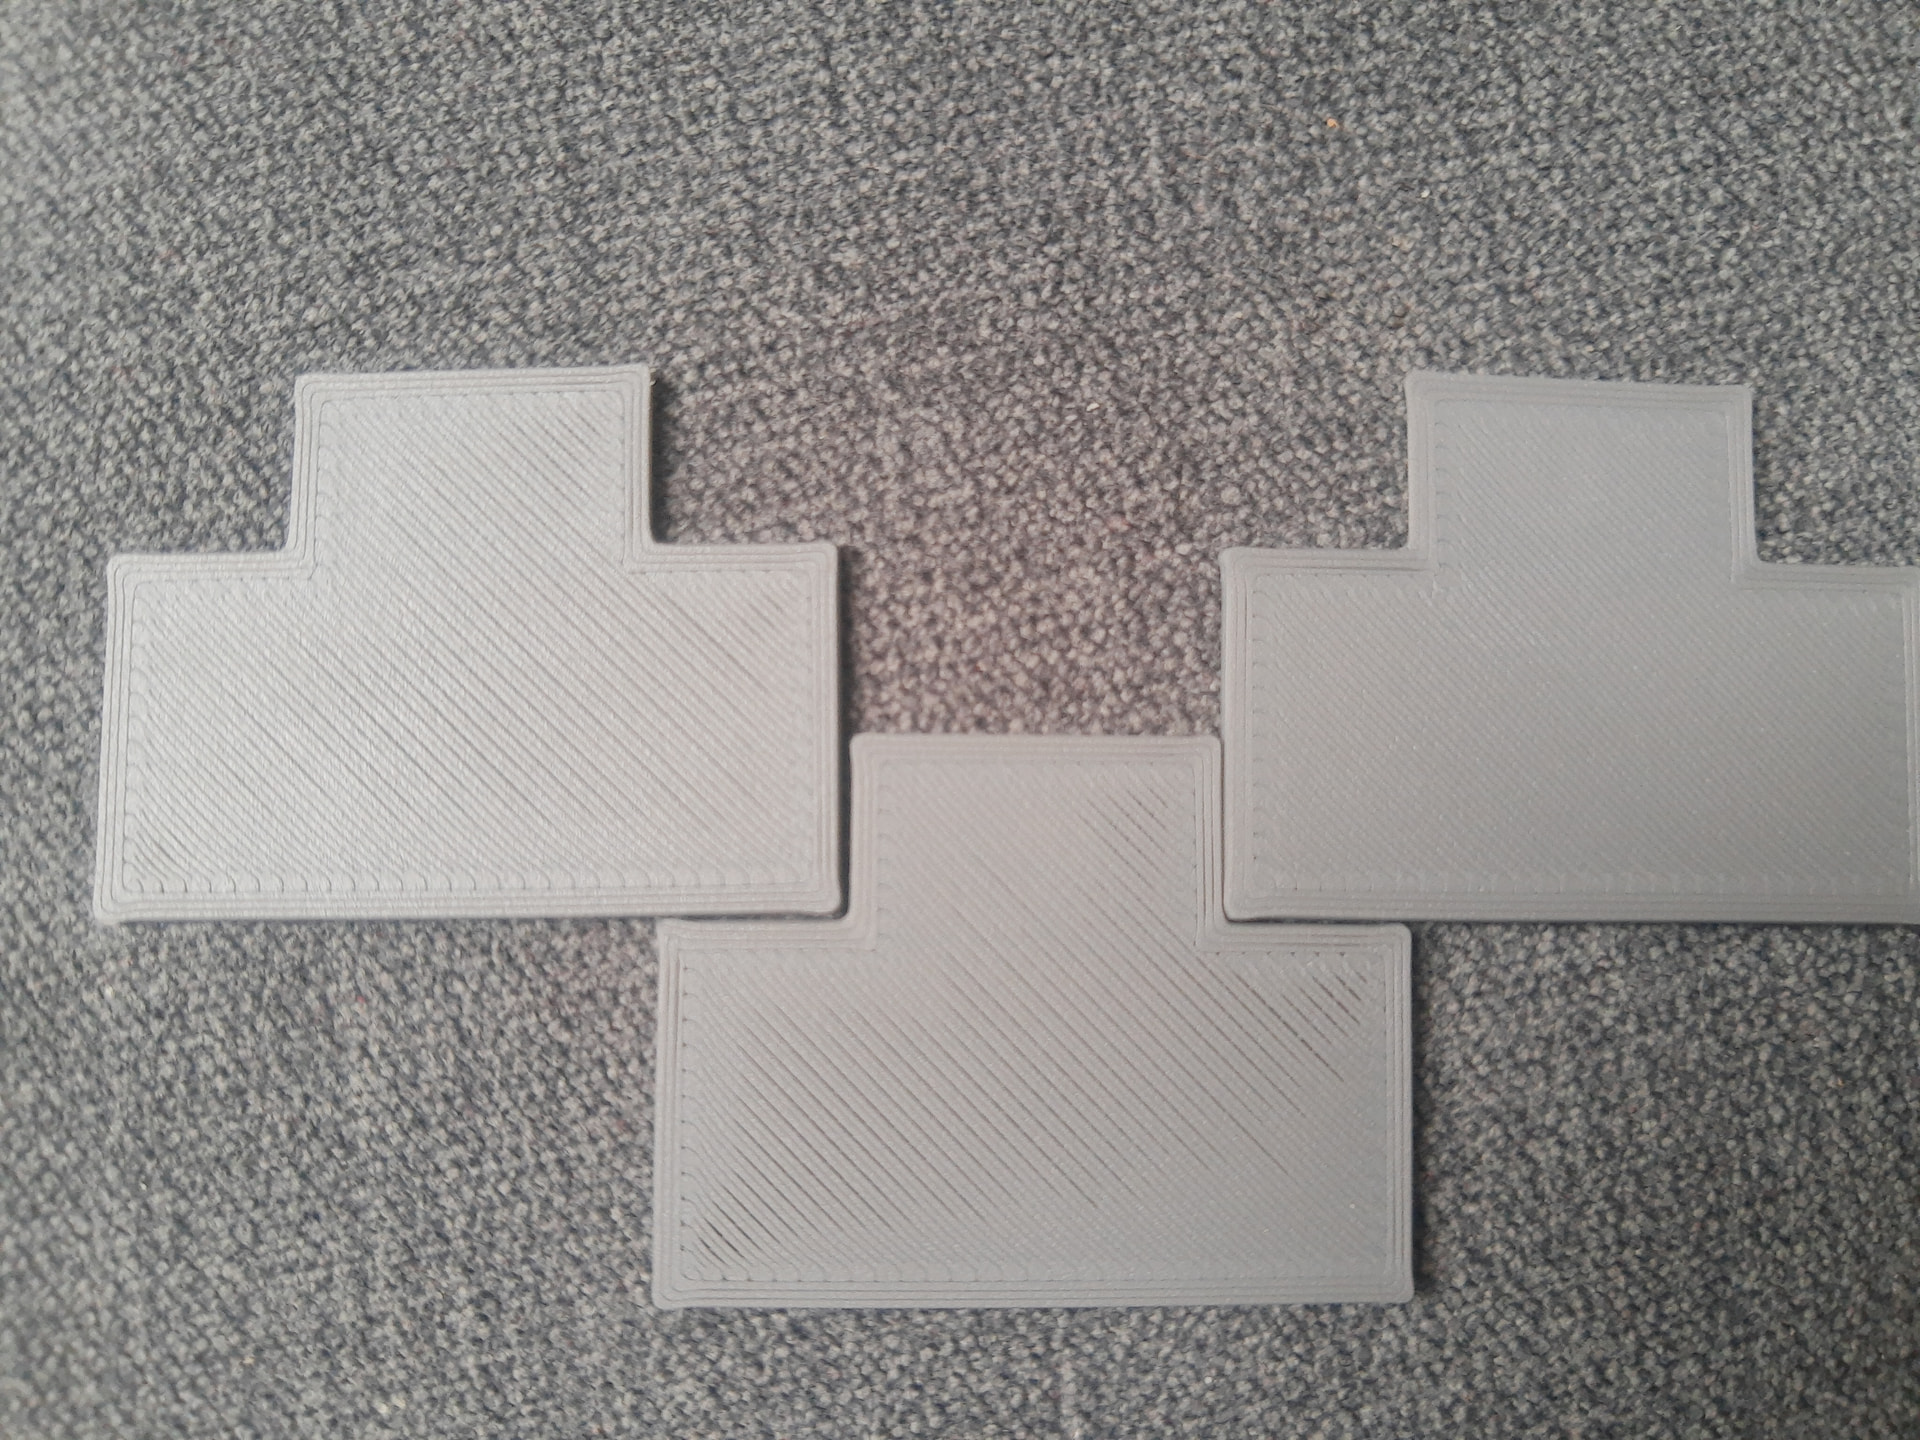
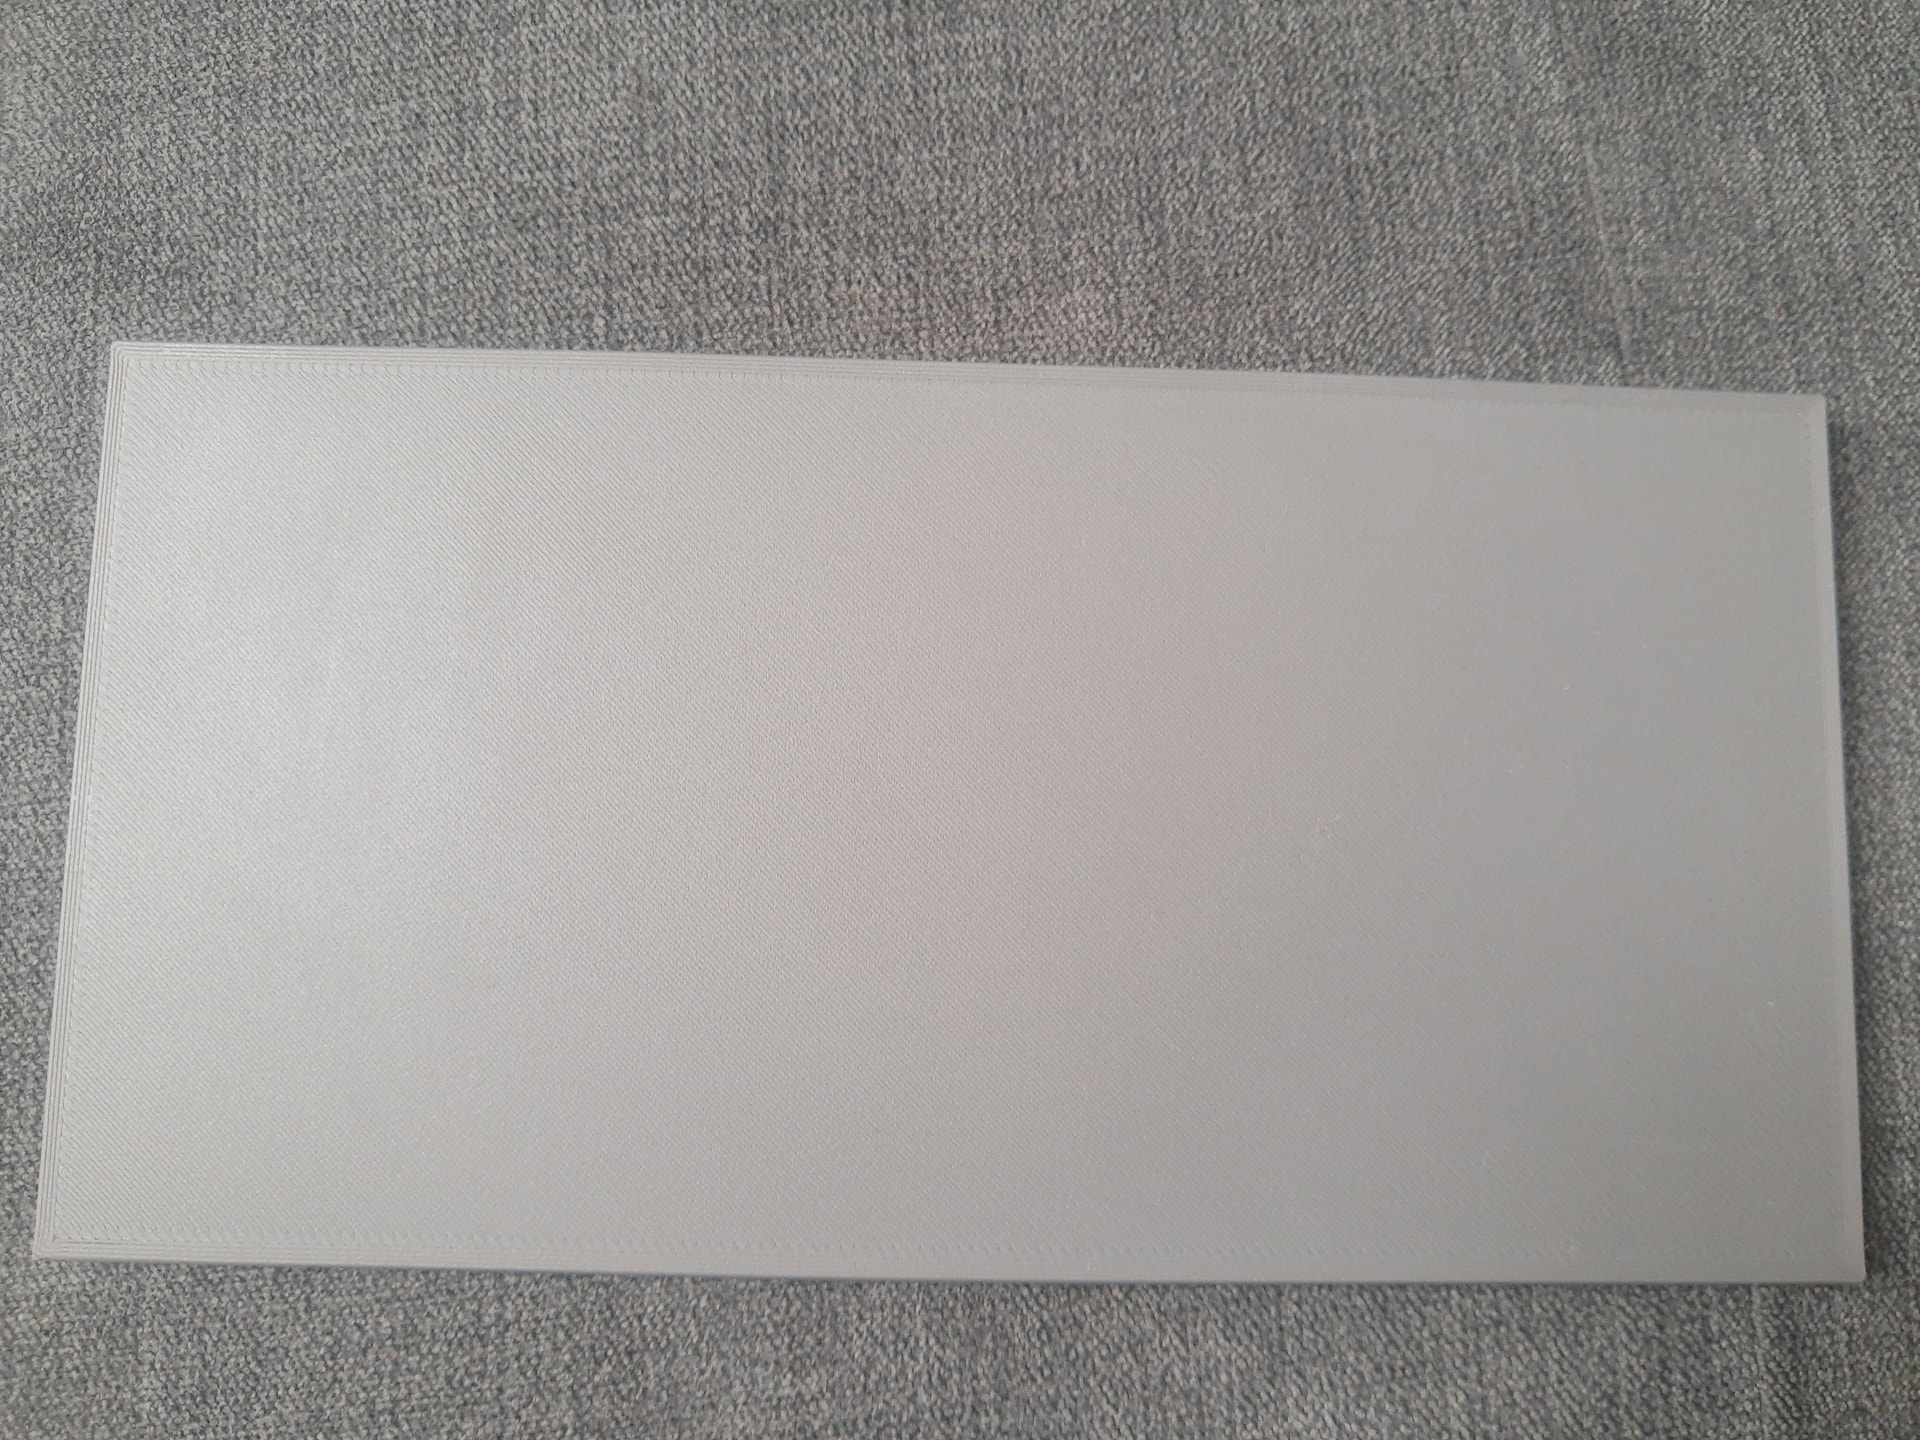
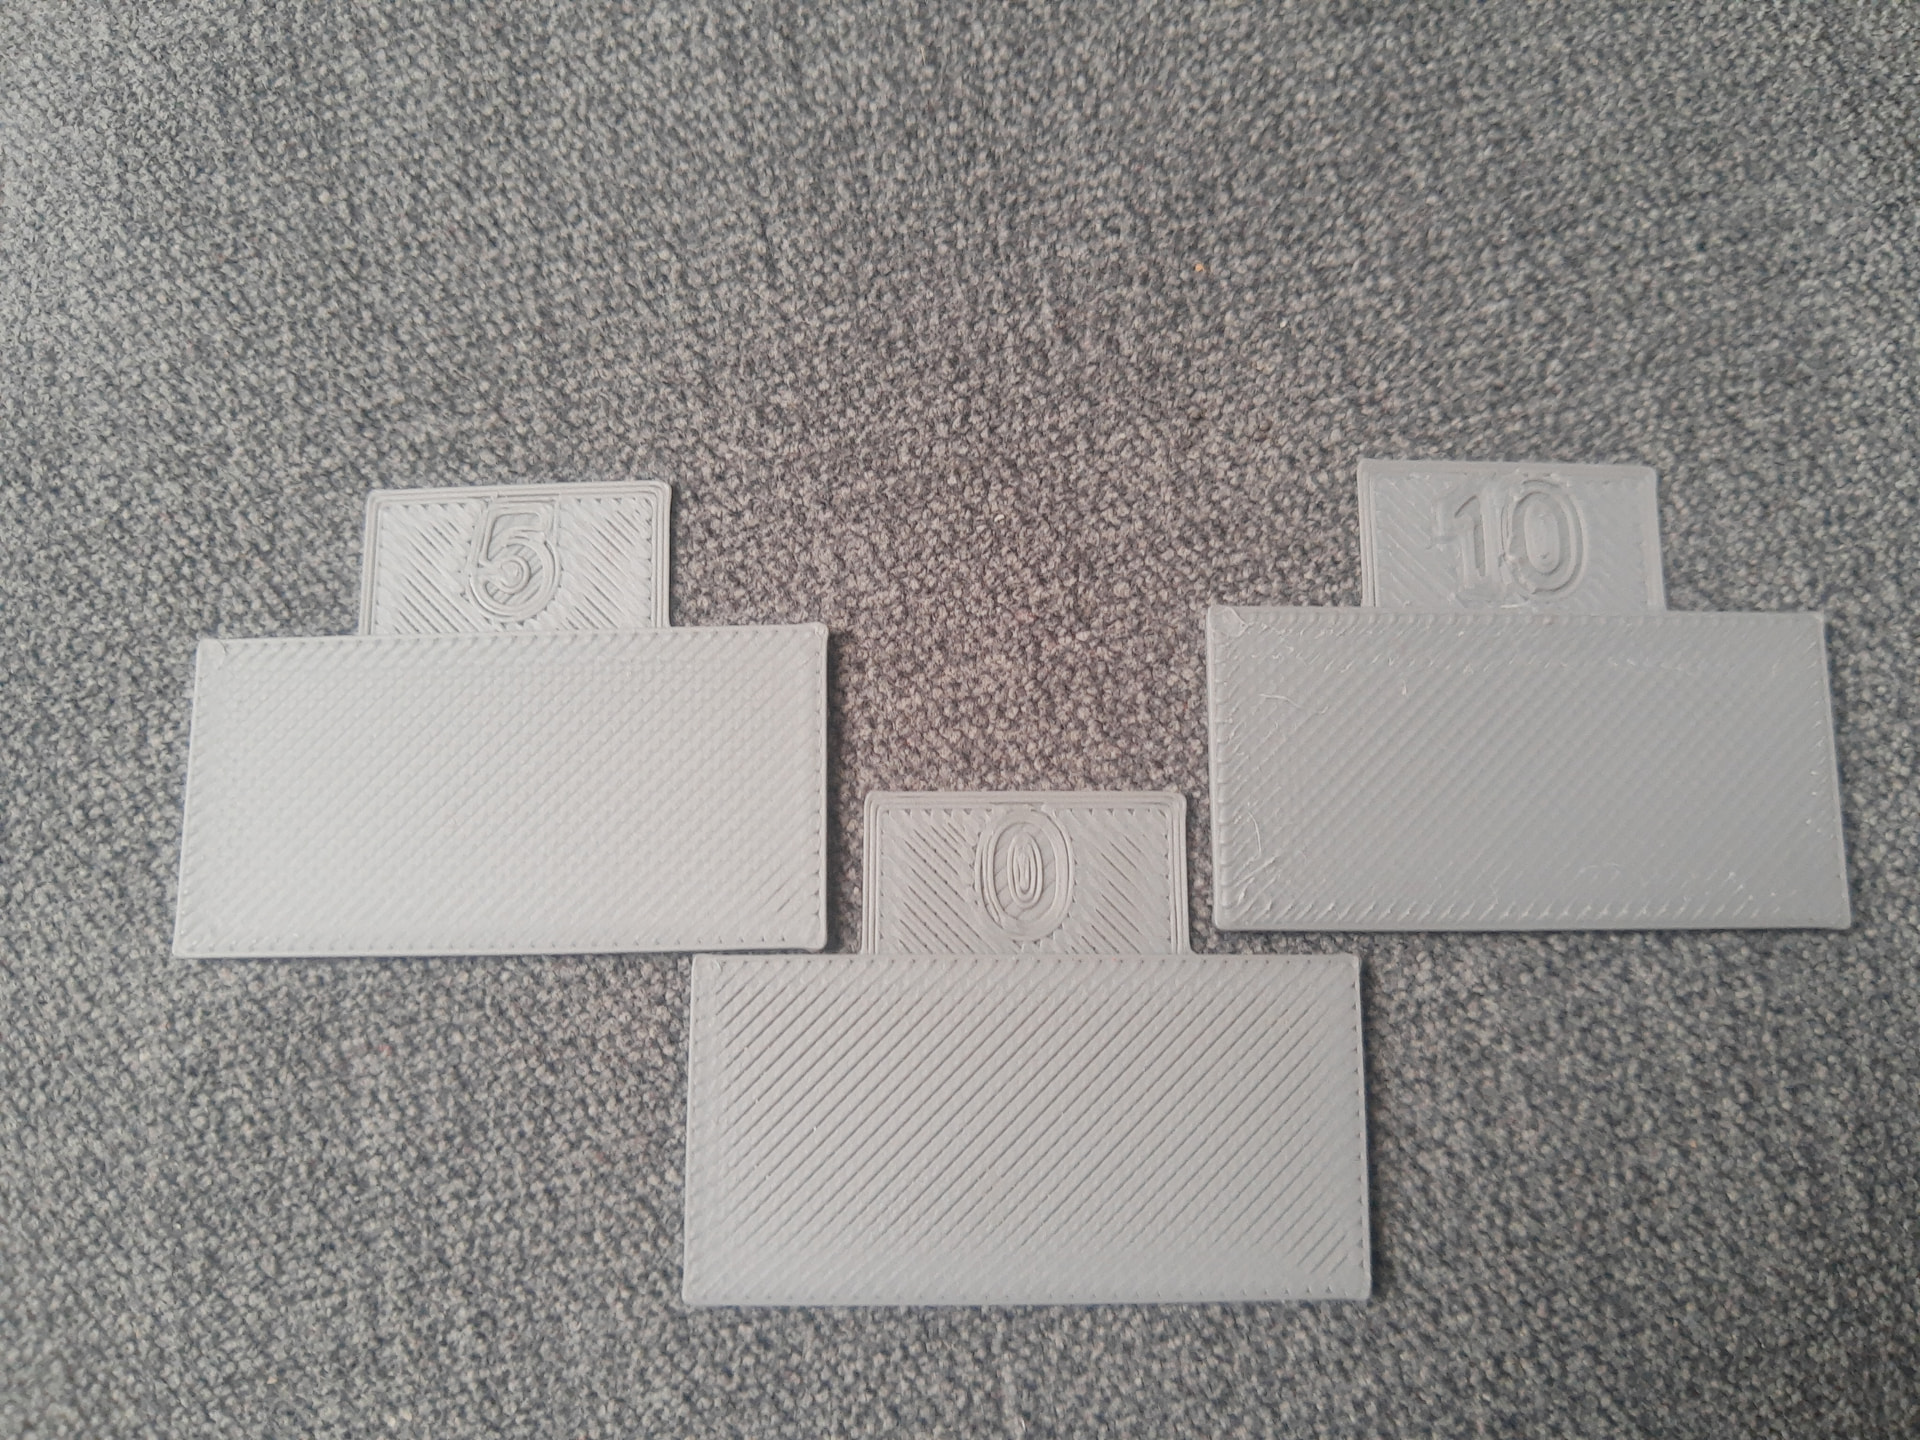
Do you have any filament to test with that doesnt have the matte additives? The more plain you can get the better during testing. I guess disregard if you only run matte, but its formulation is literally designed to hide and obscure printing characteristics, we want those during troubleshooting
From Bambu I do think all is matte. But from Panchroma I do have blue, red, yellow, white, black which are not matte. I need to print some parts with blue, red, yellow and black so I may run them some tests.
Hey! I’m getting the same issues with inconsistent layers on my brand new x2d. Can you please share if Bambu still working on the fix? Thanks!
Actually was able to solve my problem: nozzle lock was not correctly tighten. I got almost perfect print just by securing nozzle 
“Troubleshooting and Solutions for 3D Printing Layer Lines” article from official wiki gave me a hint.
Not allowed to add images and links to the post for some reason.
In my case, the investigation is still ongoing, so far without any success.
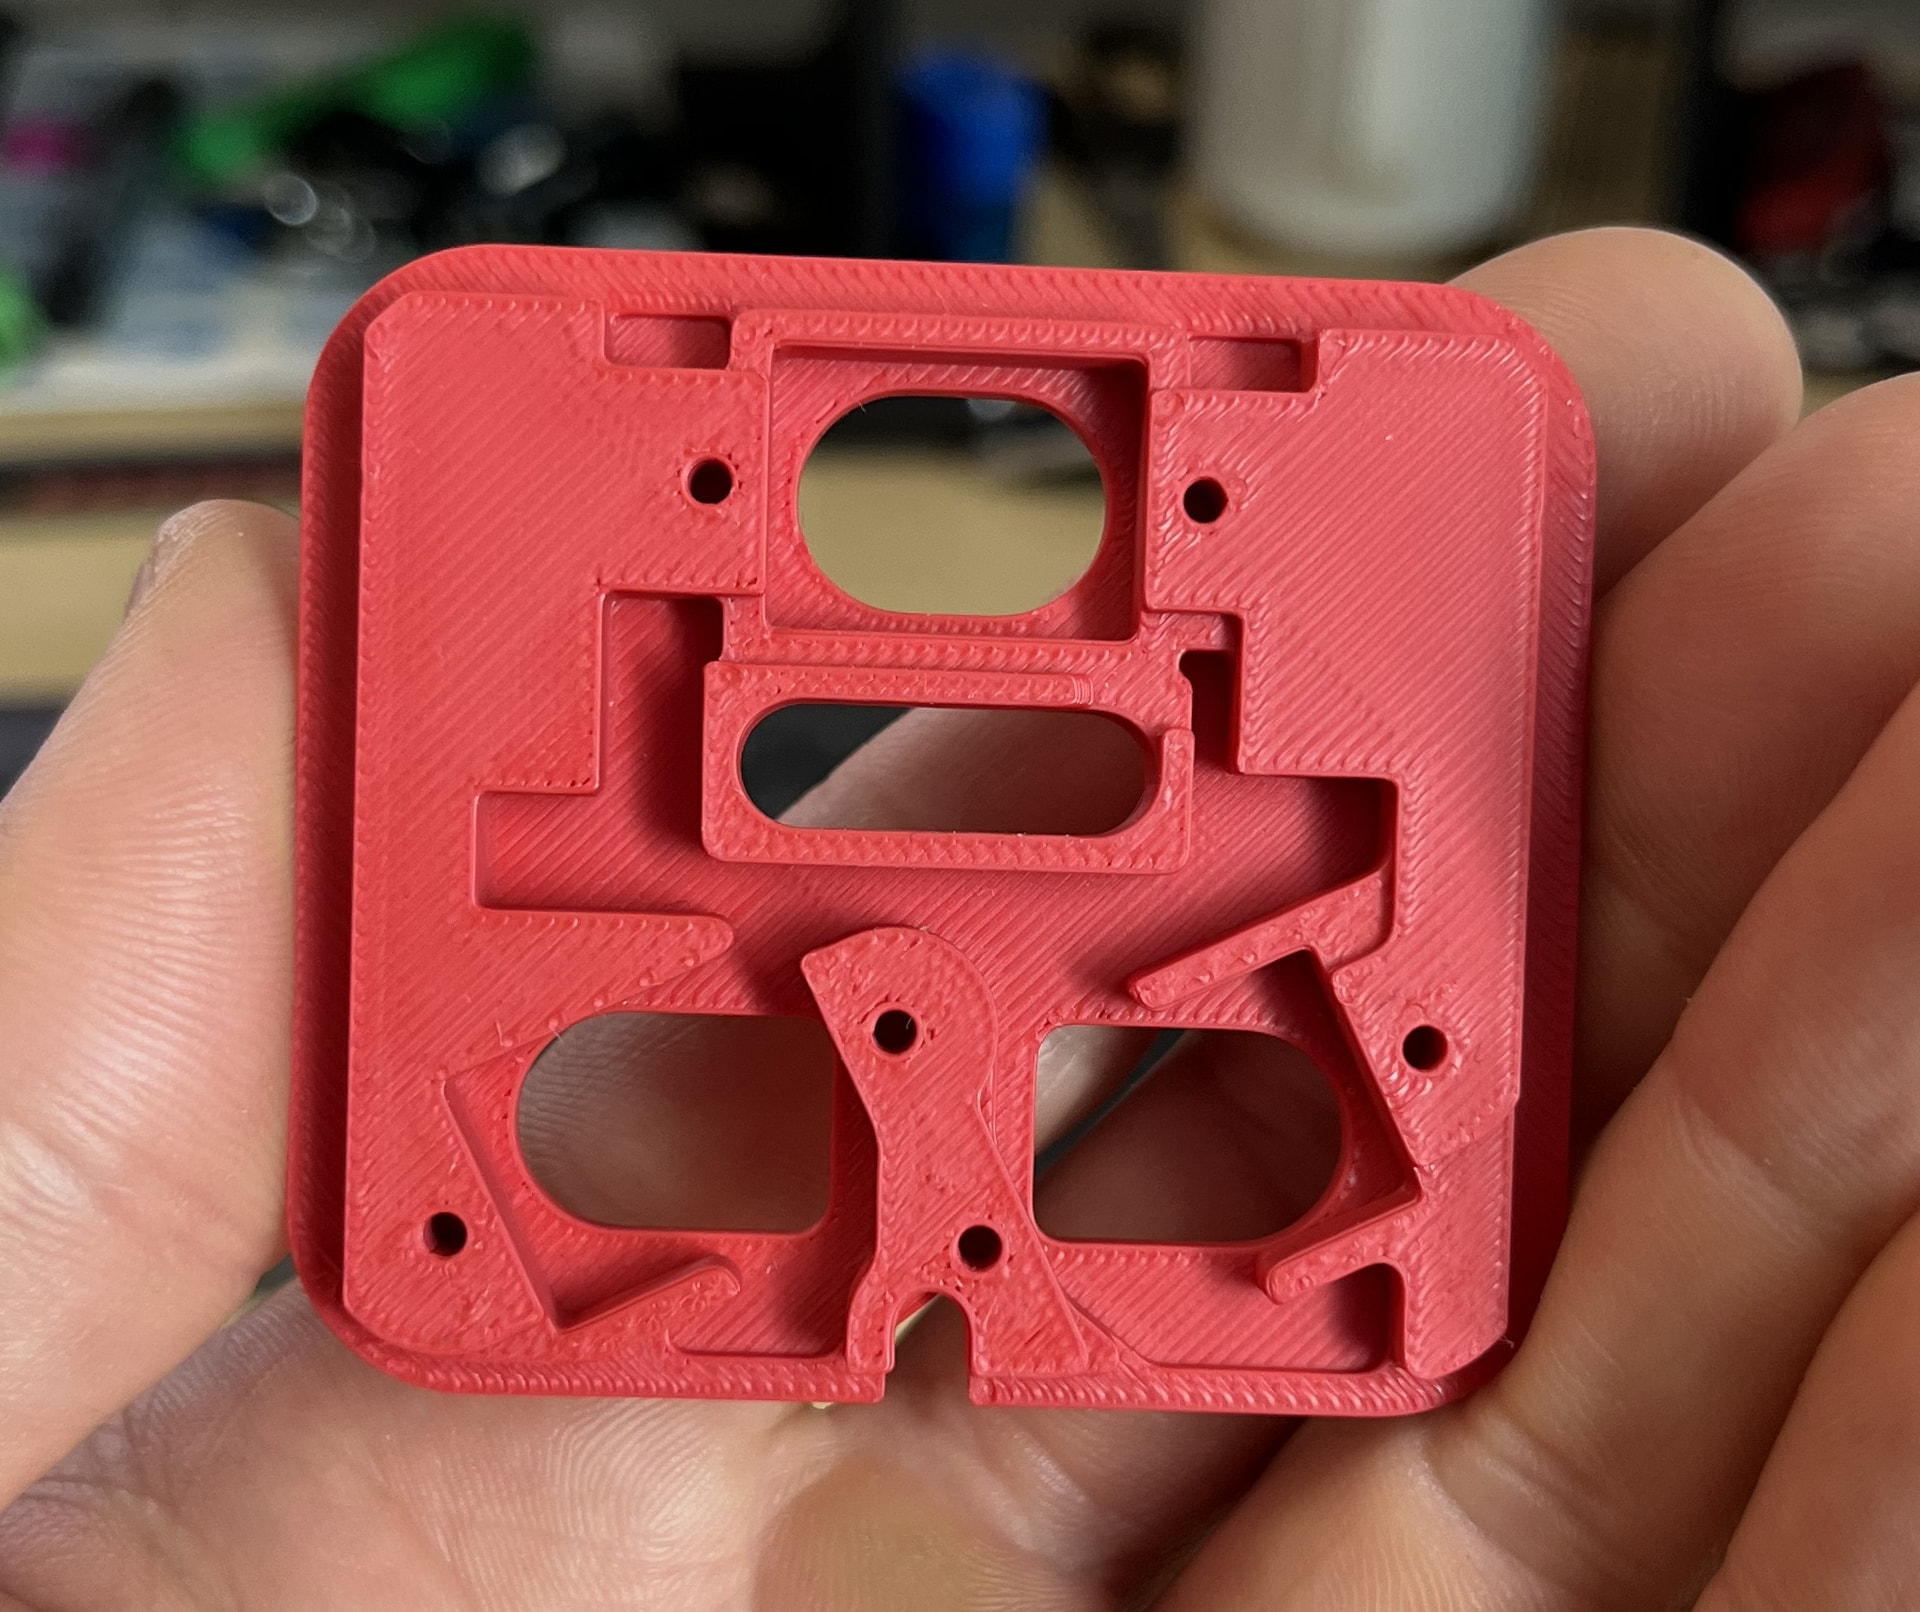
I also asked my friend to print the same test part with an X1C to compare the results with the X2D. See attached – the red one was printed with the very first Bambu Lab printer, while the grey one was printed with the latest Bambu Lab printer, featuring the newest and fanciest technology.
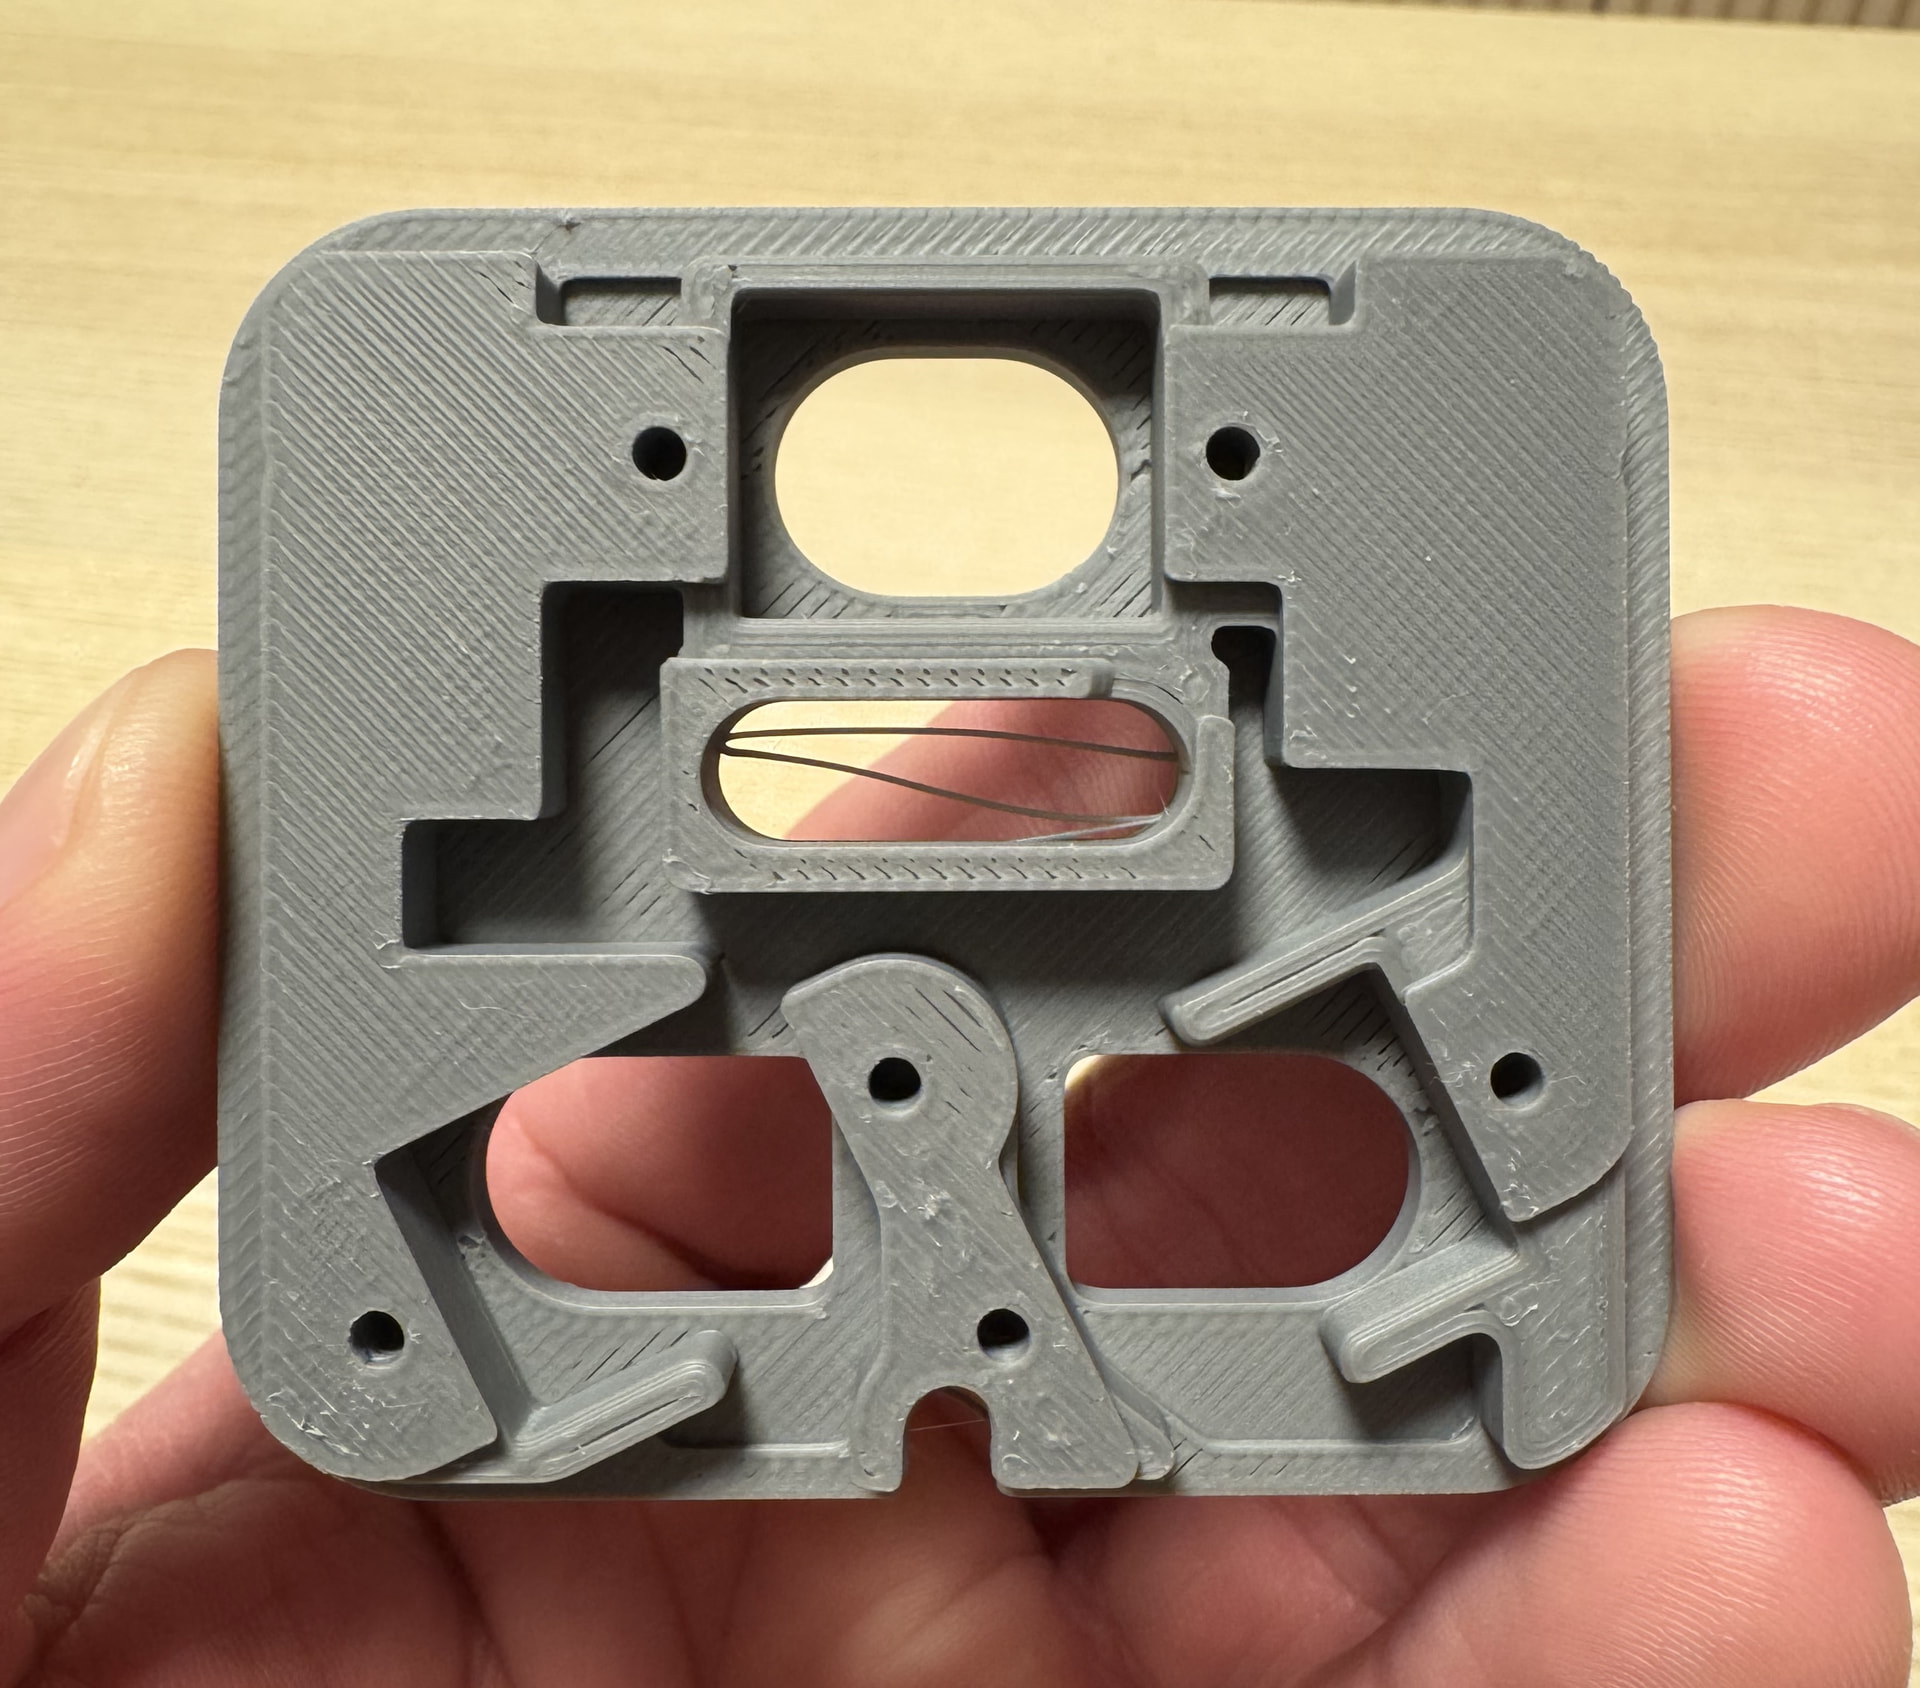
Update:
After much trial and error, I have a new machine.
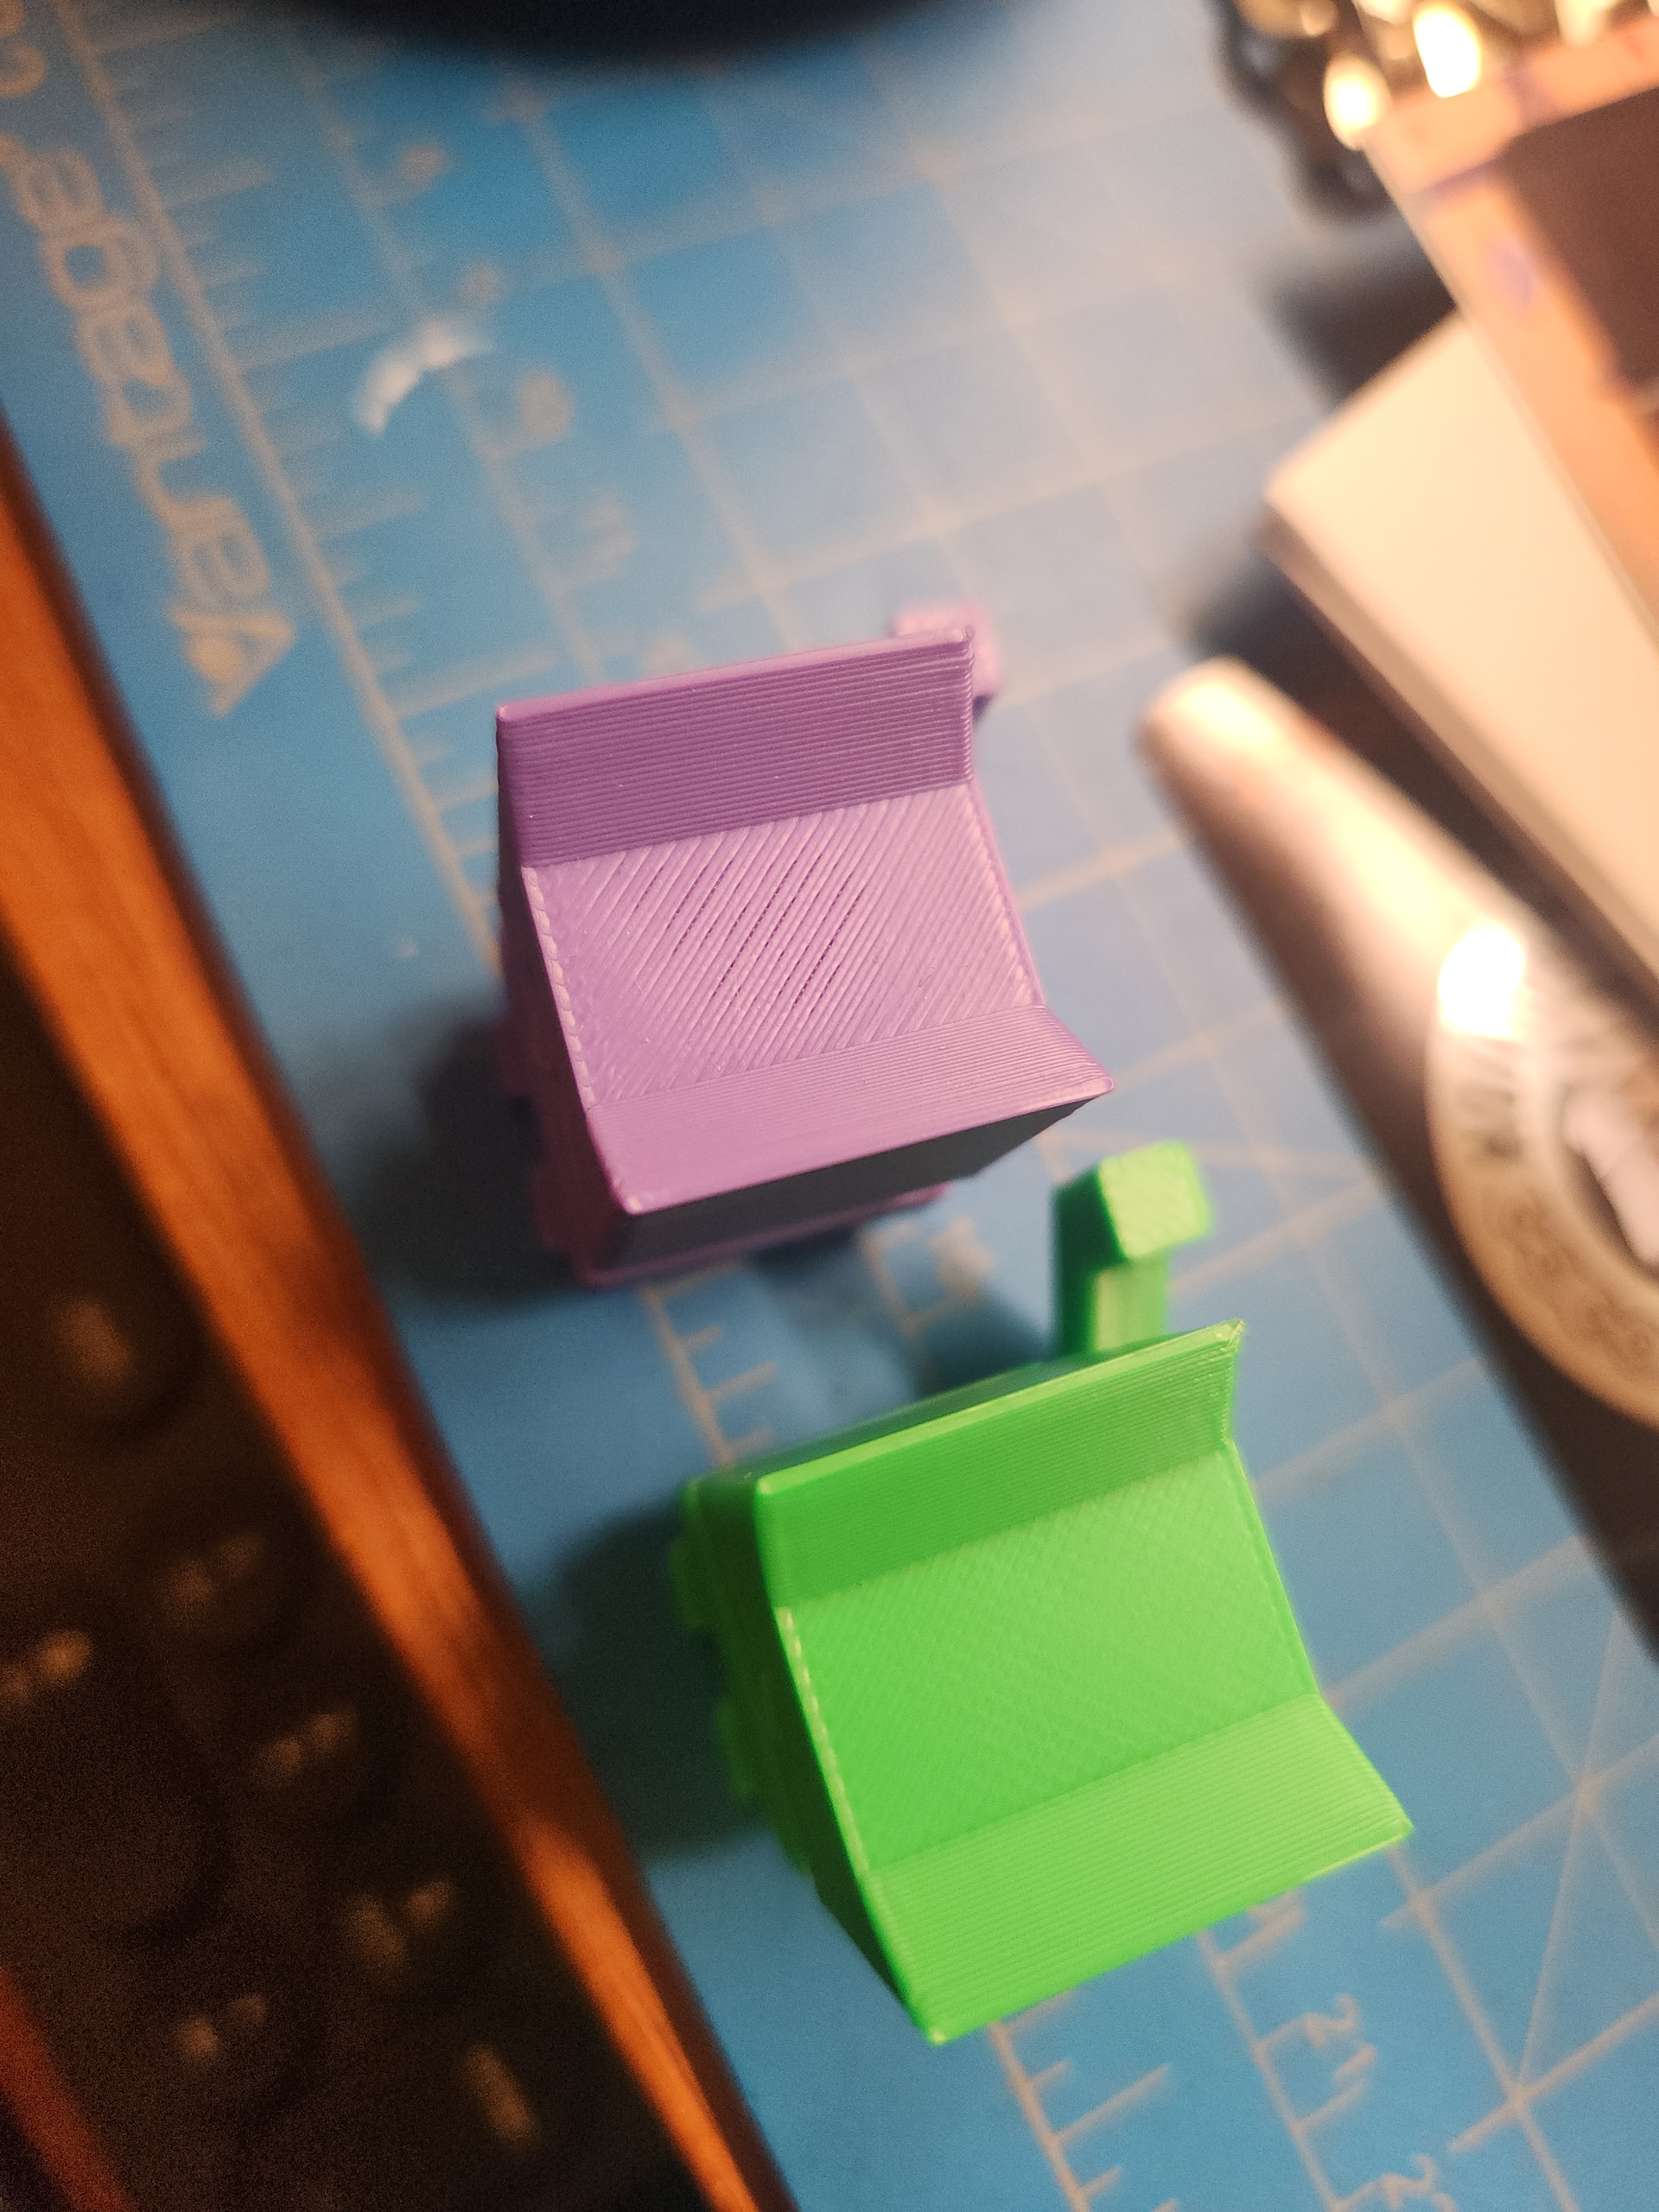
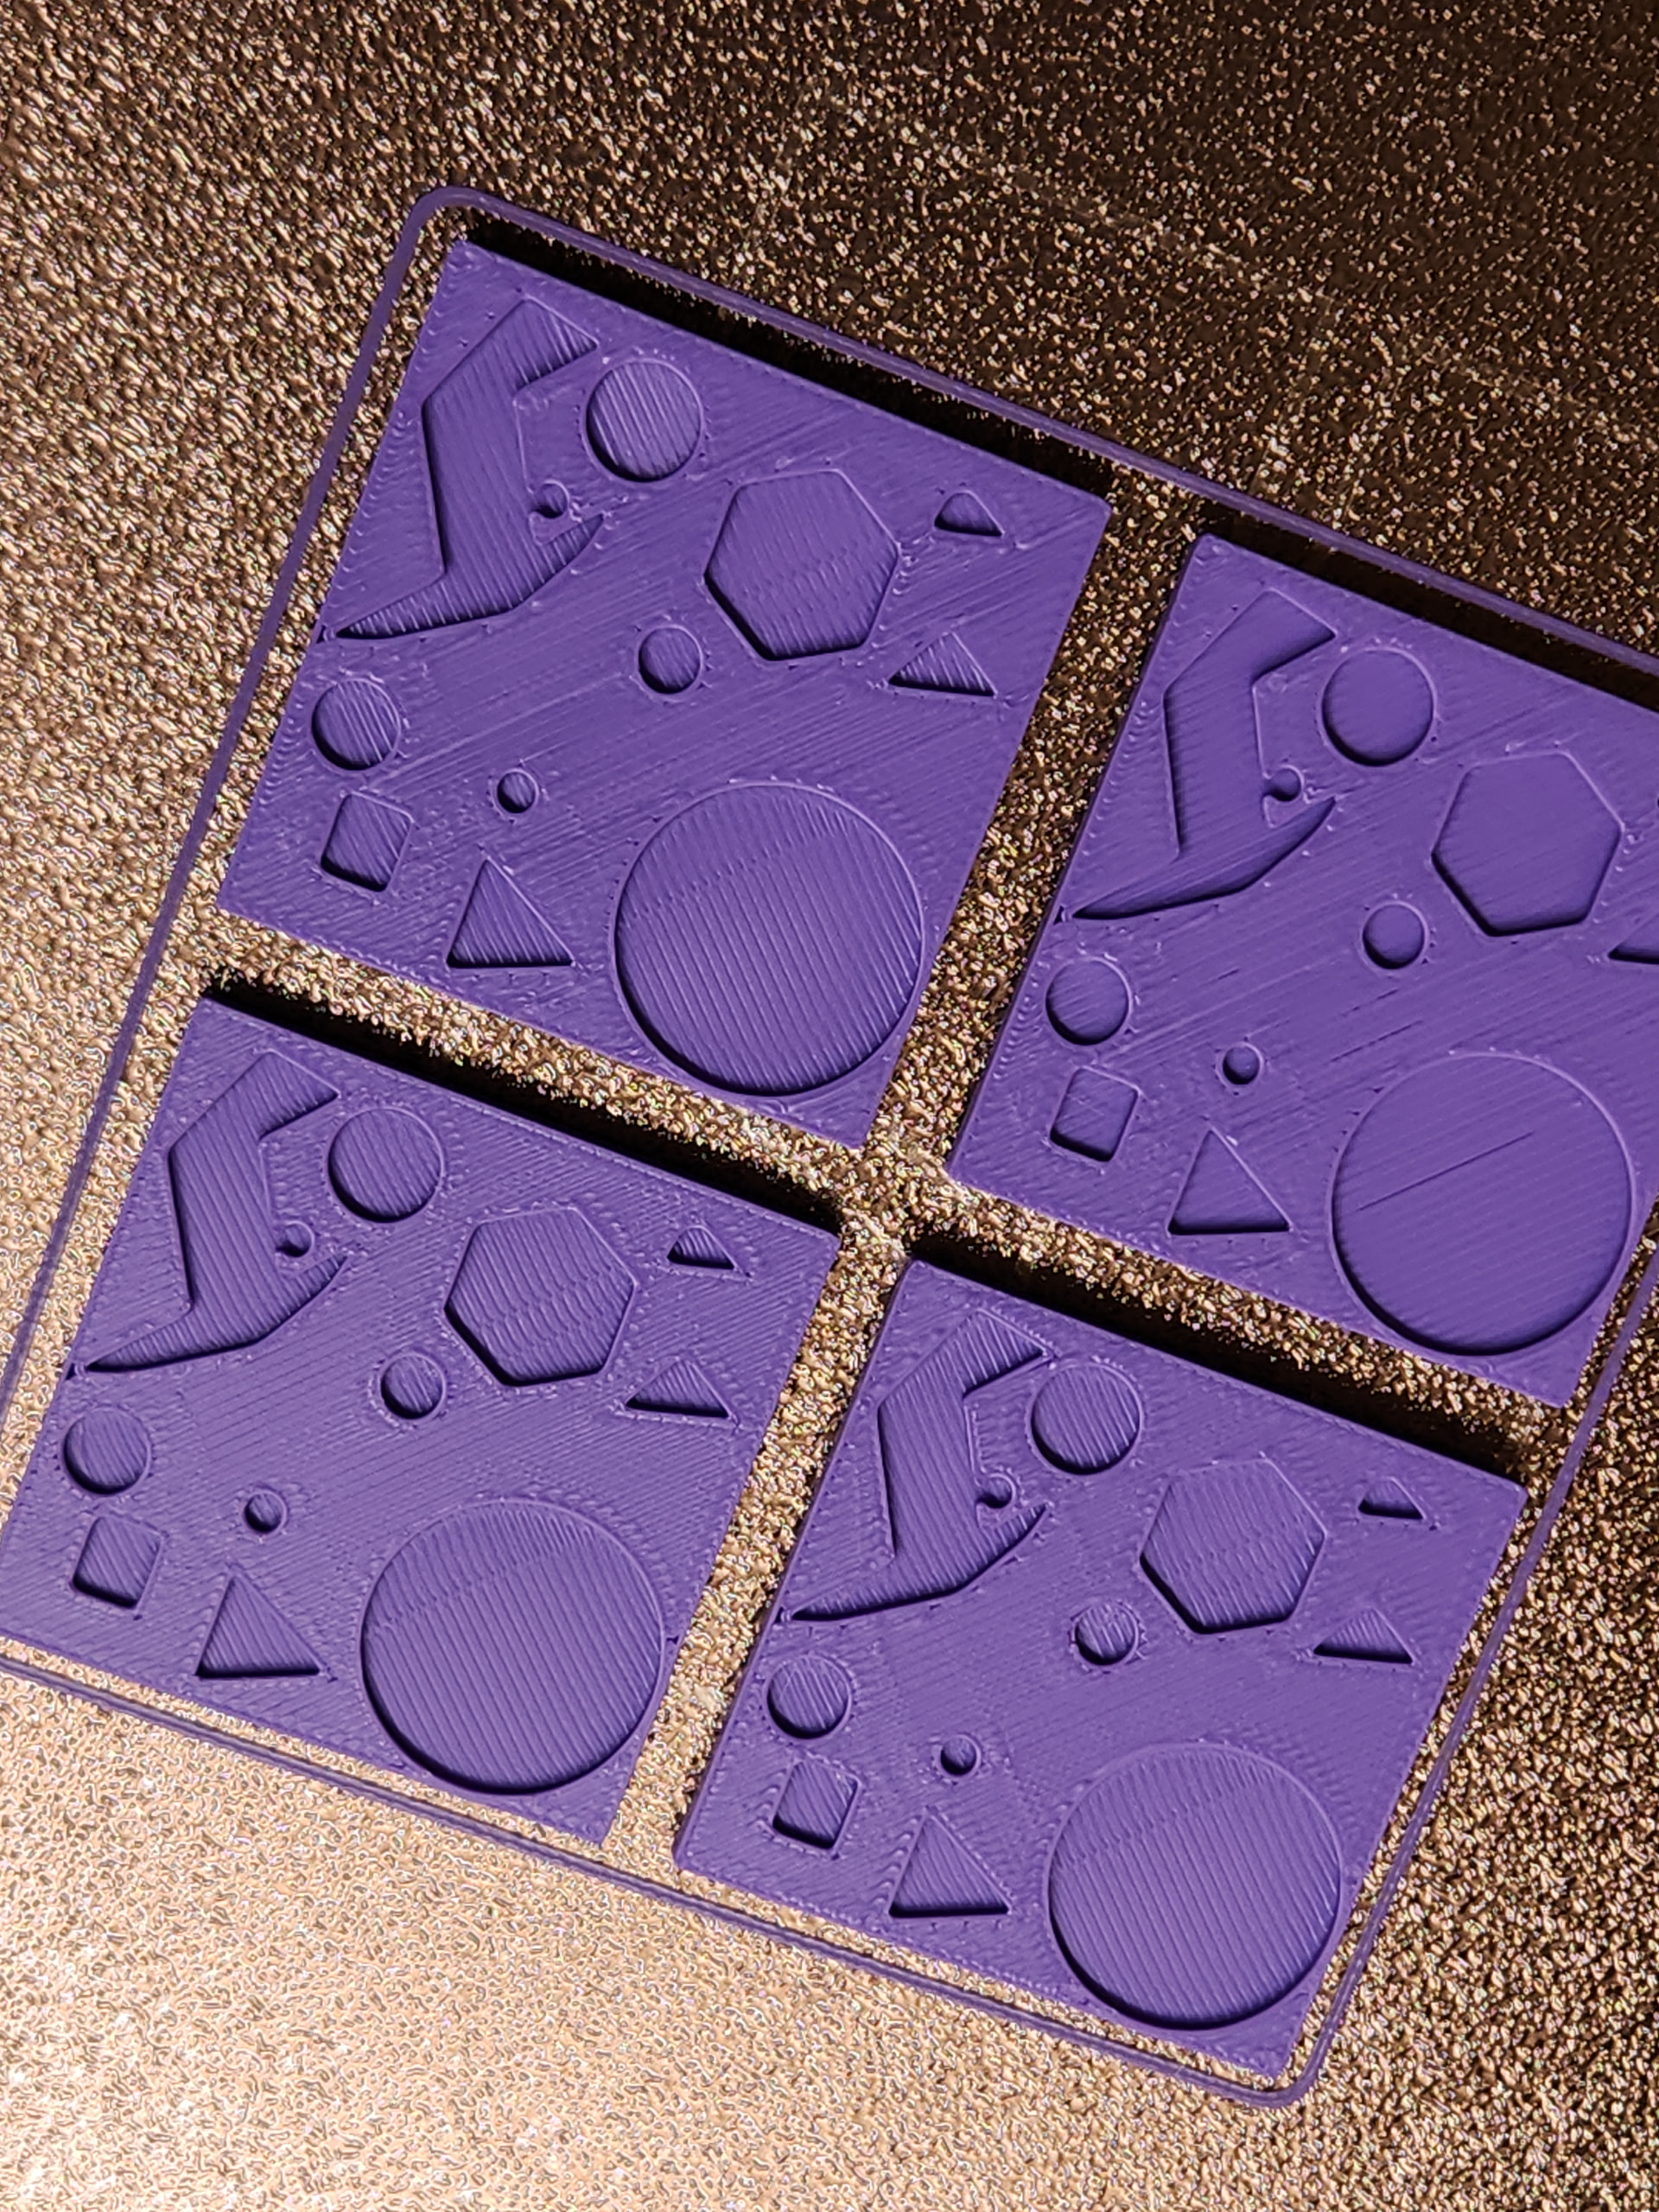
Support had me replace the heat bed, the extruder, and the extruder motor. A cable port on the tool head broke because it was tiny and flimsy and the wholetool head was replaced too. Still didn’t fix the underextrusion issues. I asked nicely if it was possible my machine was a lemon from the factory given all of the troubleshooting and replacement parts and support offered to replace the machine. They had me send back just the x2d, I kept the ams from the combo I purchased, and opted for an advance replacement and paid the x2d as a security deposit to be refunded whenever they get the return back in. New machine is better already. I believe I had a launch or beta machine given it had the 2nd wiper for the aux head and this new machine lacks that part. Print quality is as expected now, purple cat is from original, green is from the replacement and lacks the underextrusion spot on the head. The purple squares are a top surface test with the new machine, much cleaner and way less gaps with default settings. Still not as nice as my old p1s but way improved over the original x2d and I can take it from here with ironing and other settings.
Happy for this headache to be over and feel justified that it was indeed not me, it was my machine. Once my refund comes in I’ll be all good.
I’m getting really frustrated with my X2D. I enjoy calibrating and fine-tuning my printer to get the best possible results. I’ve lost count of how many days I’ve spent running every calibration test imaginable, yet I still can’t get a clean first layer and a smooth, flat top surface.
Friends of mine with an A1 get excellent, gap-free first layers without any extra effort. Meanwhile, I’ve tried manual adjustments, automatic calibration, calibration tests, different profiles, and default settings. I’ve also gone through the settings one parameter at a time, replaced the hotend, and tightened the hotend screws, but I still can’t get consistent results.
I’ve already wasted kilos of filament on prints that were progressing perfectly, only to suddenly end up with a completely ruined top surface.
Did you happen to check the official wiki? You’d be surprised how much useful information is in there. For example, IIRC, issues like yours can be caused by loose screws somewhere behind the hotends. I’d definitely give the wiki a look. 
Actually it did:
Wow, I never saw such a good top layer from mine, as with your new one.
Most probably I will need to start the fight with the support, but meanwhile most probably will need another printer.