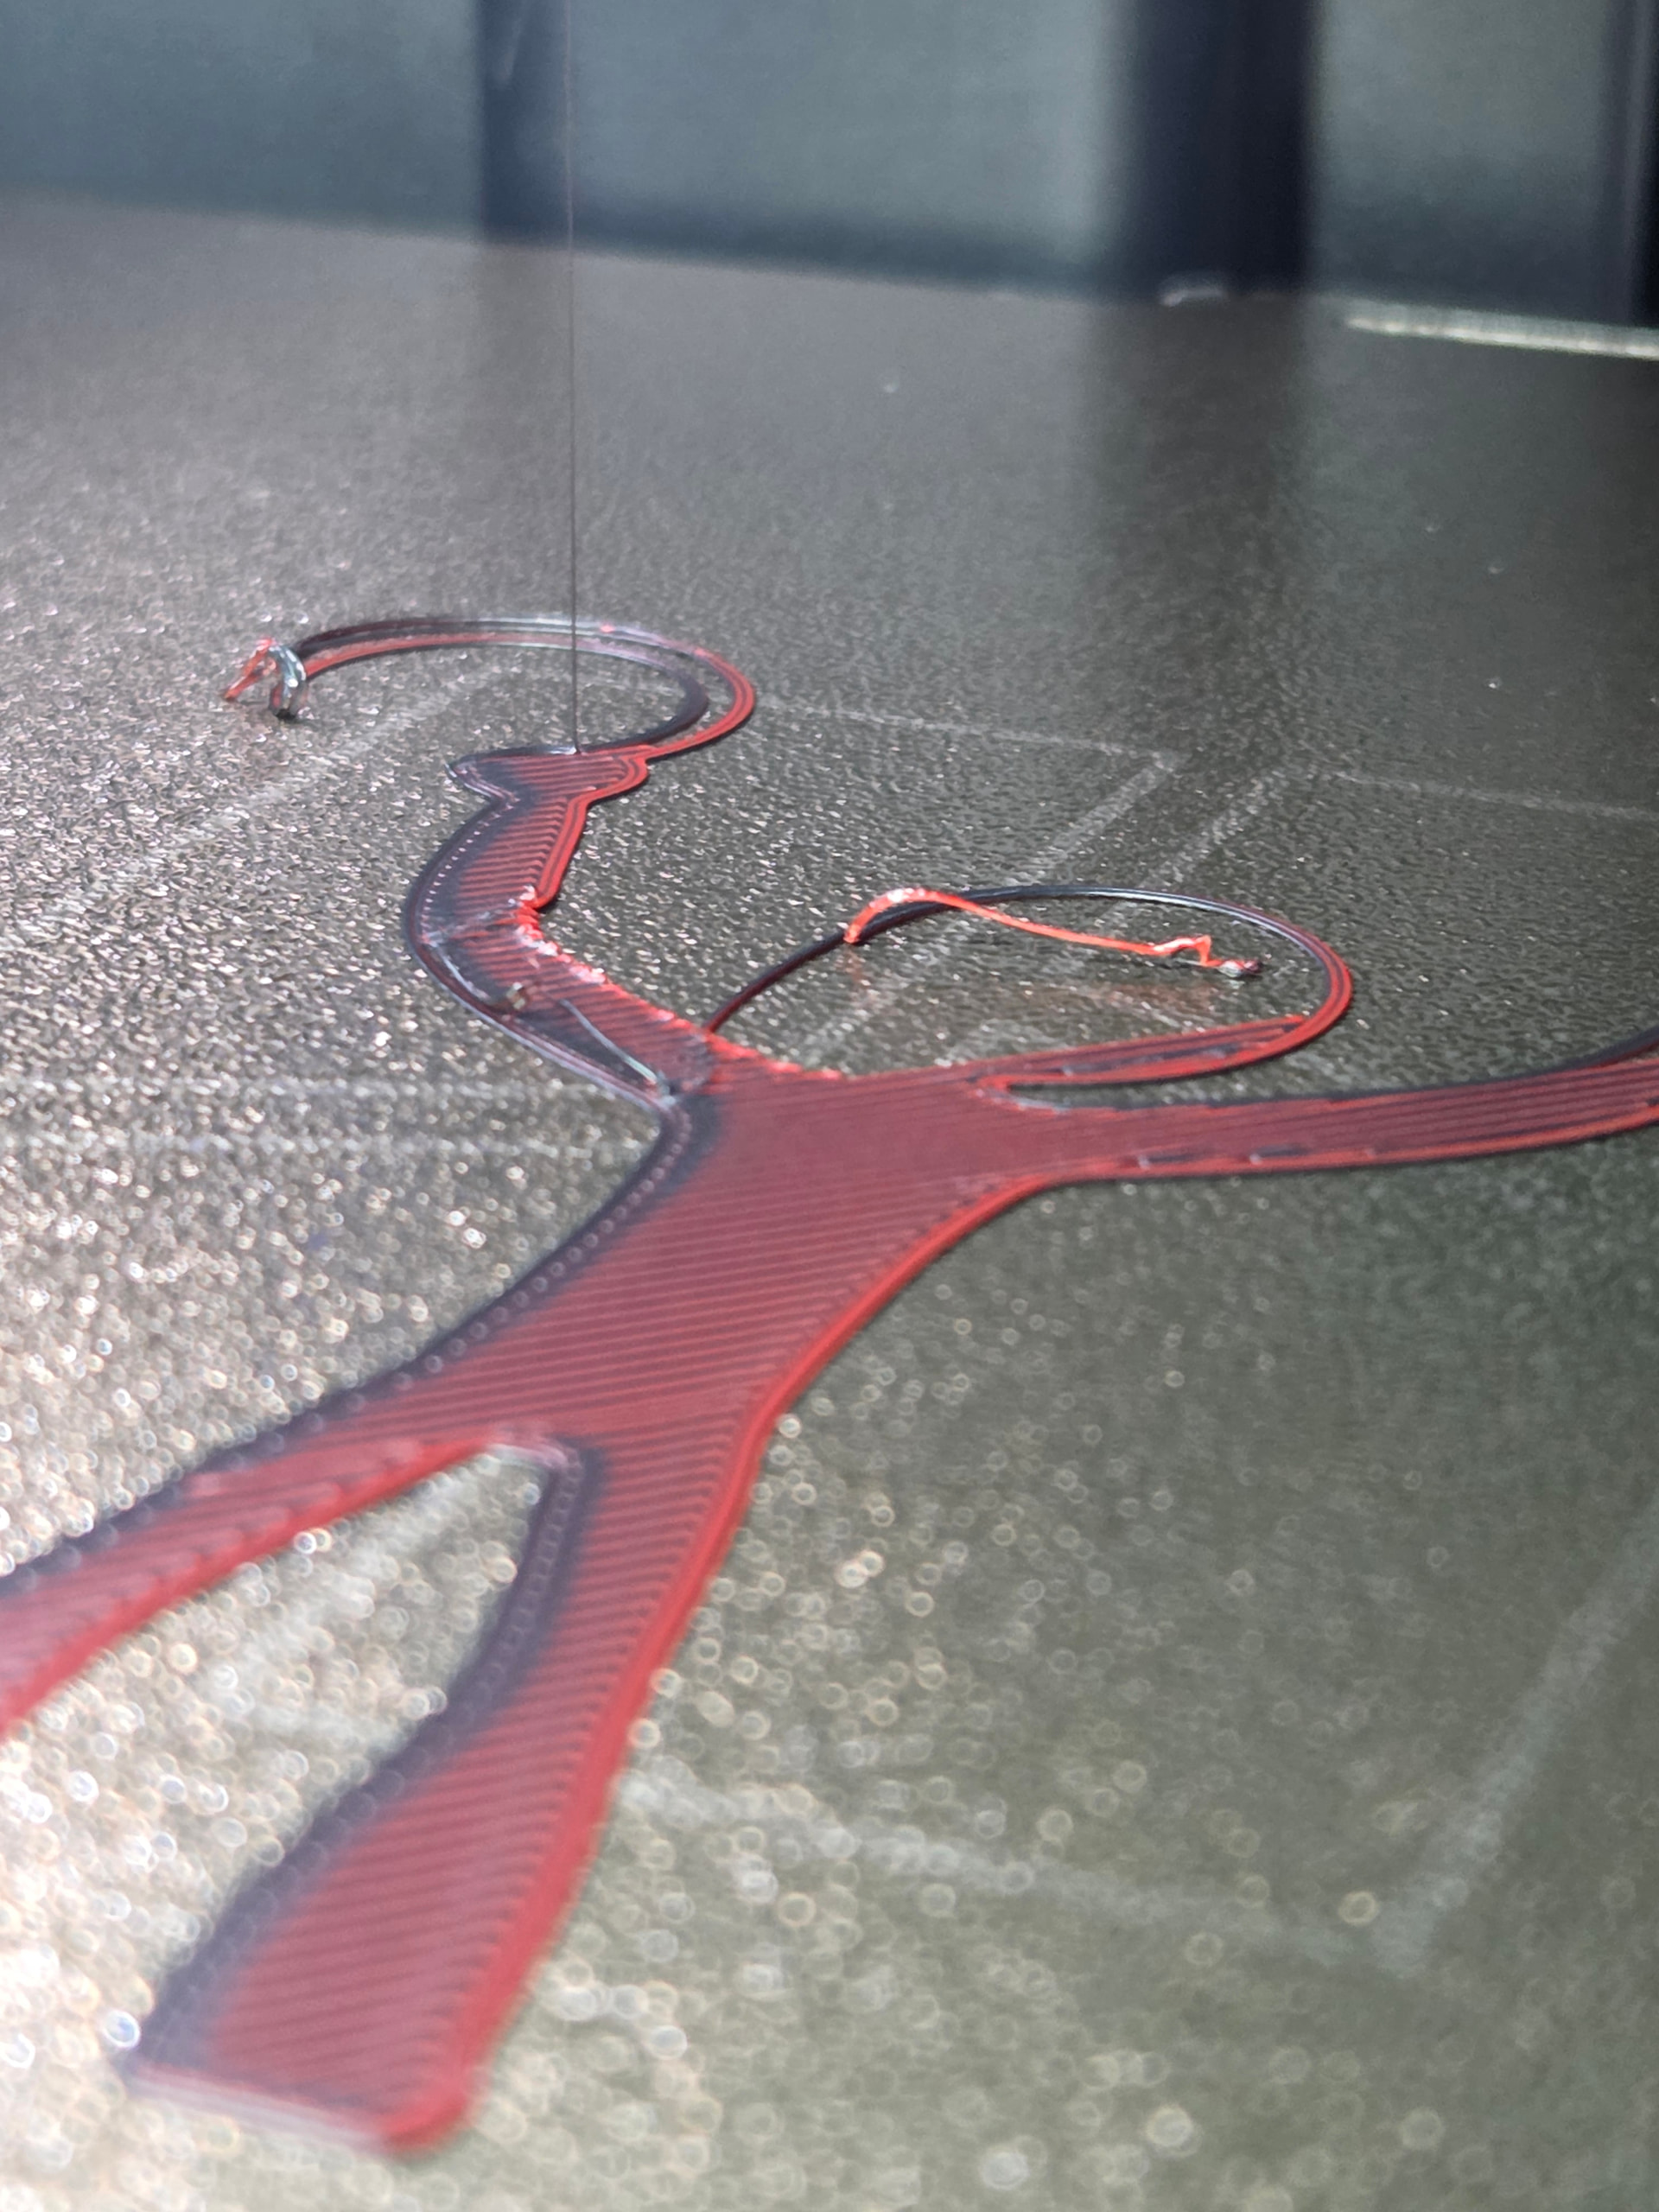
My printer is now having issues printing a first layer for every print. I am attaching a few pictures and a video. This happens with PLA, all manufactures, all colors. This not a filament or color issue, as this happens with any brand, any type and any color. As you can see, the calibration line prints perfectly fine. I have tried the following solutions:
New official Bambu nozzle
Several cold pulls
Cleaned build plate several times with soap and water only
New build plate
Cleaned and lubricated rods
Upgraded all firmware
Downgraded all firmware
Factory data restore
Dried filament for 24 hours
Multiple factory calibrations
Moved the prints to different areas of the print bed
None of these solutions fixed my problems. These issues came out of nowhere. I was printing just fine one day, and the next day, my printer can not print anything at all. My machine gives no errors at all. This issue happens no matter where I initiate the print. The problems happen from the handy app, Bambu Studio, and prints initiated from the machine itself. This also happens on every model I try to print, even the stock benchy.
Just for context: did the problems start while you were experimenting with TPU 95, or shortly after?
So it’s not about what filament you’re using now, but whether the problem first occurred when you started using TPU? Because I saw that you started a thread about this.
I also saw that you wrote something about print plates - is there some kind of connection here?
I have not yet experimented with TPU yet. I was going to, but haven’t had a chance yet. At first I thought this could be a build plate issue, which is why I inquired about the frostbite. I purchased the frostbite and still had the same issues.
I do not believe it is pressure advance related, since I had upgraded, downgraded, and restored the firmware.
If you are willing to accept the risks, you could explore this to see if the problem resolves, it would rule in or out things.
Adjusting Z-Offset for First Layer “Squish”
Bambu Lab typically handles Z-offset automatically using bed leveling, but if you need to micro-adjust it for different build plates (like a textured PEI sheet) or filaments, you can alter the Start G-code:
Open Bambu Studio and navigate to the Device or Prepare tab.
Select your printer, click the Edit icon next to the Filament profile, and go to the Machine G-code tab.
Scroll down to the Machine start G-code section.
Locate the line that specifies the Z-offset for your build plate (e.g., G29.1 Z{...}).
Adjust the numerical value to change the distance:
Increase the value (e.g., from -0.04 to -0.02) to move the nozzle further from the bed.
Decrease the value (e.g., from -0.04 to -0.06) to move the nozzle closer to the bed.
Pressure advance is a measurement of the time delay between extrusion force being applied at the motor, into the gears, through the filament, and being realized at the nozzle’s endpoint. Your printer’s Component wear, filament composition, filament wetness which creates constant uncommanded extrusion, etc all feed into that final number, its not uncommon for it to change.
Got the pic from your benchy? Im not sure what that model is nor what its supposed to print like but I think we all know what the benchy should be. And also anything above layer 1 would also be helpful.
Or share the 3mf so we can see your settings and the model.
Good point: Yes, that happens quite often. Screws tend to come loose during transport. This is especially common on the tool head - or the tension on the belts may have been lost. Someone might not even notice it right away; for some people, it didn’t become apparent until a month later. In any case, it’s a very good idea to check the screws, especially on the tool headt. It doesn’t take long.
I actually did try to wiggle the nozzle, and I even checked the screws in front AND behind the nozzle. They were all tight, and I still had the failures even after the checking of the screws. Unfortunately, I will not be able to provide a picture of the second layers and beyond, as the nozzle picks up and drags the print around the plate before layer 2 is normally reached.
I will attach the file here for your reference. I will also attach a file of a simple cube that I also tried, that failed as well. If any of you can recommend a test, or adjustment that I can do, I will be happy to, as long as I don’t have to modify the g code, as I should not have to modify any coding to make my printer work correctly. Thank you all again!
If I were to investigate pressure advance, how would I do that? Is there a calibration test for this? I wouldn’t mind sharing the results with you all.
I tried sharing the 3mf file that I attempted to print in the red and black filament but it said the file was too large.
Hard to tell considering your filament is a mix of colors, but it just looks like bed adhesion issues.
pressure advance could cause plowing etc., but if you have a good first layer, it shouldn’t pick it off the bed.
If the build plate is truly clean, I’d raise temps a bit and see if if doesn’t stick better. Add 10 degrees just on first layer (where the issue is obviously happening) on both the nozzle and the plate then retest.
It may have a few strings. It may not. But if it finally sticks to the bed, there’s your sign.
As far as any filament calibration tests, there’s models all over you can download to test / fine tune with.
Edit: Just watched the 1st part of your video. Clearly the filament is not sticking to the bed. Definitely add some heat on the 1st layer and try again.
If i raise the temps as suggested, and everything works out fine, what is that a sign of? Is there something going bad that needs to be replaced, since this is a new issue, with over 700 hours on my machine?
While I dont disagree with your reasoning of filament liking different temps, why would this issue pop up all of a sudden? I have printed with these same exact rolls of filament many times, using stock profiles. Why would this change be required now, on all of my filament rolls?
I am attaching a video of a first layer print with stock temperature settings, and then a video of a first layer print using settings where I increased the bed and nozzle temperatures by 10C. The first layer print failed with the stock settings (bed at 55C and nozzle at 220C), but the print was somewhat successful at the modified temperatures (bed at 65C and nozzle at 230C). The settings can be seen on the screen before the print starts.
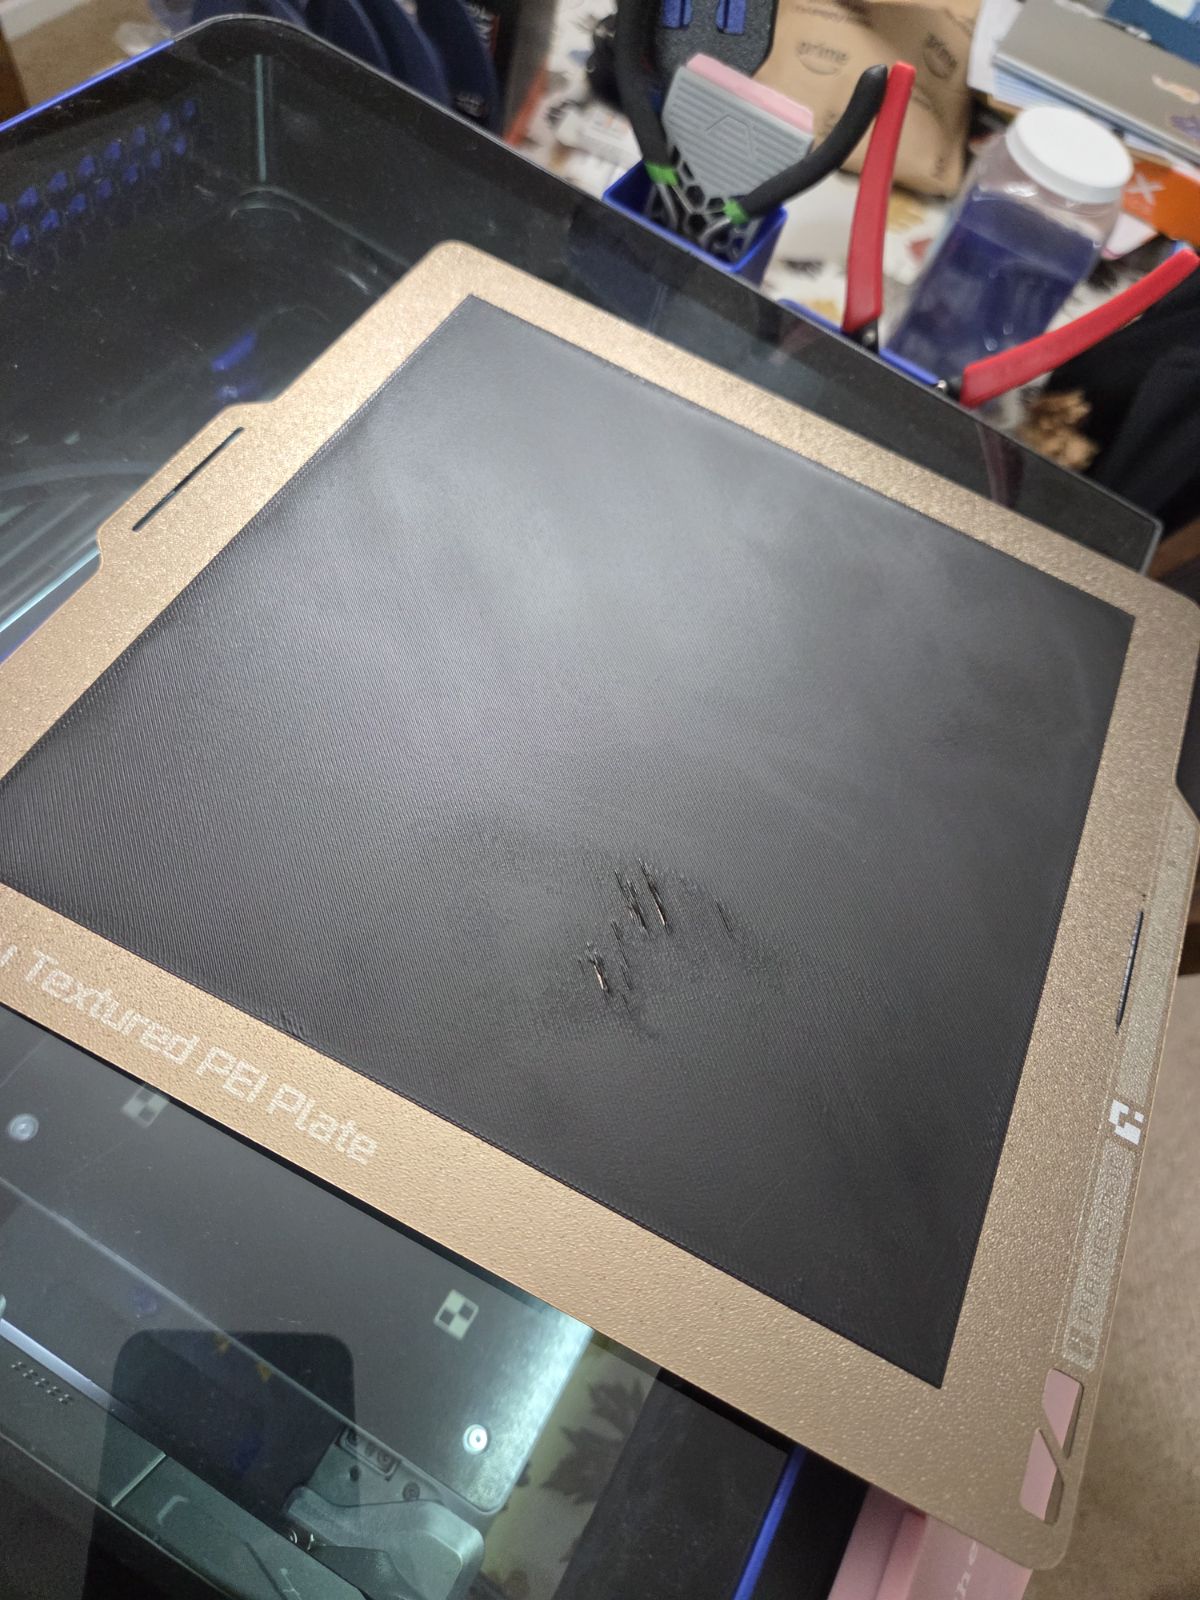
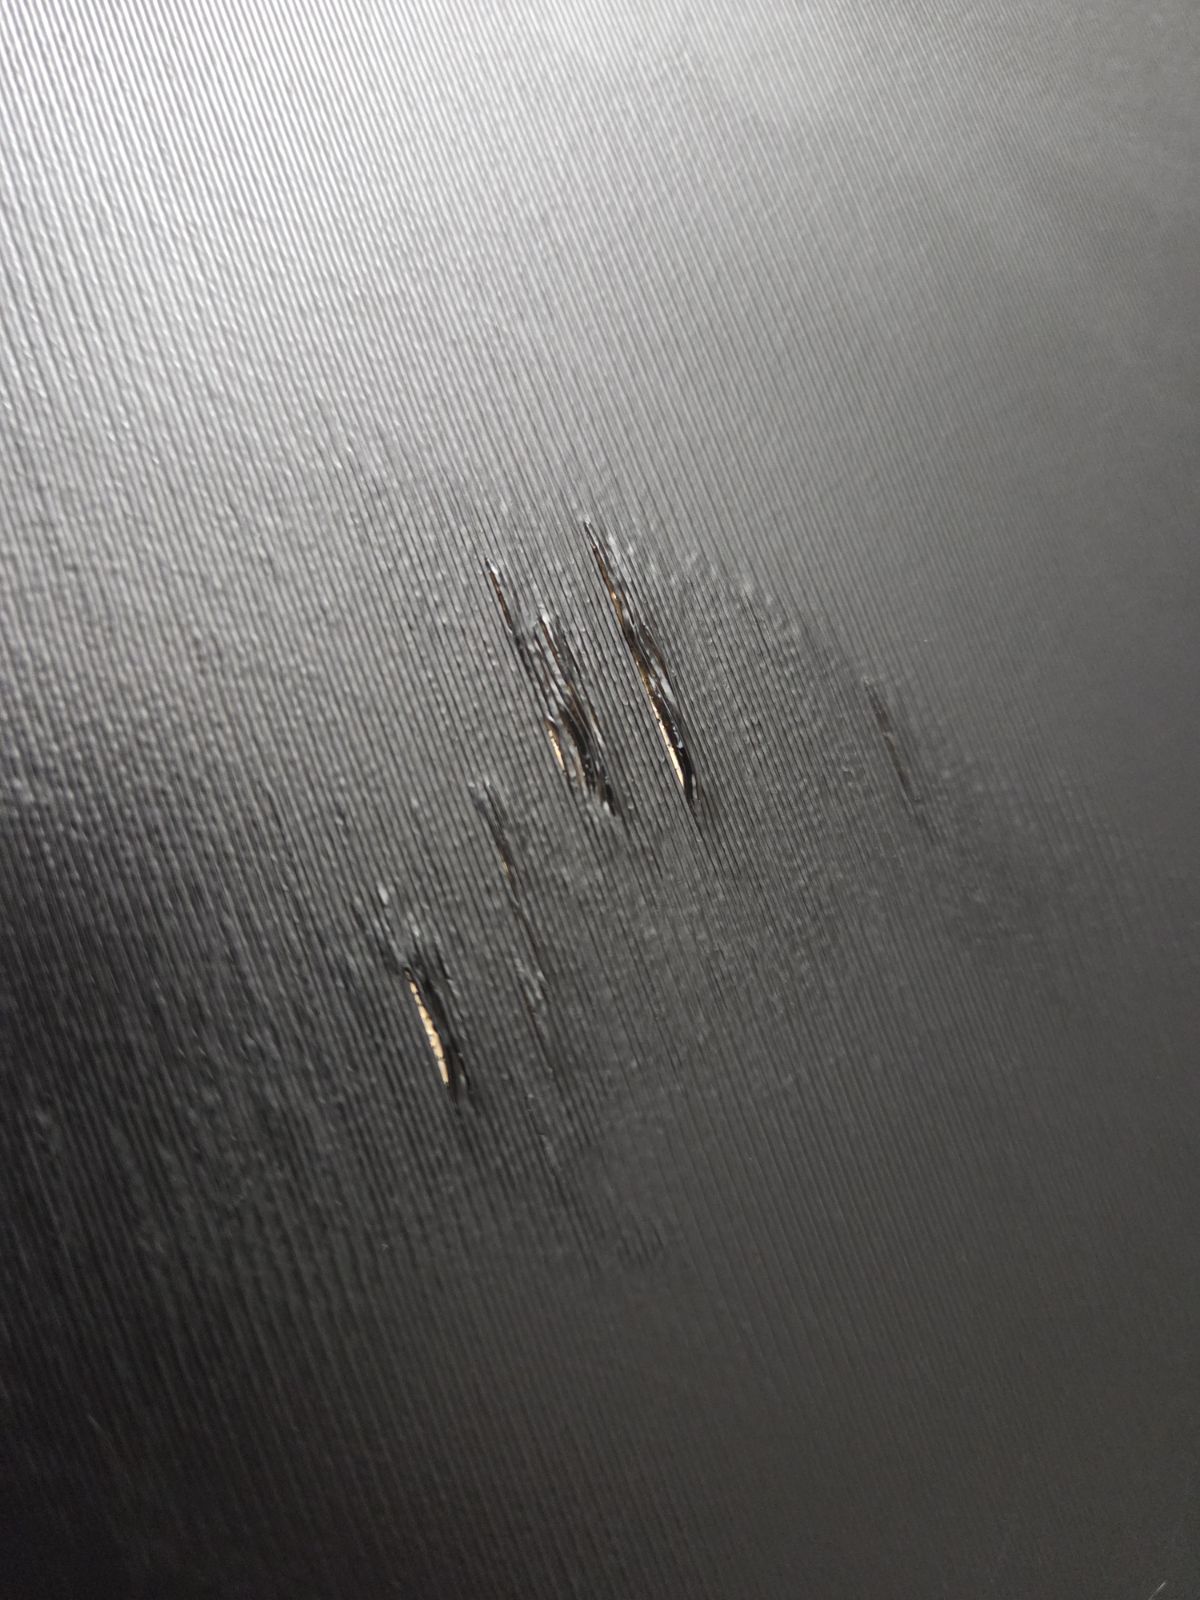
Unfortunately, there is a new problem, please see that attached pictures. There is a spot toward the lower left that looks likes holes or missing filament, not sure what to call it, but its not a smooth print in that area.