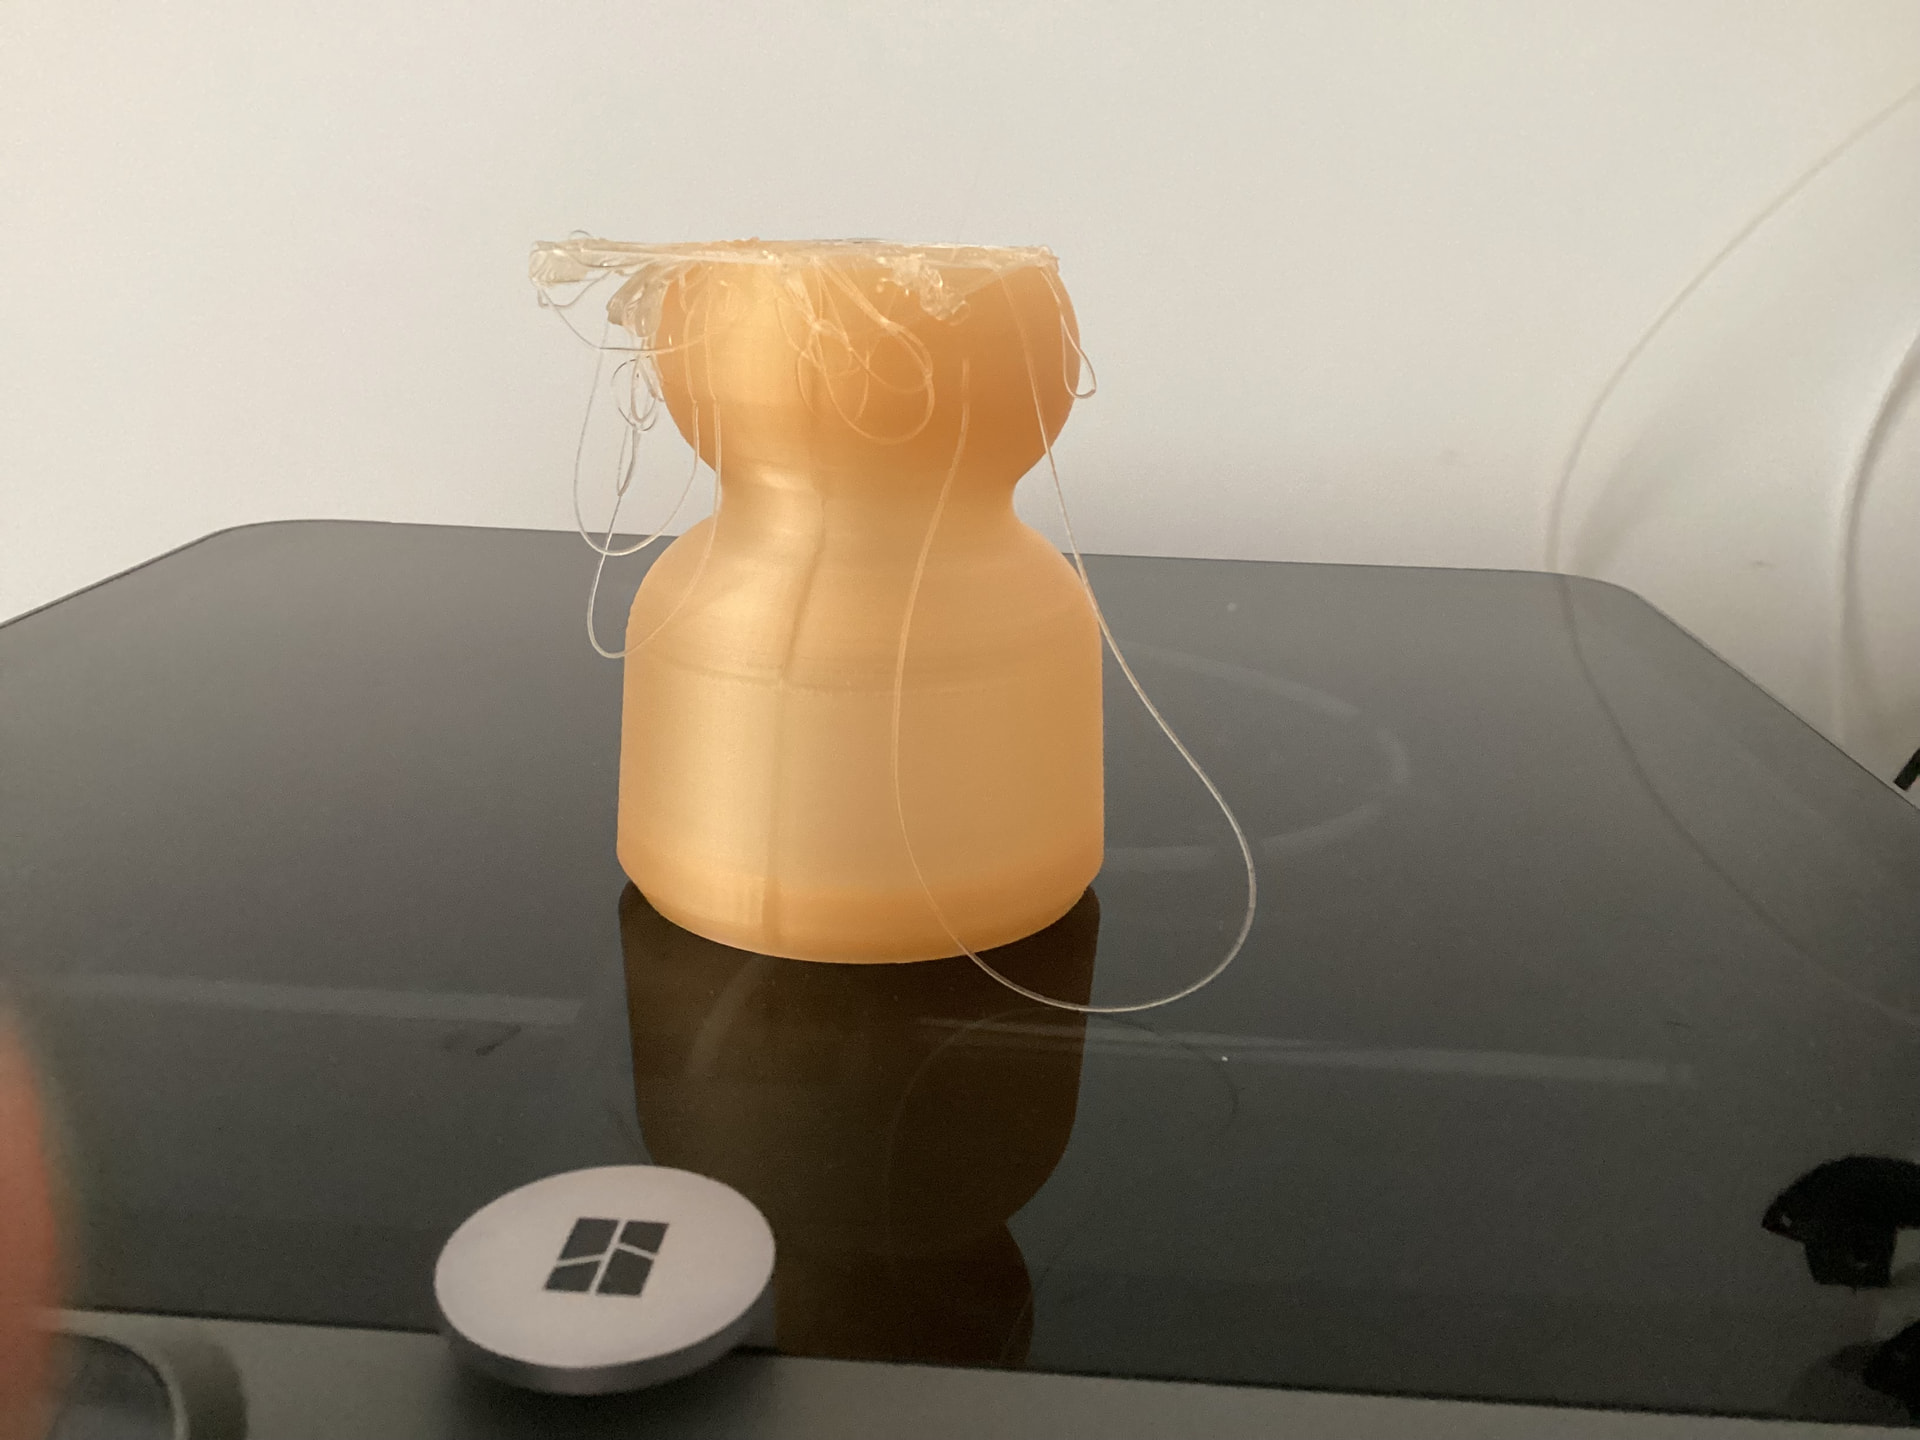
I’m trying to print a lamp on my p2s but it unsticks from the plate and fails. (Every time in a different moment). It is bambu’s cool plate supertack pro and I washed it with water and soap. I also tried putting glue on it, but it also unsticks. I do bed leveling before every print and I have done flow and PA calibration. What else can i do?
You read my mind. I was just going to write 3DLac and you beat me too it. I like the spray can but the pump spray works too. You only need it every 5 or 10 times. It works on everything. Just spray it outside because it stinks. Im on like the second can after many years. But like everyone else says, wash it with soap and water and rinse good.
Use whatever you have, it doesn’t matter. I use a plastic green scrubie sponge but noting harsh. No alcohol, no acetone ever!! If you need those, just buy a new build plate. Just be carful with the filaments that stick TOO well. I use glue stick with those. TPU especially.
Treat your build plate well, and it will last a long time. I think on still on my original textured PEI plate on most of my printers.
Printing PLA means you need to consider how hot it is inside the enclosed printer.
If the ambient is warm, consider opening the door or lid. If it is cold leave it snug and enclosed. If in between, test both.
Is the base contacting the build plate uniformly? Some models do not touch the surface snuggly. You can check this in the preview, slice it and scroll the right side layer bar down to the bottom. Does the entire circular base appear on the build plate? If not, modify the model if you made it, or lower the model 0.2mm at a time and try again.
As you are printing PKA Translucent, are you using any tweaks to increase the translucency? If so, turn them off and try again.
Remember, our hobby is still tweak, test, check, repeat.
Good point. In many places it is known as Dawn in the U.K., it is Fairy. Often it is the cheapest, unscented, no ‘extras’.
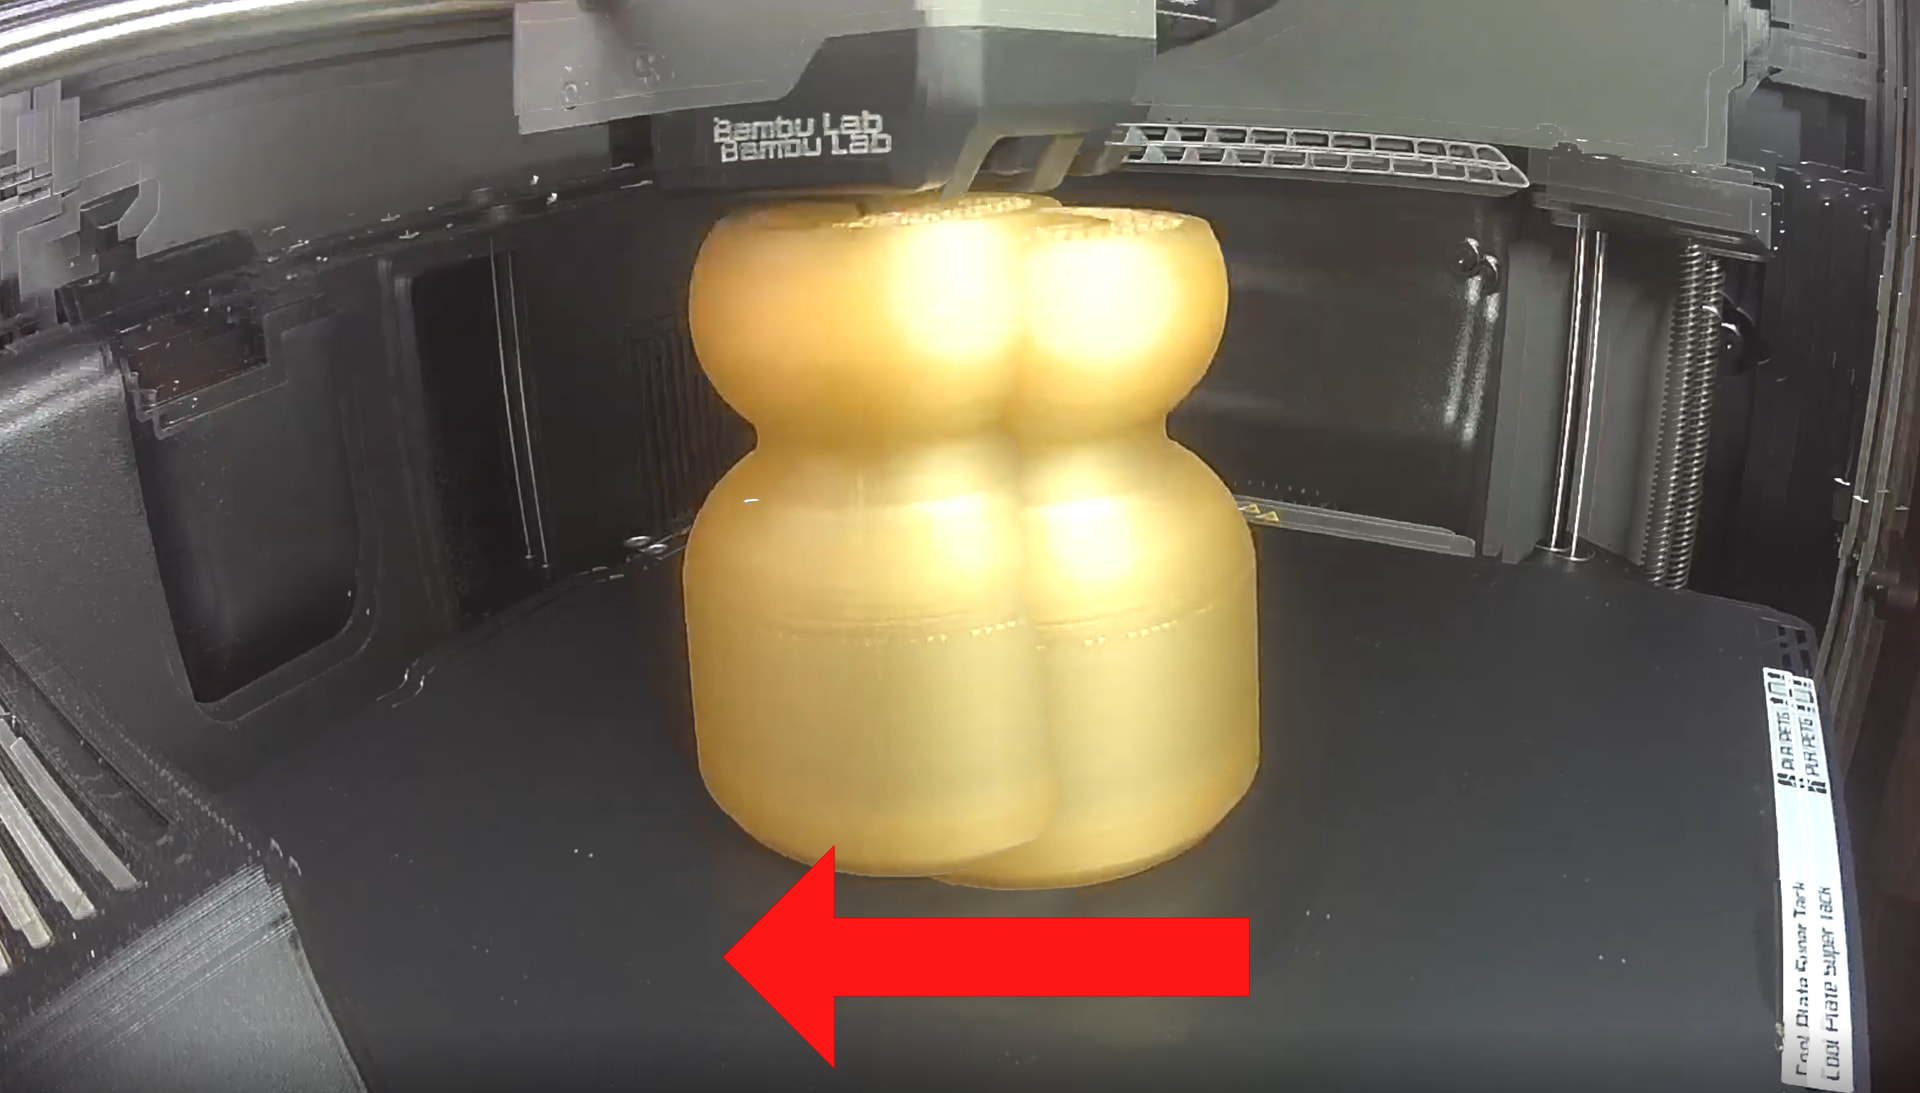
Could you provide us with the 3MF file? That would be more helpful than us just guessing what the problem might be. In my opinion, this isn’t an adhesion problem; rather, it seems that your nozzle is jamming on the object, suggesting that the settings are incorrect.
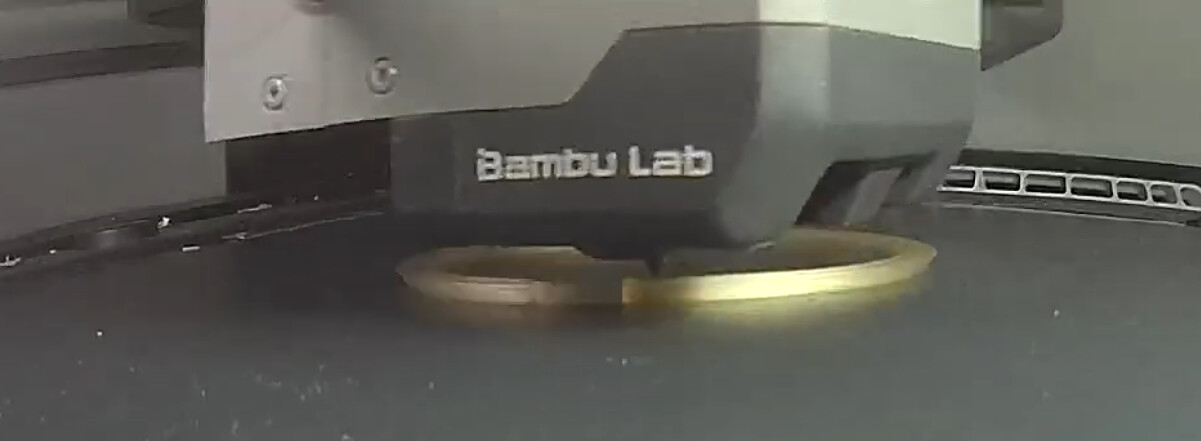
As you can see in the video, the nozzle clearly pushes the object to the side when time-lapse mode is selected. Here is the exact point, with both frames overlaid. I don’t see an adhesion problem- Especially considering that you’re using the Cool Plate Supertack Pro and say you cleaned it really well. Rather, it seems your nozzle is crashing into the object.
A brim might help, and as has already been mentioned here, you should take advantage of this - but it won’t solve the core problem. The contact surface is actually large enough, though more is always better, of course.
I can think of some possibilities, but to be sure, we’d have to analyse the 3MF files more closely:
Perhaps this problem is caused by the cooling down of this specific material, which contracts. However, you’ve already checked the bed temperature and, while contraction can cause problems, it doesn’t make the nozzle ram into the object. = Unlikely, but possible
That’s why I think it’s more likely that your settings aren’t optimized or are simply a little off. Unfortunately, can’t tell from the video which infill you used, which would have been a clue, for example. = Very likely
It’s also possible, though rare: Your belt doesn’t have enough tension, and the teeth are skipping, but I’d rule that out for now. Still, it’s worth mentioning here. = Extremely unlikely
You are absolutely correct to mention this build plate washing procedure in detail, and every time I see it mentioned I get sad that there is still no build plate washer-dryer machine that can fit beside a printer in a regular home.
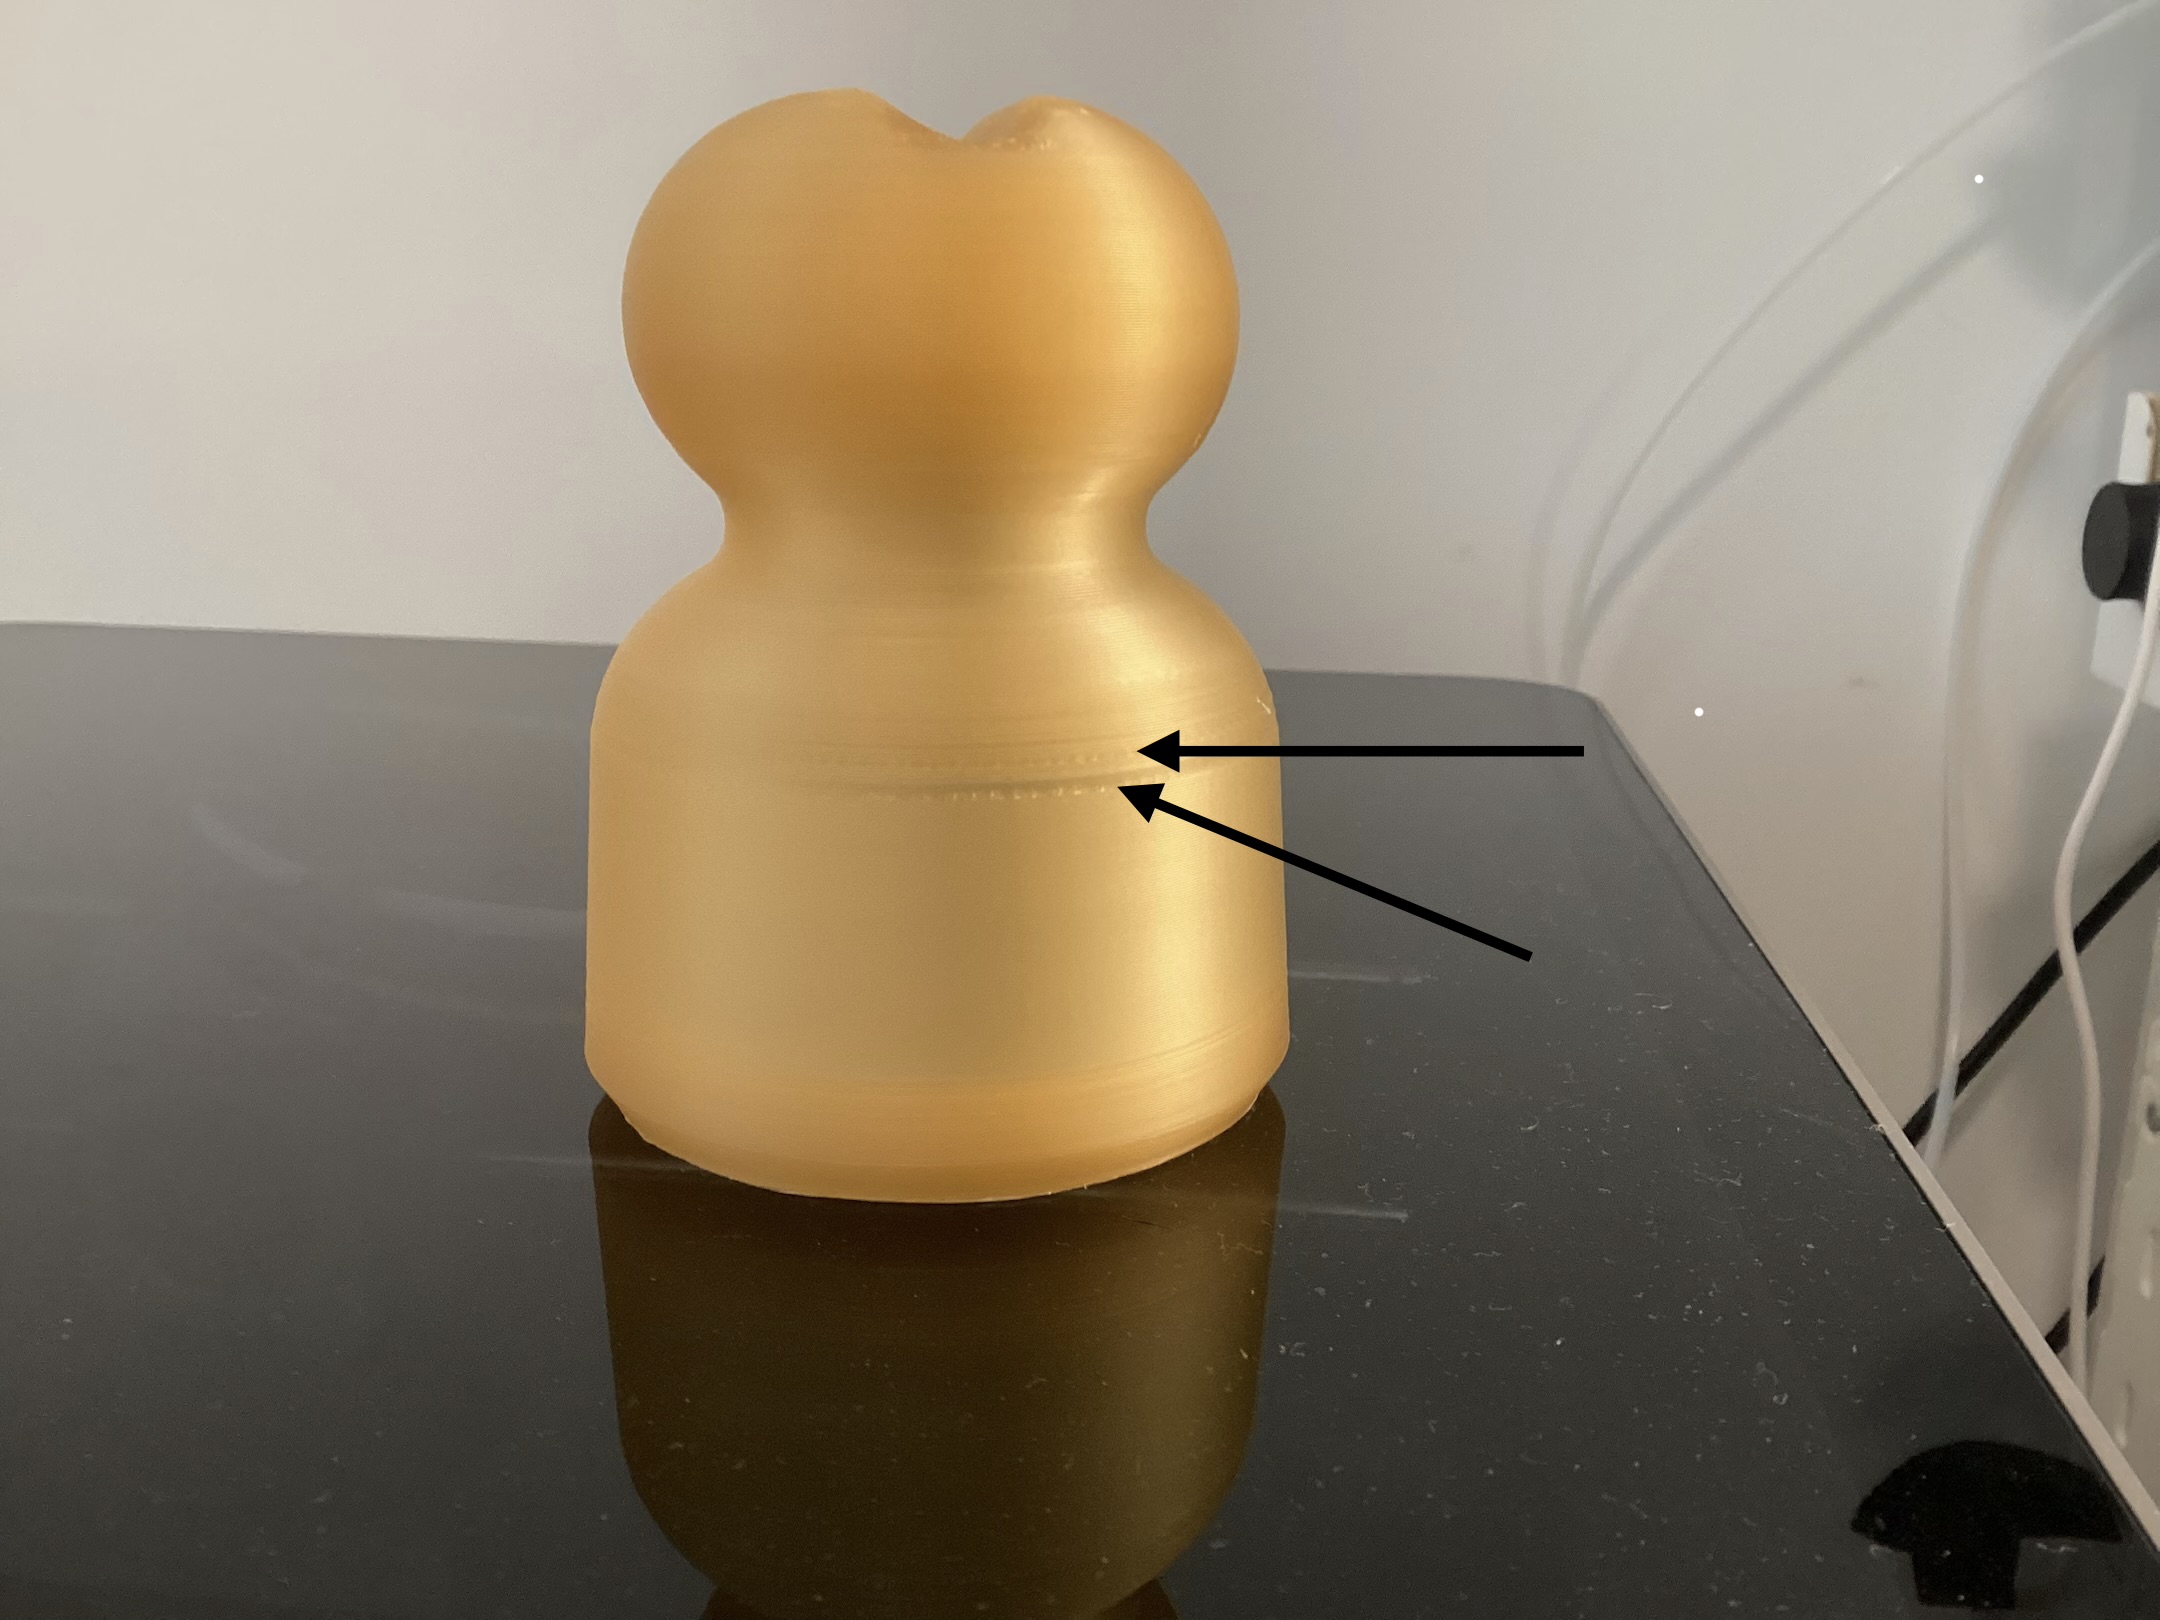
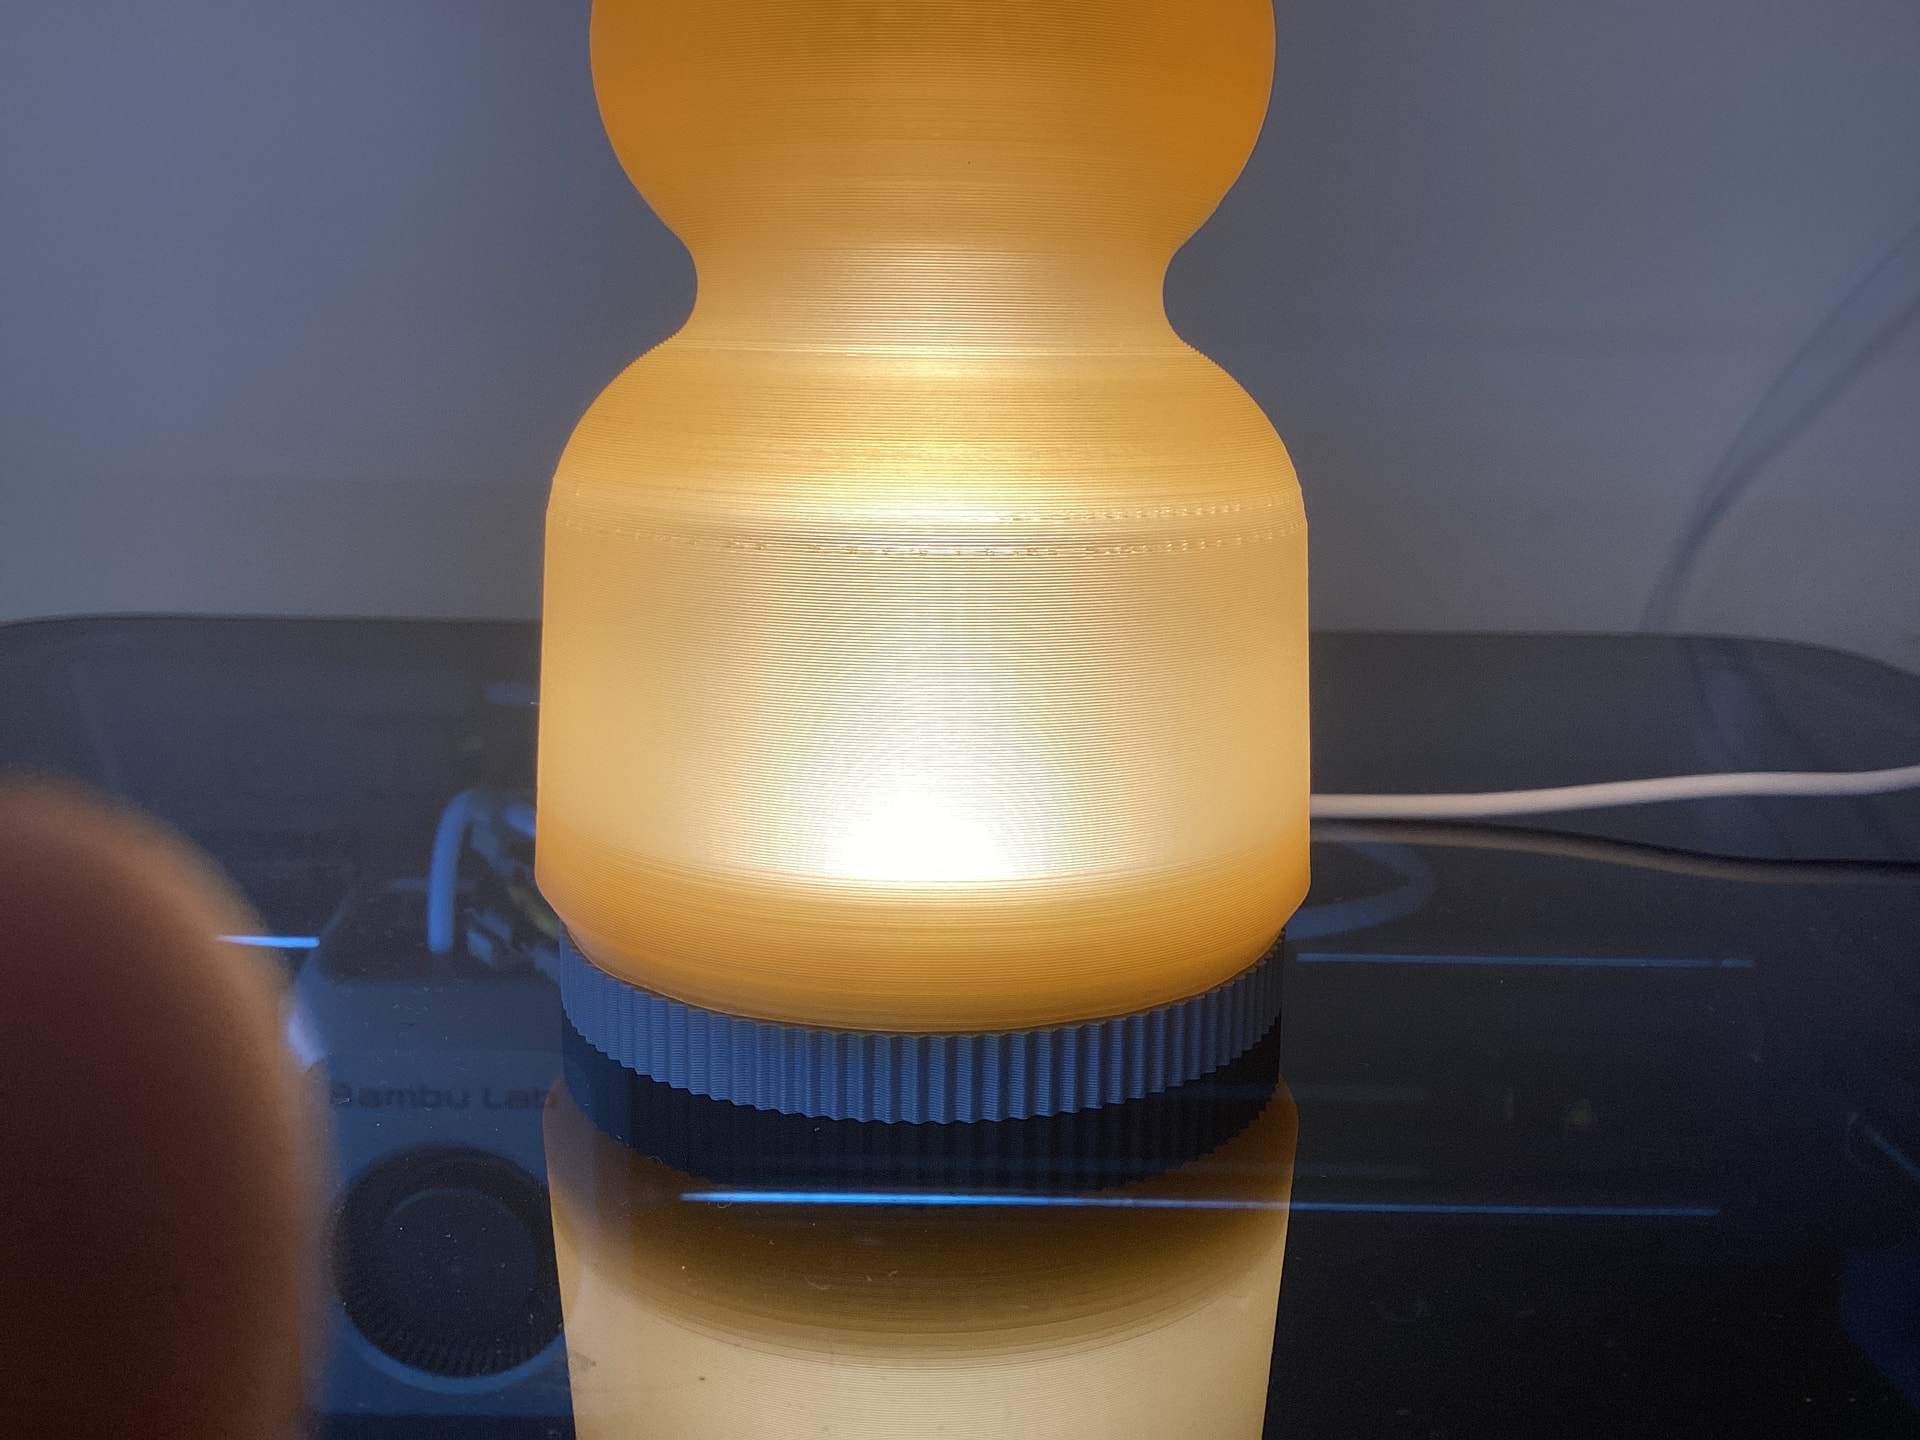
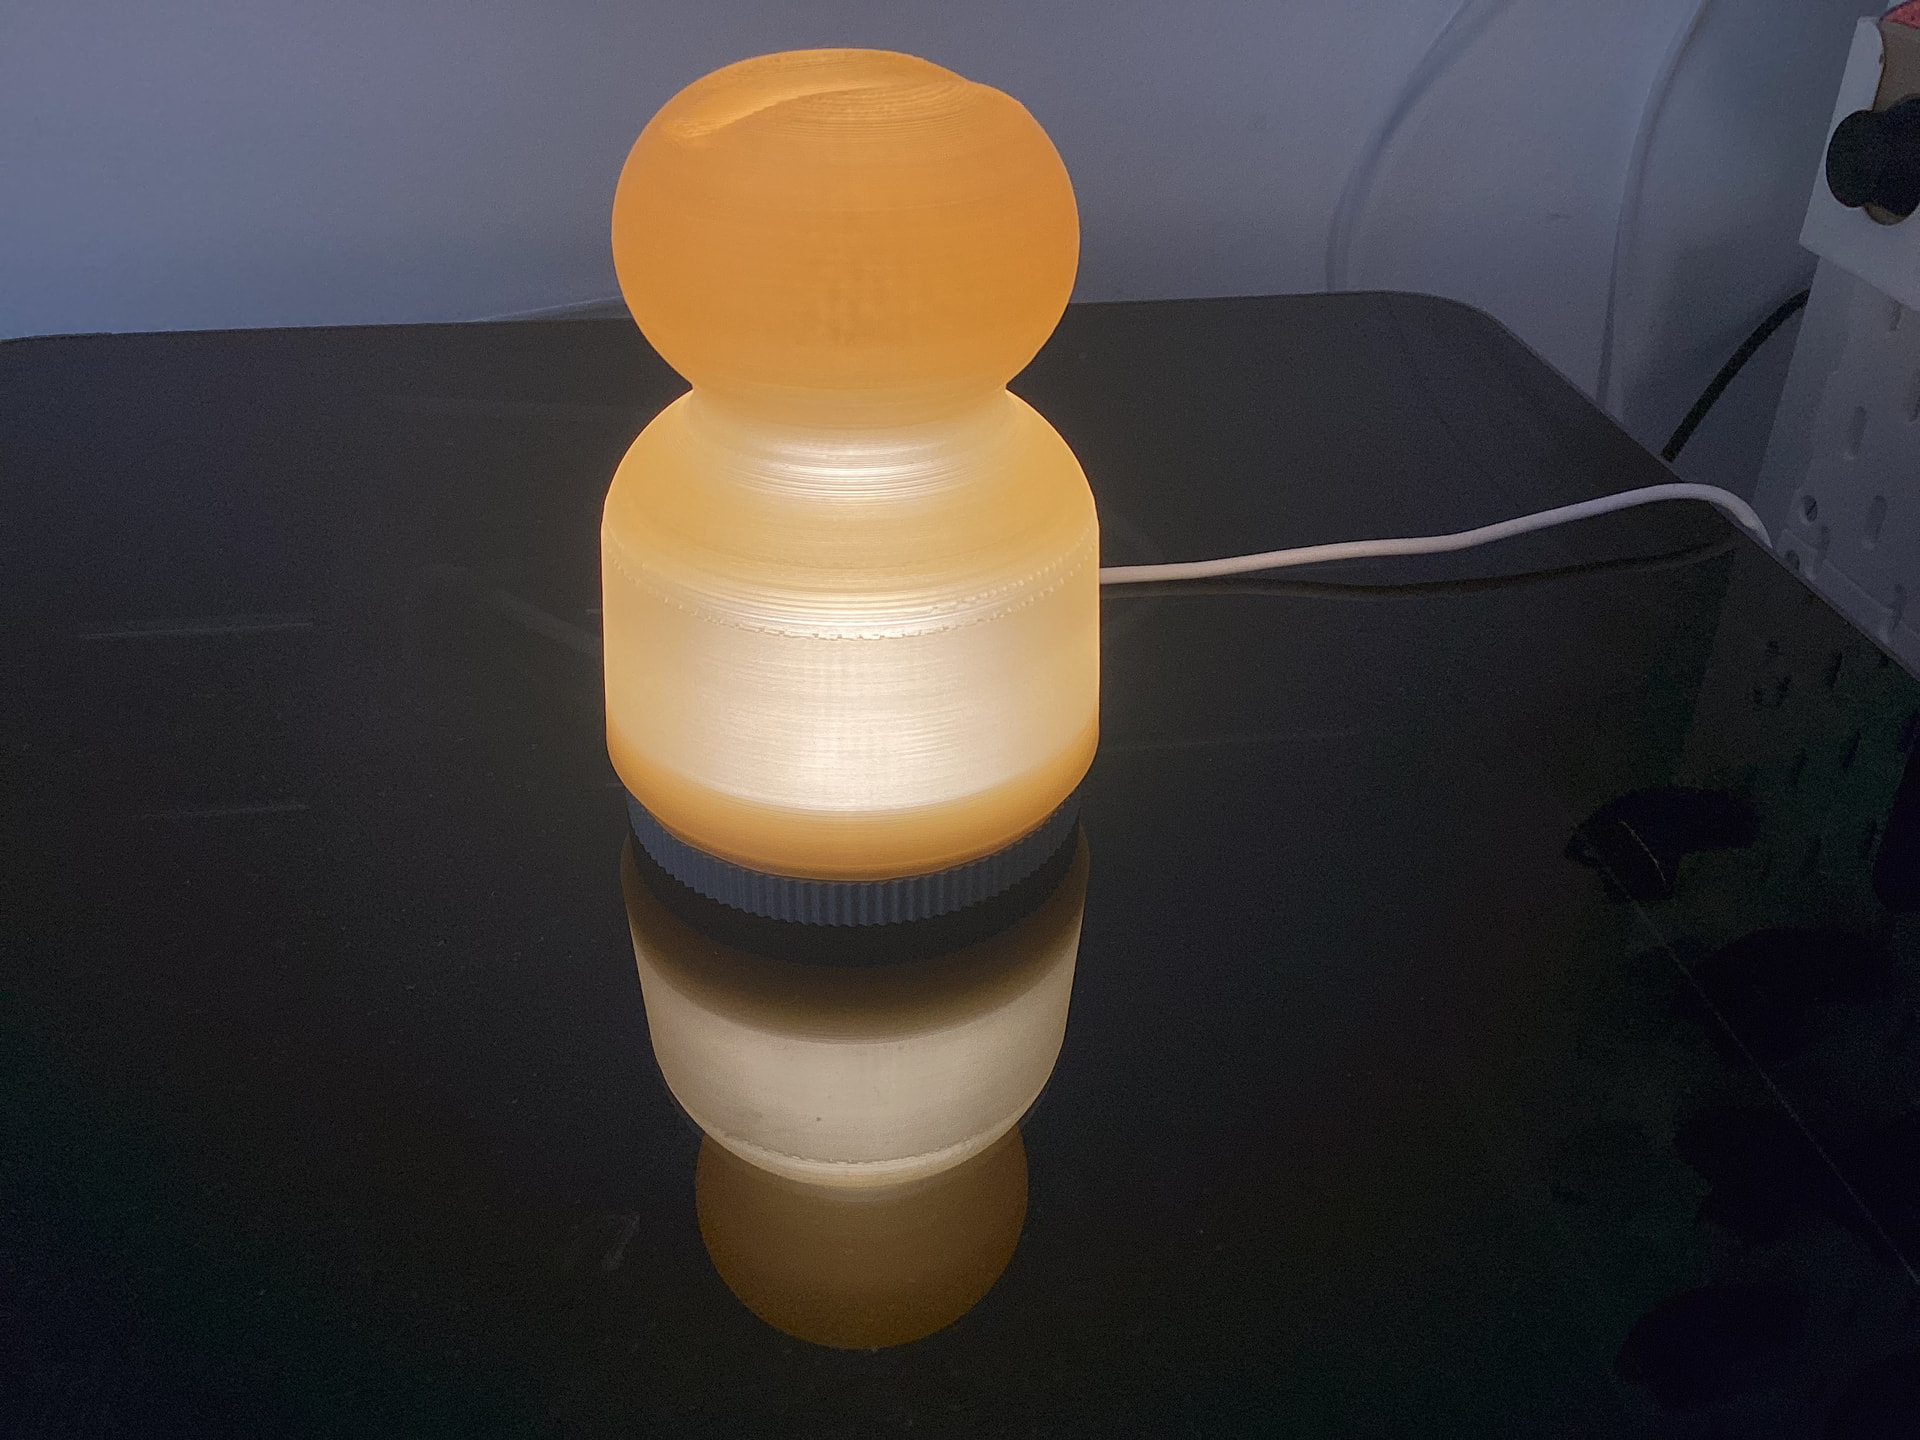
UPDATE: Increasing the bed temp, adding a 15mm brim and cleaning the plate made it finish the print, BUT there are two very obvious layer lines in the middle that it seems as if they were under extruded. And they are even more obvious when you put the lamp inside
So, in addition to the advice that’s already been given, I’ll just post a few things I’ve noticed:
You chose the worst profile, the one that’s really only used for rapid prototyping. That’s a really bad place to start. It’s all about speed, with no consideration given to poor quality or failures.
The resulting velocity, vibrations - everything geared toward speed - will be one of the main reasons why your print keeps failing and why there are visual defects.
You’re also deviating significantly from Bambu’s recommended settings for transparent PLA - see the link at the end.
In that case, I’d actually advise against using Gyroid. It causes an extreme amount of vibration, and combined with your high-speed profile, I wouldn’t be surprised if it at least contributes to the problem. You can go ahead and use gyroid - that’s actually a good decision - but take it slow! The downside of Gyroid is that it causes a lot of vibrations.
The settings in the filament profile differ from Bambu’s recommendations, particularly with regard to cooling. Both the flow rate and the nozzle temperature differ from what Bambu recommends, too. Even though the flow rate should, of course, be calibrated on its own, it should at least be slightly increased for transparent PLA - not the default value.
In summary: It’s not one big problem, but rather a number of small issues with the profile that add up. More specifically, you haven’t adjusted it for either the 3D object or the filament. Once you have done so, the print should go off without a hitch.
To put it even more succinctly: Your settings make it seem like you’re trying to win a speed-printing contest rather than focusing on quality.
Perfection is an elusive beast, and generally unobtainable.
But do keep trying. What nozzel are you using? I found a smaller works better, often using my 0.2mm to get finer results. The drawback is it takes longer. Much longer.




 What nozzel are you using? I found a smaller works better, often using my 0.2mm to get finer results. The drawback is it takes longer. Much longer.